If the mantle is the heart of every living room, then the headboard is undoubtedly the soul of every bedroom. More decorative than functional, a headboard says a lot about your personal aesthetic. Are you regal and classic? Modern and industrial? Bohemian and vintage? A cursory glance at the headboard probably holds a clue.
That said, a boring headboard can feel especially stuffy for those with a penchant for art and style, and this is the right project to breathe some life into an outdated bed. Requiring just a few inexpensive materials and a whole lot of creative vision, this upcycling DIY will leave your bedroom feeling fresh and individualistic. A darker color of paint will help accentuate the lights.
Materials
- Wooden headboard
- Chalk paint
- Paintbrush
- Drawn lettering guide
- Pencil
- Small knotted rope
- Power drill and 3/8-inch bit
- Sandpaper
- String of mini lights
Instructions
1. Place the plain headboard flat on the ground. Put it on a sheet or some other protective surface if you're worried about damaging the floor.

2. Cover the front of the headboard completely with chalk paint, leaving the back unpainted unless it's going to show. Let it dry.

3. Select a word and design to apply to the headboard. (The tutorial uses "Dream" in cursive writing.) Draw a prototype of the design on paper, and follow it as you draw an outline on the headboard in pencil.

4. Bend the rope around the penciled letters, drawing dots anywhere that a knot falls.

5. Drill holes where the dots are marked.

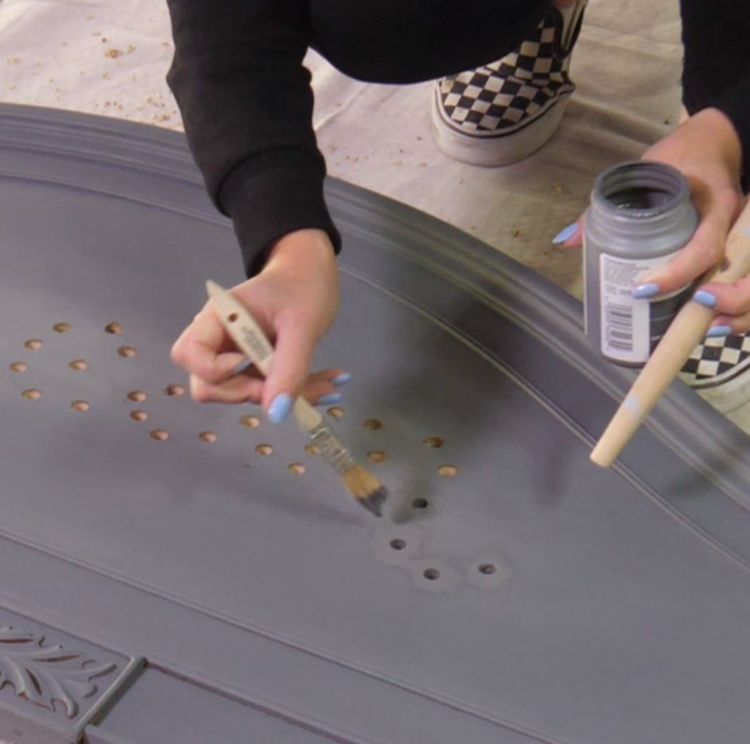
Brush away the wood dust as you go.

6. Sand the tops of the holes until they are smooth.

Touch up the chalk paint around the holes so no wood shows. Let it dry.
7. Turn over the headboard so the back is facing up. Use wooden planks or other item under each side to suspend the headboard a few inches.

8. Place the individual bulbs of the string lights through the drilled holes until each of them has a light.

9. Plug in and admire your creation!

