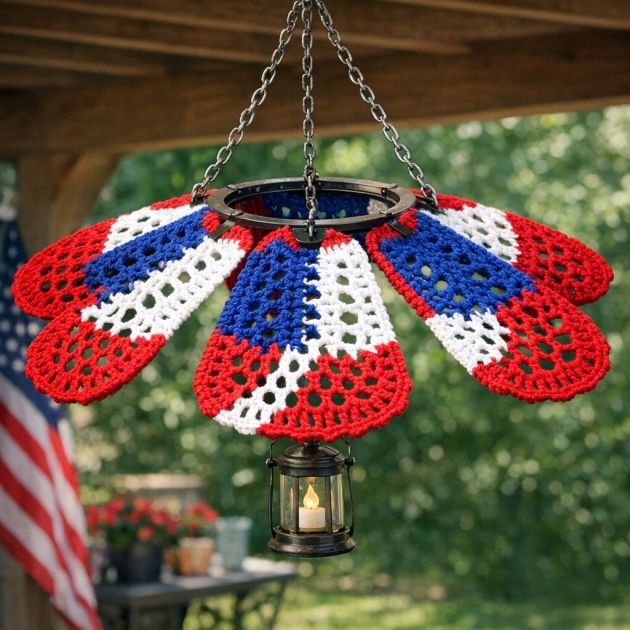
Crocheting is a timeless craft that combines creativity with functionality, offering a unique way to repurpose objects and add a personal touch to home decor. This particular project transforms an old, broken plastic ceiling fan blade set into a vibrant, patriotic outdoor chandelier, perfect for Memorial Day celebrations. By using red, white, and blue yarn, this DIY not only breathes new life into discarded items but also adds a festive flair to your outdoor space, solving the problem of waste while enhancing your decor with a touch of Americana.
The finished crochet chandelier can be styled as a striking outdoor decor piece. Hang it on your porch, patio, or garden to create a festive atmosphere. The vibrant red, white, and blue colors make it ideal for patriotic holidays like Memorial Day or the Fourth of July. Pair it with matching outdoor cushions or flags for a cohesive look. The airy crochet pattern allows light to filter through, casting intriguing shadows and adding texture to your space. Consider placing it near a seating area to draw attention and spark conversations.
Patriotic Crochet Ceiling Fan Blade Chandelier
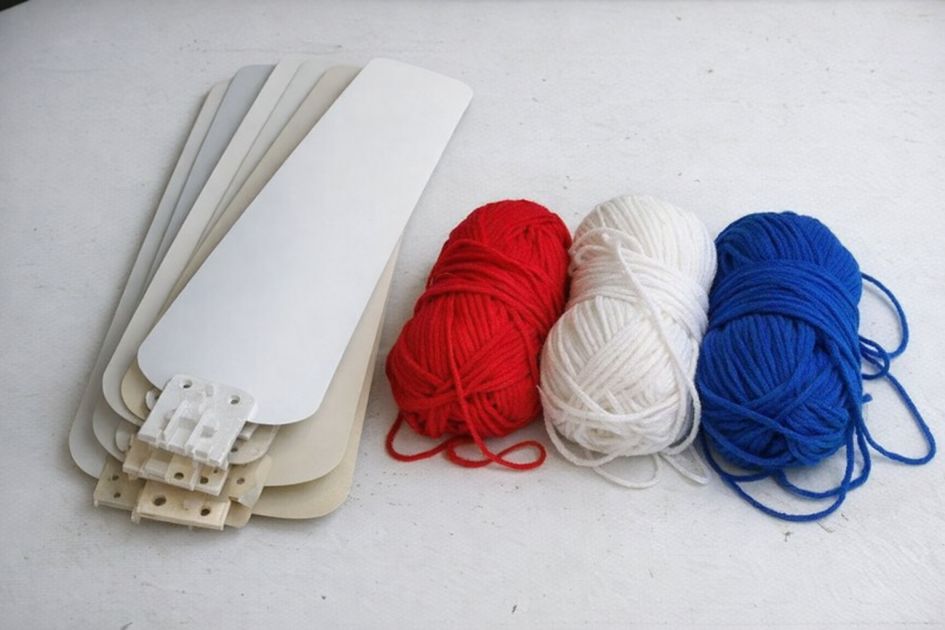
Materials
Red yarn (cotton, worsted weight) - 100g
White yarn (cotton, worsted weight) - 100g
Blue yarn (cotton, worsted weight) - 100g
5mm crochet hook
Stitch markers
Tapestry needle
Old plastic ceiling fan blade set (5 blades)
Scissors
Measuring tape or ruler
Directions
1. Start by cleaning the ceiling fan blades thoroughly to ensure the yarn adheres well and looks neat.
2. Use the 5mm crochet hook and red yarn to make a slip knot and chain 10.
3. Attach the chain to the narrow end of the first fan blade using a single crochet stitch.
4. Continue single crocheting along the edge of the fan blade, ensuring the stitches are evenly spaced. Use stitch markers to keep track of every 10 stitches.
5. When you reach the end of the blade, switch to white yarn. Secure the yarn by tying a knot and weave the ends using the tapestry needle.
6. Chain 1 and proceed with a row of single crochet back along the same edge, maintaining even tension.
7. Switch to blue yarn at the end of the row. Repeat the process, chaining 1 and crocheting back along the edge.
8. Repeat steps 3 to 7 for each of the remaining blades, alternating colors in the red, white, and blue sequence.
9. Once all blades are crocheted, arrange them in a circle to form the chandelier shape. Use the red yarn to connect the tips of the blades with slip stitches, ensuring they are evenly spaced.
10. Weave in all loose ends with the tapestry needle, ensuring no yarn is visible.
11. Hang the finished chandelier using additional yarn or strong fishing line, ensuring it is secure and balanced.
Variations & Tips
To personalize this project, consider using different yarn types, such as acrylic for a more weather-resistant finish, or a soft wool blend for a luxurious texture. Alternative color schemes, like pastels for a springtime look or earthy tones for a rustic vibe, can adapt the chandelier for different occasions. Adjust the size by adding or removing blades, or by altering the stitch count and rows. For a unique twist, incorporate decorative stitches like shells or bobbles between the single crochet rows, adding depth and interest while preserving the chandelier's core structure.