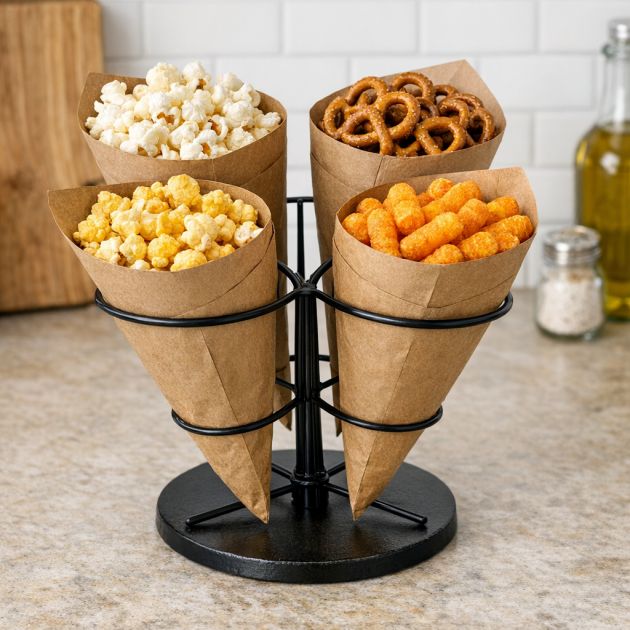
Transform ordinary brown paper bags and wire hangers into a functional and stylish snack cone stand, perfect for parties or casual gatherings. This DIY project offers a creative way to repurpose common household items, turning them into a unique piece that adds flair to any tabletop setting.
Place the paper bag wire hanger snack cone stand on a kitchen counter or dining table. Coordinate with rustic or minimalist decor themes by choosing neutral-toned snacks like popcorn or nuts to complement the natural brown of the paper bags. Pair with wooden or metal serving utensils for a cohesive look.
Paper Bag Wire Hanger Snack Cone Stand
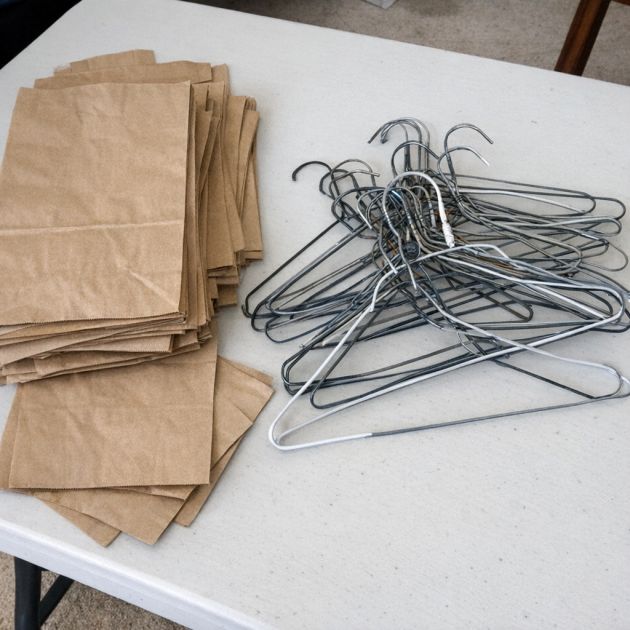
Materials
4 brown paper bags, medium size
4 wire hangers
Craft scissors
Hot glue gun
Ruler
Pencil
Directions
Start by straightening out each wire hanger using your hands and a flat surface, creating a long straight wire.
Measure and cut each wire to a length of approximately 18 inches.
Bend the wire into a cone shape, ensuring one end is tightly wound into a circular base for stability.
Cut each brown paper bag into a square piece, roughly 10x10 inches.
Wrap the paper bag square around the wire cone, ensuring the paper overlaps at the seam. Secure the overlap with hot glue.
Fold any excess paper at the top of the cone inward, creating a smooth rounded edge.
Repeat these steps for each wire hanger and paper bag, creating a total of four cones.
Arrange the four cones in a stand formation, with the bases touching in a square pattern and the tips pointing outward.
Use additional wire pieces to connect the bases of the cones, ensuring the stand is stable.
Allow the glue to dry completely before using the stand to hold snacks.
Variations & Tips
Consider painting the wire frames in a metallic finish, such as gold or silver, before wrapping them with the paper bags for a more elegant look. Alternatively, use colored or patterned paper bags to match specific themes or occasions. For added stability, attach a small wooden or metal base underneath the stand, providing extra support and a polished finish.