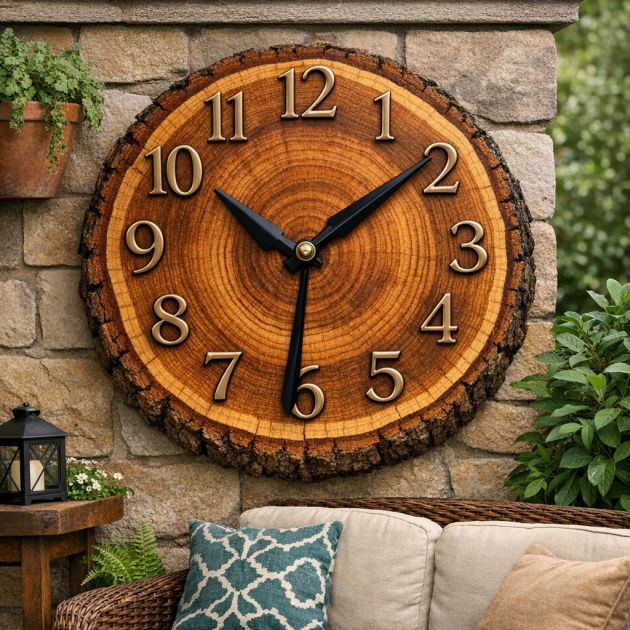
Creating a DIY outdoor clock using a sliced tree trunk and bronze metal numbers is a unique way to enhance your patio with a rustic yet elegant timepiece. This project not only adds a functional element to your outdoor space but also serves as a charming decorative feature that complements natural surroundings. Homeowners may embark on this project for its aesthetic appeal and the opportunity to personalize a piece that reflects their style while utilizing natural materials.
The finished DIY outdoor clock beautifully integrates into a variety of outdoor settings, from modern patios to rustic garden spaces. Its natural wood and metal combination makes it a versatile piece that can complement farmhouse, minimalist, or eclectic styles. The rich tones of the cedar wood and bronze numbers add warmth and character, making it an ideal centerpiece for a patio wall or garden fence. Pair it with other natural elements like potted plants or wooden furniture for a cohesive look.
Bronze Number Cedar Wood Outdoor Clock
Materials
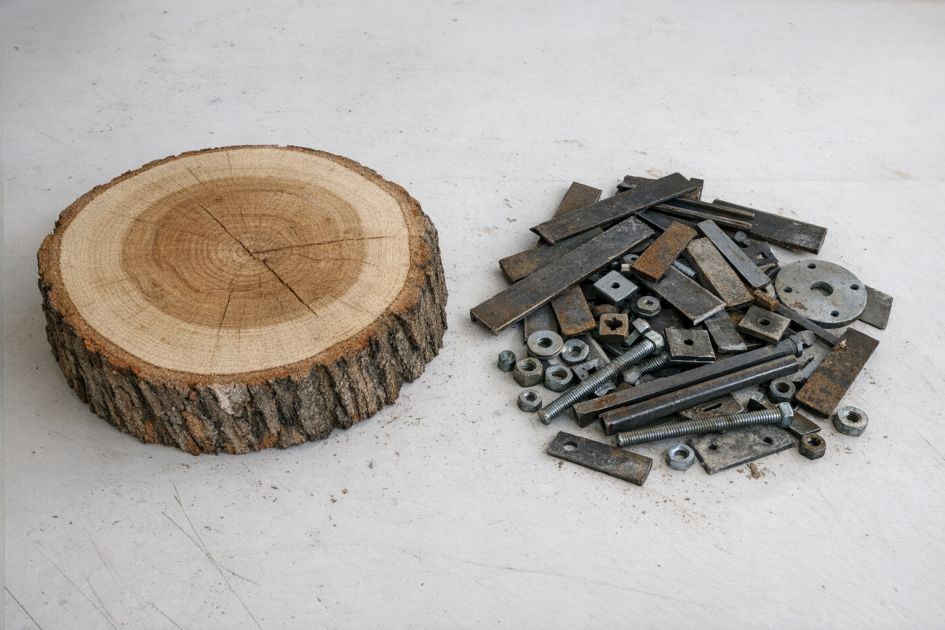
1 - 24-inch diameter sliced cedar tree trunk round with bark edge
12 - Bronze metal numbers (1 through 12, approximately 3 inches high)
1 - Clock mechanism kit with hands suitable for outdoor use
1 - Drill with a drill bit size appropriate for the clock mechanism
1 - Screwdriver
1 - Tube of strong outdoor adhesive
1 - Measuring tape or ruler
1 - Pencil or marker
Directions
Lay the cedar tree trunk round flat on a work surface with the bark edge facing upwards.
Use the measuring tape and pencil to find the center of the wood round. Mark this spot for the clock mechanism.
Drill a hole through the center mark using a drill bit sized for your clock mechanism.
Insert the clock mechanism into the drilled hole according to the manufacturer's instructions, ensuring it is secured tightly.
Arrange the bronze metal numbers around the clock face in a circular pattern, using a ruler to ensure even spacing between each number.
Once satisfied with the placement, use the outdoor adhesive to affix each number onto the wood surface. Press firmly and allow to dry according to the adhesive's instructions.
Attach the clock hands to the mechanism, following the specific instructions for alignment and attachment.
Install a battery into the clock mechanism and set the correct time.
Mount the completed clock on a patio wall or garden fence using appropriate outdoor wall mounting hardware.
Variations & Tips
For those seeking a more personalized touch, consider painting the cedar round with a weatherproof stain or color to match your outdoor decor scheme. Alternatively, you can substitute the bronze numbers with a different metal finish, such as silver or black, to better align with your style preferences. To enhance durability, apply a clear outdoor varnish to the wood surface to protect it from the elements. For added functionality, consider integrating a thermometer or hygrometer into the clock face, making it a multi-functional outdoor piece.