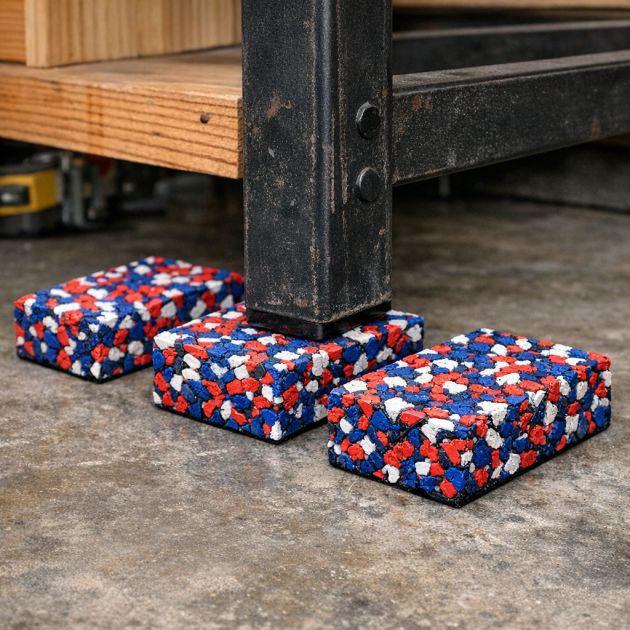
Creating heavy-duty workshop dampening blocks from rubber dog toys is an innovative and cost-effective way to repurpose materials into something incredibly useful. These blocks are perfect for minimizing vibrations and noise in a workshop environment, providing a rugged and durable solution that’s surprisingly simple to make at home. Utilizing common household items alongside vibrant red, white, and blue rubber fragments, this DIY project brings functionality and a pop of color to any workspace.
The finished dampening blocks can be styled in a home workshop or garage where functionality meets aesthetics. Place these blocks under heavy machinery or on workbenches to contrast against wooden or metal surfaces. Their vibrant red, white, and blue colors can complement industrial decor themes or serve as a standout feature in a more muted setup. Pair with metal tools and wooden surfaces for a balanced visual appeal.
Vibrant Rubber Dampening Blocks
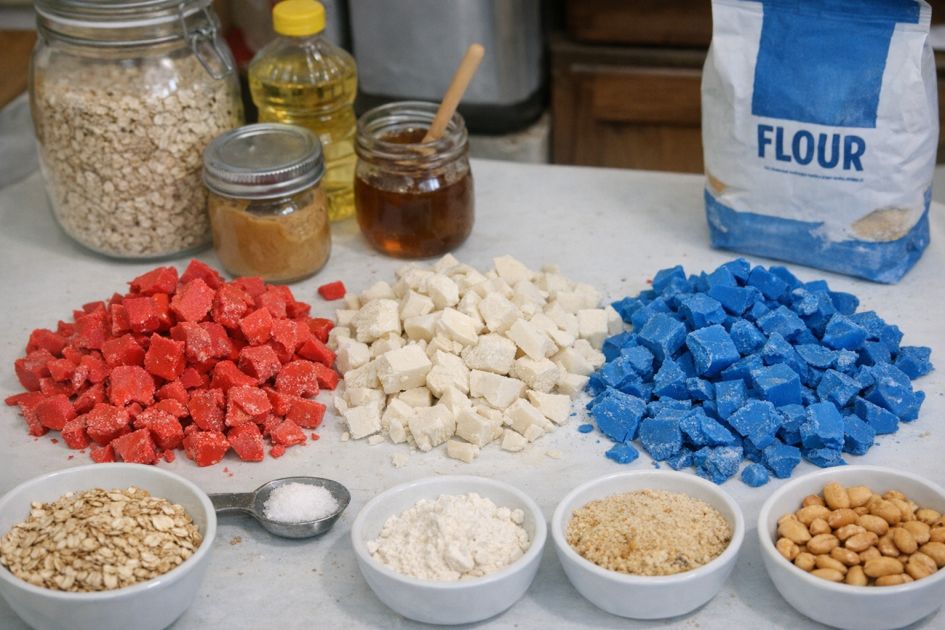
Materials
Chopped red rubber dog toys (2 cups)
Chopped white rubber dog toys (2 cups)
Chopped blue rubber dog toys (2 cups)
Cornstarch (1 cup)
Olive oil (2 tablespoons)
Large pot for boiling
Mold for pressing (e.g., silicone baking mold)
Heat-resistant gloves
Directions
Chop the red, white, and blue rubber dog toys into small chunks using a sharp utility knife. Aim for uniformity in size to ensure even melting.
Fill a large pot with water and bring it to a boil on the stove. Add the rubber chunks to the boiling water carefully.
Boil the rubber chunks for 15-20 minutes until they become soft and pliable. Stir occasionally to prevent sticking.
While the rubber is boiling, prepare your mold by lightly coating it with olive oil to prevent sticking.
In a separate bowl, mix the cornstarch with a small amount of water to create a slurry.
Once the rubber is pliable, use heat-resistant gloves to carefully remove it from the pot. Drain excess water.
Quickly mix the hot rubber chunks with the cornstarch slurry, ensuring an even coating.
Press the mixture firmly into the prepared mold, applying even pressure to ensure a compact form.
Allow the blocks to cool and harden for at least 24 hours before removing them from the mold.
Once fully set, gently remove the blocks from the mold. Trim any excess rubber with a utility knife for a clean finish.
Variations & Tips
For enhanced durability, consider incorporating a layer of fabric or mesh between the rubber layers during the pressing stage. This can add structural integrity and further reduce vibrations. Alternatively, experiment with different mold shapes and sizes to create custom dampening blocks tailored to specific equipment or furniture in your workshop. Adding essential oils to the boiling water can also infuse the blocks with a subtle scent, making them pleasant to handle.