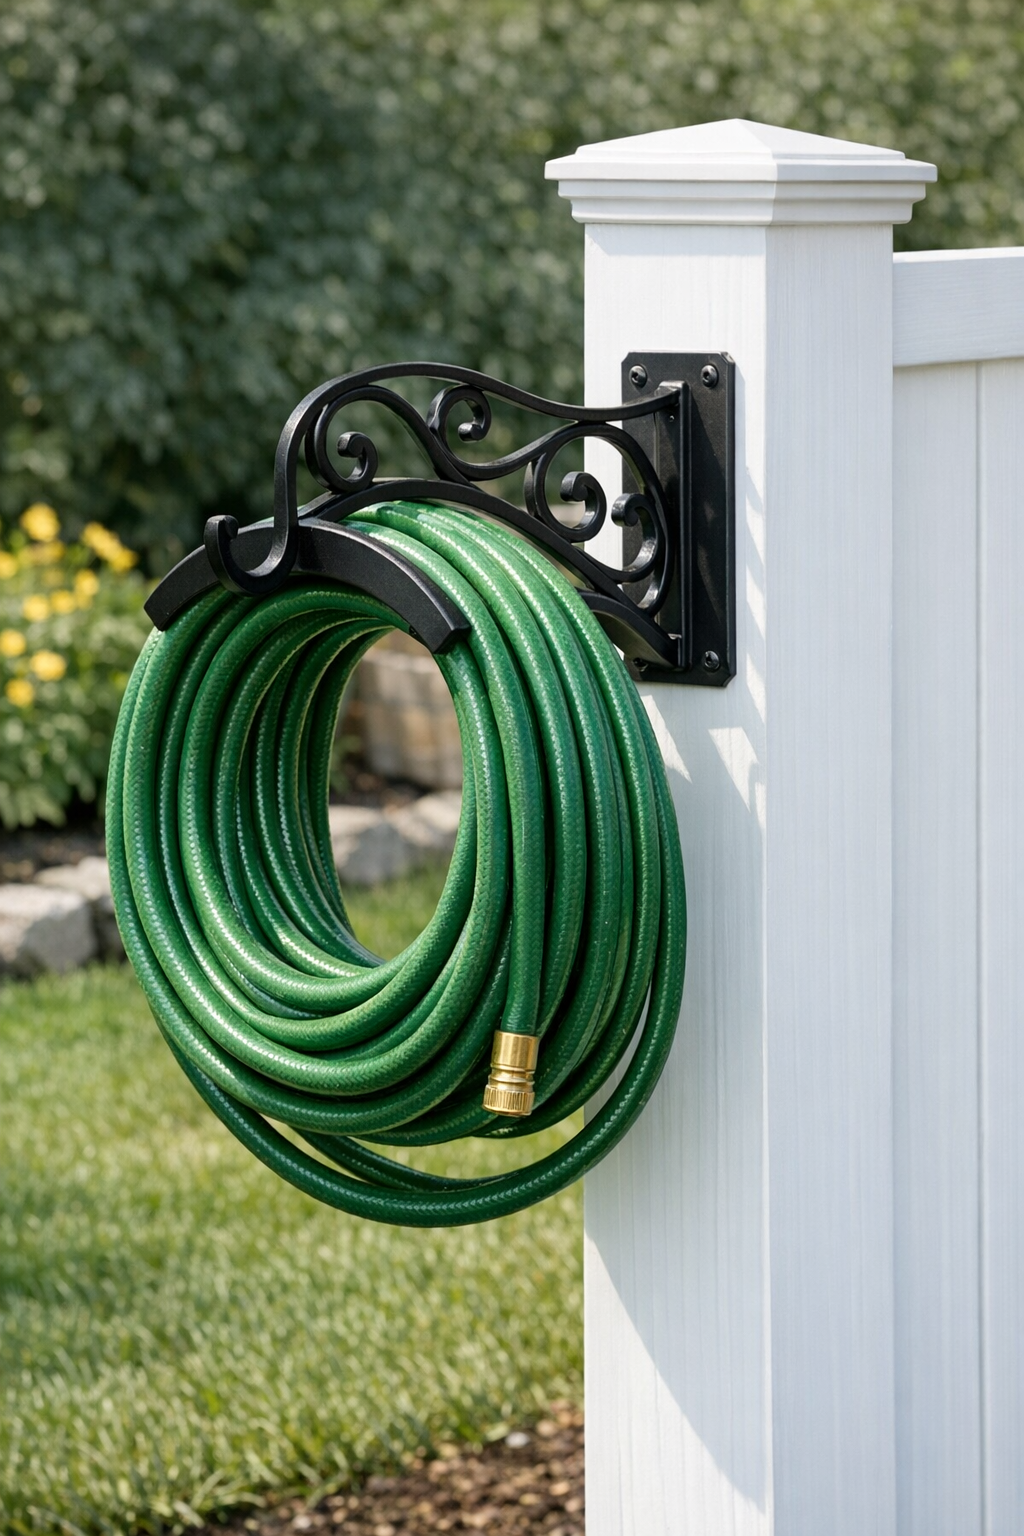
If you’ve ever tripped over a garden hose piled by the back door, this simple hose holder is the kind of backyard fix that makes everyday life feel a little easier. For this project, I’m mounting a decorative metal bracket through a painted wooden fence post to create a sturdy, pretty place to coil a hose instead of letting it sprawl across the yard.
I love projects like this because they’re practical, affordable, and quick enough to finish in an afternoon. It’s especially great for anyone who wants outdoor storage to look tidy without buying a bulky plastic organizer, and it’s an easy upgrade if you already have a fence or post near your garden spigot.
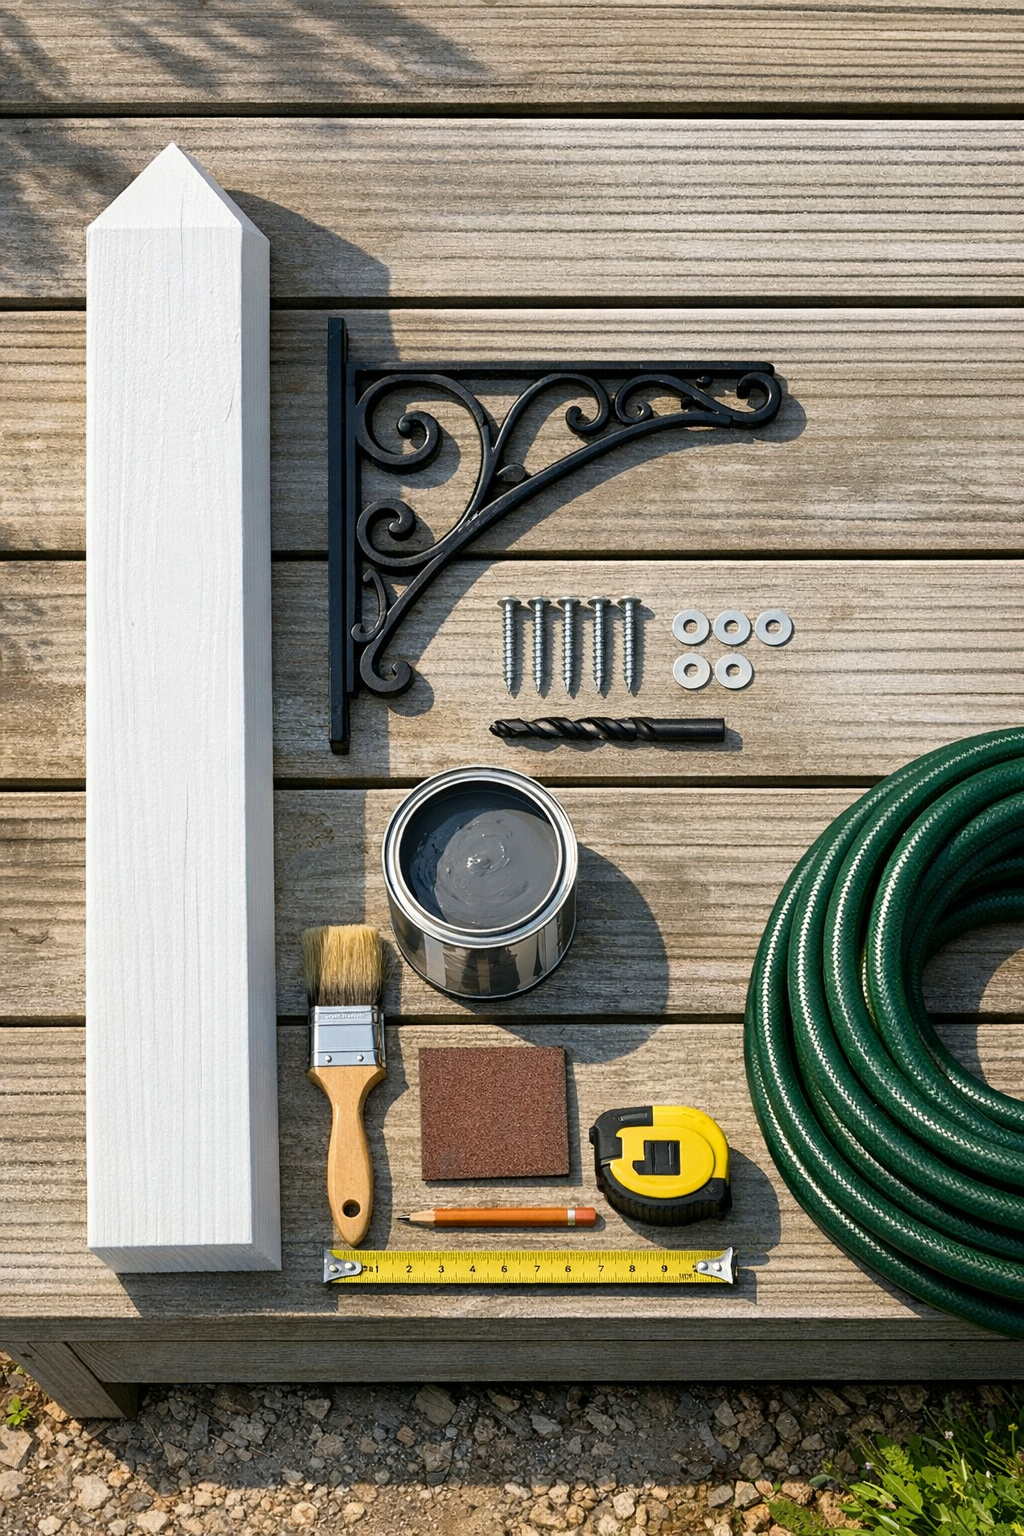
Materials
1 decorative metal wall bracket, 10 to 12 inches deep, heavy-duty steel or wrought iron
Instructions
1. Choose a fence post close to your spigot where the hose will be easy to reach but won’t block a walkway. I like placing the holder about 36 to 42 inches from the ground so the coil sits comfortably without dragging.
2. Clean the post surface and sand any rough spots with 120-grit sandpaper so the paint and hardware sit neatly. Wipe away dust before moving on.
3. Prime the post if the wood is bare, then apply exterior paint and let it dry fully. A painted post gives the finished holder a polished look and helps it hold up better through rain and sun.
4. Hold the decorative metal bracket against the post and test the height and angle before marking. Make sure the bracket curves or extends outward enough to support a full coil of hose.
5. Mark the screw holes with a pencil, using the bracket as your template. Double-check that the bracket sits level and centered on the face of the post.
6. Drill pilot holes at the marked spots to prevent the wood from splitting and to make installation easier. Match the pilot hole size to the screw or bolt hardware you’re using.
7. Position the bracket over the pilot holes and insert the lag screws with washers. Tighten them firmly until the bracket is snug against the post without crushing the wood or stripping the holes.
8. Test the bracket by pulling on it gently with both hands before adding the hose. If there’s any wobble, tighten the hardware a bit more or switch to through-bolts for extra support.
9. Coil the garden hose into wide loops and hang it over the bracket, adjusting the loops so the weight is distributed evenly. Keep the nozzle end on top or hooked over the front for easier grab-and-go use.
10. Step back and check that the hose clears the ground and the bracket stays solid under the load. If needed, reposition the coil slightly so it looks tidy and doesn’t kink.
Variations & Tips
For heavier hoses: If you use a long or extra-thick hose, choose a thicker wrought iron bracket and use through-bolts with nuts instead of lag screws for added strength.
For a cleaner finish: Touch up the screw heads with matching exterior paint after installation. It’s a small detail, but it helps the holder blend beautifully into the fence line.
For family-friendly organization: If your kids help with watering like mine sometimes do, keep the bracket low enough that they can rehang the hose without a struggle, but still high enough to keep it off the ground.
No-kink tip: Coil the hose in large, even loops rather than tight circles. That one habit makes the hose last longer and saves a lot of frustration the next time you need it.
Style variation: Swap the bracket for a decorative plant hanger, scroll bracket, or rustic forged hook as long as it’s rated for outdoor use and strong enough to support the hose weight.
Weatherproofing tip: Use only exterior-rated hardware and paint so the holder holds up through wet seasons, summer heat, and winter freeze-thaw cycles.