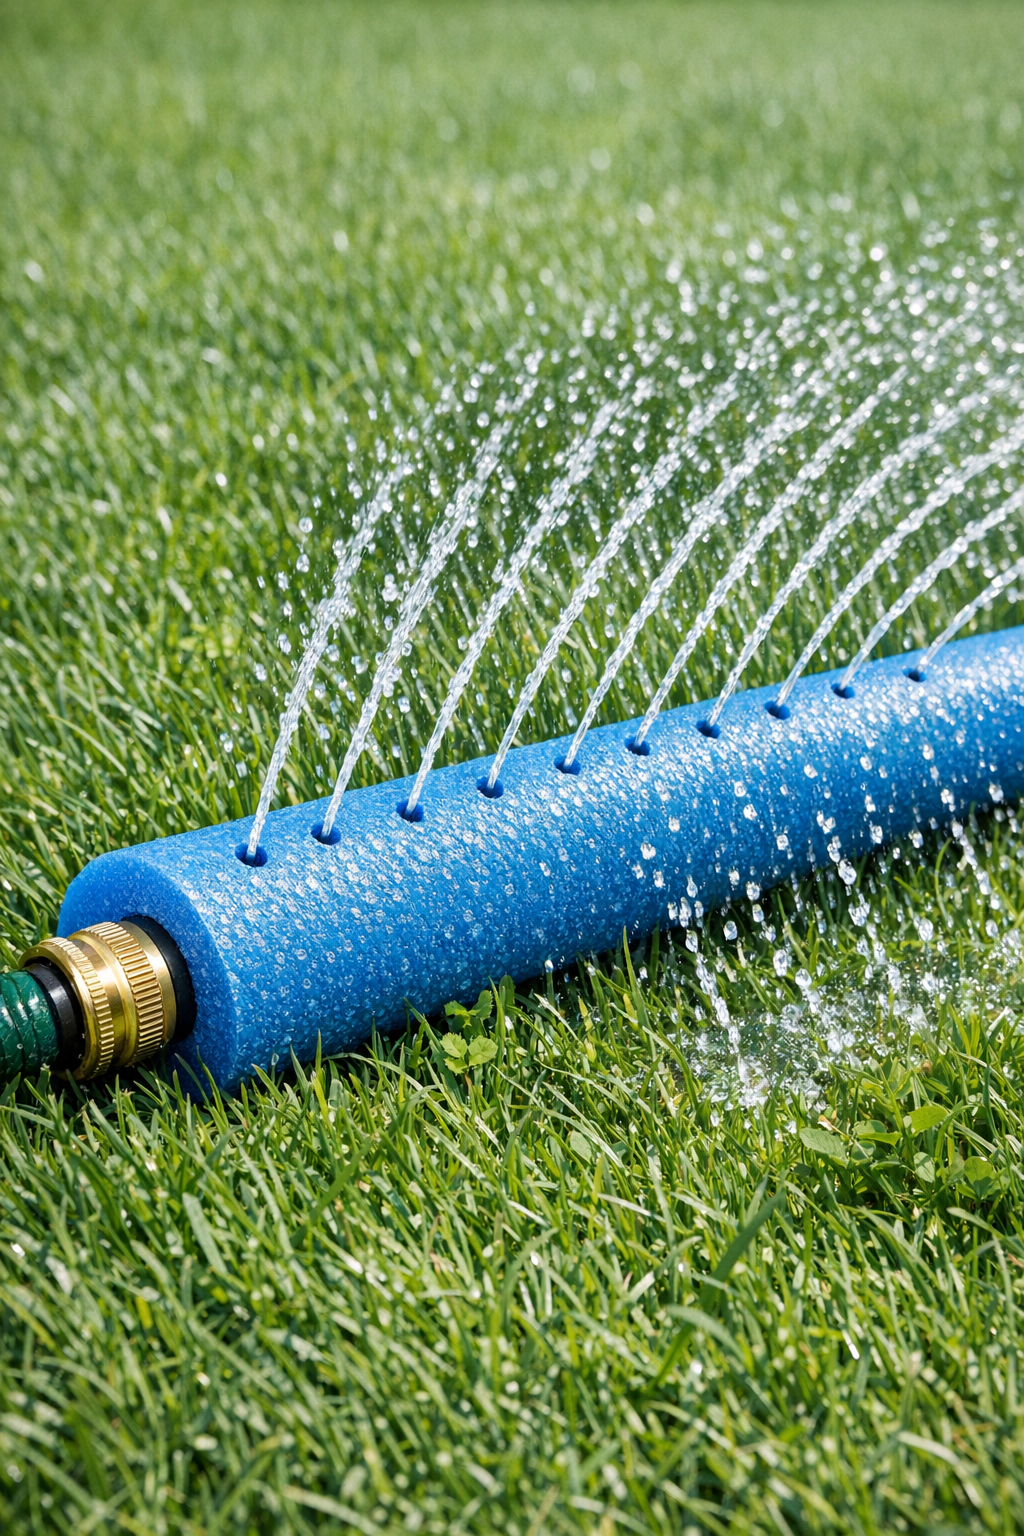
When the weather turns sticky and the backyard starts calling, I love a project that takes just a few minutes but delivers a lot of fun. This pool noodle sprinkler is exactly that kind of make: a simple foam tube fitted onto a garden hose connector, then dotted with holes so water sprays out in every direction. It is inexpensive, fast to put together, and perfect for kids, dogs, or honestly any adult who doesn’t mind cooling off between pulling weeds and checking the grill.
What I especially like about this project is that it uses easy-to-find materials and doesn’t ask for much precision. If you can poke evenly spaced holes and push a hose fitting into foam, you can make this. I’ve made plenty of backyard food and summer setups over the years, and this is the sort of low-effort addition that makes an ordinary afternoon feel like a little event.
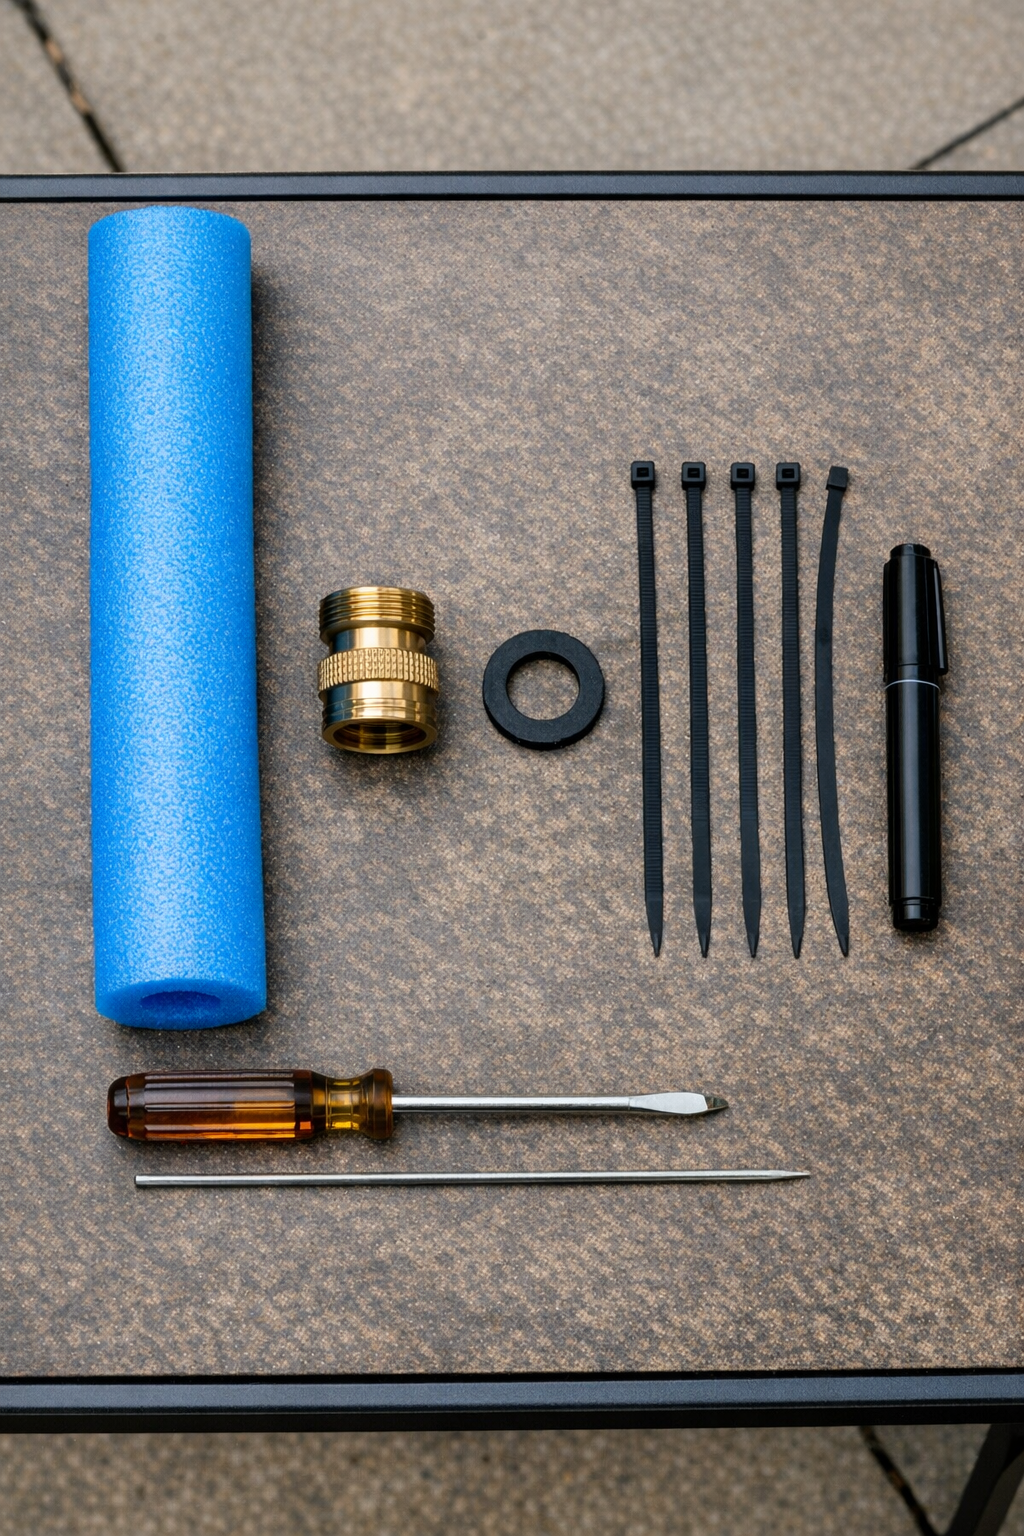
Materials
1 bright blue pool noodle, approximately 52 to 55 inches long and 2.5 to 3 inches in diameter
Instructions
1. Lay the pool noodle on a flat surface and check that the center opening runs cleanly from end to end. If the opening is tight or uneven, trim just a little foam from one end so the brass connector can start more easily.
2. Use the marker to dot hole locations all around the noodle, spacing them about 1 1/2 to 2 inches apart in staggered rows. Keep the first 4 to 6 inches near the hose connection free of holes so that section stays stronger.
3. Poke through each marked spot with the skewer, awl, or screwdriver, making holes straight into the foam and through to the center channel. Wiggle the tool slightly to widen each hole just enough for a good spray.
4. Insert the rubber washer into the brass garden hose connector if it is not already seated inside. This small step helps prevent leaks once the hose is attached and the water pressure builds.
5. Push the brass connector firmly into one end of the pool noodle’s center opening. Twist as you press so the fitting slides in snugly, aiming for about 2 to 3 inches of the connector seated inside the foam.
6. Wrap two zip ties tightly around the noodle near the connector end, spacing them about 1 inch apart. Pull them very snug so the foam grips the fitting and is less likely to pop loose under pressure.
7. Screw the garden hose onto the brass connector and carry the noodle to the lawn or another soft surface. Point the hole-covered side upward or slightly outward for the best sprinkler effect.
8. Turn on the water slowly and watch how the spray comes out of the holes. If some streams are too weak, enlarge a few holes slightly; if the noodle shifts too much, reduce water pressure or add one more zip tie near the connector.
Variations & Tips
Use a shorter noodle: If you want a more forceful spray, cut the noodle down to 30 to 36 inches. A shorter tube often gives stronger water pressure at each hole.
Change the spray pattern: Fewer holes create stronger jets, while more holes make a softer sprinkler effect. I like staggered rows because they spread the water more evenly across the yard.
Anchor it in place: If the noodle rolls too much on slick grass, nestle it between two bricks or stake it lightly at the ends without crushing the foam. That keeps the spray aimed where you want it.
Choose the right tool for holes: A skewer makes smaller, gentler streams, while a screwdriver creates larger openings and a splashier spray. Start small; you can always widen holes later, but you cannot make them smaller again.
Check hose pressure: Very high pressure can force the connector loose or make the noodle whip around. Turn the spigot on gradually and stop once the spray looks full and steady.
Make it kid-friendly: Set the sprinkler on grass rather than concrete and inspect the foam for splits before each use. A quick check takes a moment and helps the project last longer through the summer.
Store it out of the sun: Pool noodles break down faster if they sit outside all season. After the fun is over, drain the water, disconnect the hose, and store the sprinkler in a garage or shed.