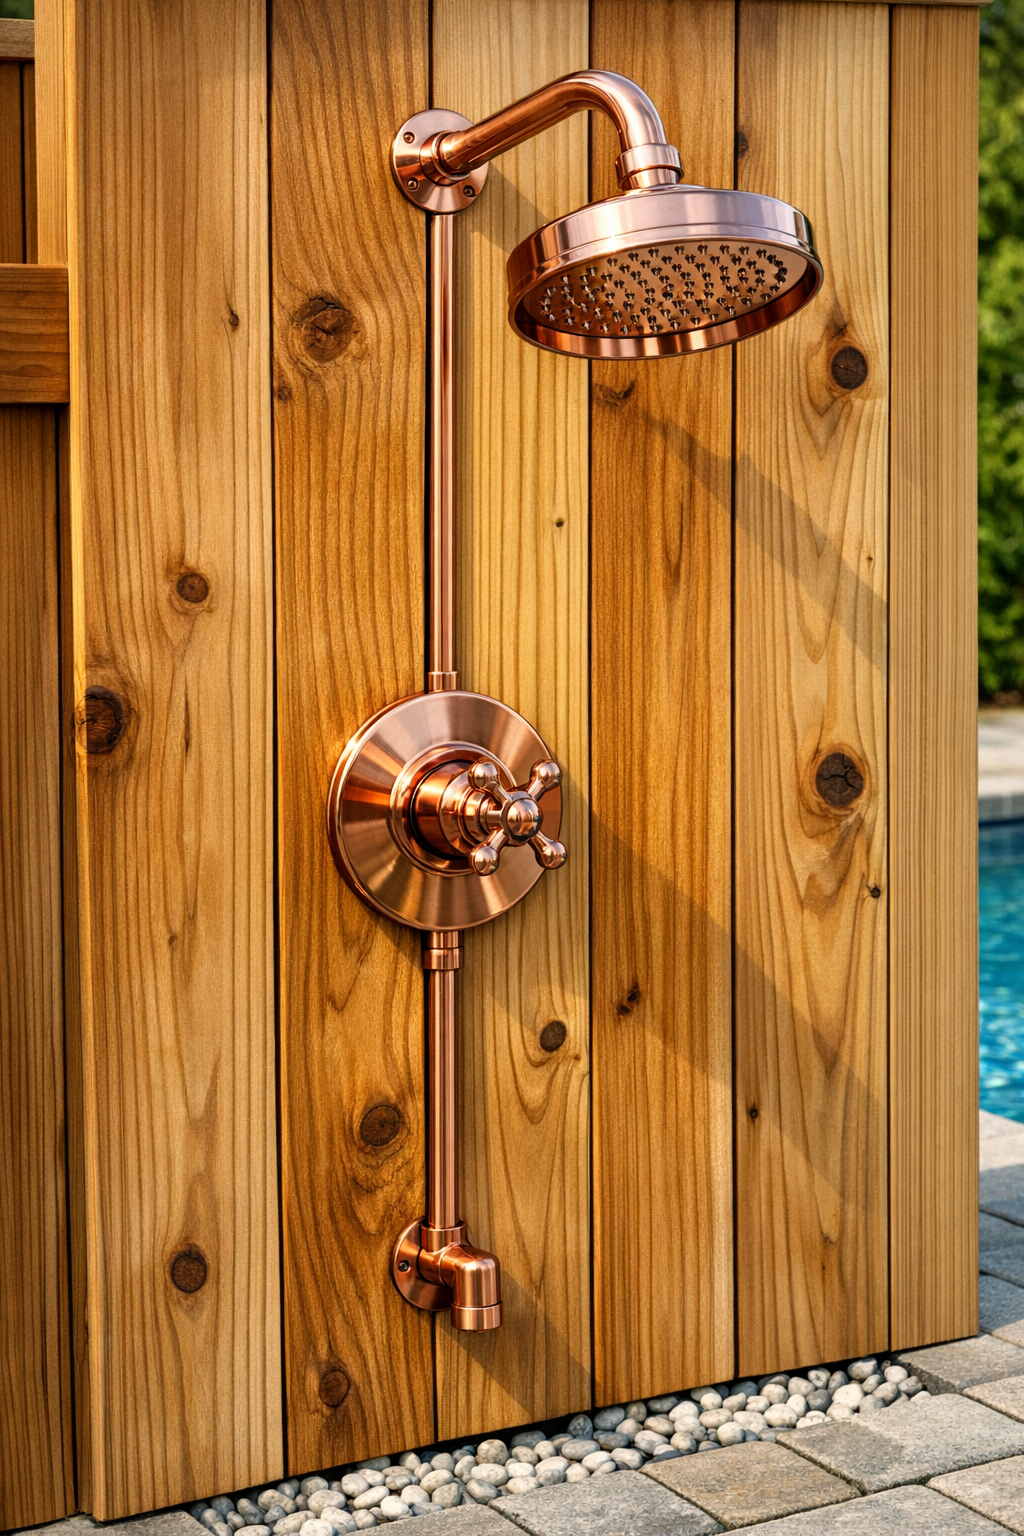
An outdoor shower like this is one of those projects that looks custom and expensive, but the bones of it are surprisingly straightforward. In this build, I’m threading copper pipe fittings through mounted cedar fence boards to create a poolside shower that feels warm, architectural, and practical all at once.
I love projects that balance utility with a little beauty, and cedar with copper does that effortlessly. If you have a pool, a hot tub, a beachy backyard, or you simply want a rinse-off station for muddy kids and gardening days, this is a satisfying weekend build that gives you a polished result without needing a full bathroom remodel mindset.
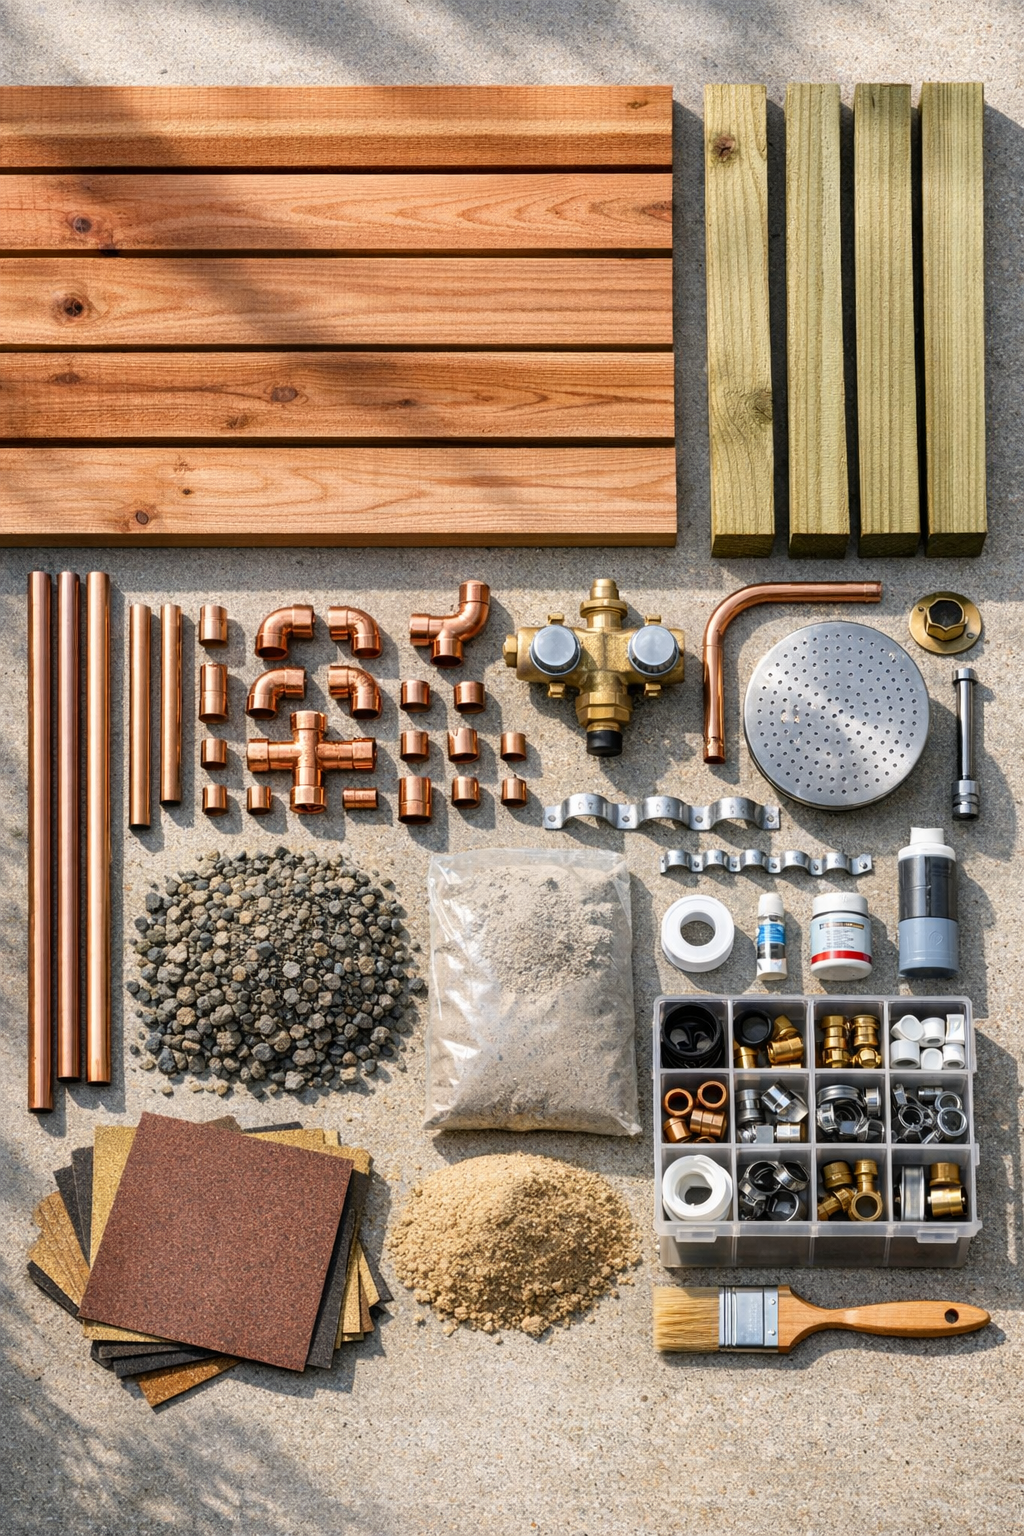
Materials
2 cedar fence boards, 1 in x 6 in x 72 in
Instructions
1. Choose a level shower location with good drainage and access to a cold-water supply line or garden-hose-fed outdoor plumbing connection. Mark a shower wall footprint about 30 inches wide, leaving enough room behind the boards for the pipe run.
2. Set the two 4x4 posts 24 inches apart by digging holes about 12 inches wide and 24 inches deep, adding 2 inches of gravel to each hole, then plumb and set the posts in concrete. Let the concrete cure according to the bag directions before loading the frame.
3. Fasten the cedar 2x4 cross supports between the posts: one 12 inches from the bottom, one at valve height around 42 inches, one near shower-head height around 78 inches, and one at the top for rigidity. Use the structural screws so the frame feels solid and does not rack.
4. Sand the cedar fence boards lightly to break sharp edges, then brush on a coat of exterior cedar sealer and let it dry. This extra step helps the boards weather more evenly and keeps the color richer longer.
5. Hold the cedar fence boards on the frame and mark the centerline for the valve opening and the shower riser. Dry-fit the copper tee, valve depth, and vertical pipe path behind the boards so the holes land exactly where the fittings need to pass through.
6. Drill the openings in the cedar boards with a hole saw sized to let the copper fittings pass through cleanly without oversized gaps. Test each opening with the actual fitting, then sand the cut edges smooth.
7. Mount the cedar fence boards vertically to the frame with even spacing and exterior deck screws, making sure the drilled holes align with the valve body and riser path. Keep the screw heads neat and consistent because they will remain visible.
8. Cut the 1/2-inch copper pipe into sections for the supply line, valve connections, vertical riser, and shower-head arm. Dry-fit the full plumbing assembly behind the boards, threading the visible copper sections and fittings through the openings before making final connections.
9. Secure the copper lines to the rear cross supports with copper pipe straps so the valve and riser stay steady when the shower is turned on and off. Check that the valve stem projects at the correct depth for the trim plate and handle.
10. Make the permanent plumbing connections according to your valve type, then wrap threaded shower-head connections with PTFE tape and install the shower head and visible adapters. Add escutcheons where needed to give the board penetrations a finished look.
11. Connect the water supply and slowly pressurize the system while checking every joint for leaks. If you see any drip, shut the water off, correct the connection, and test again before sealing around exposed penetrations with a light bead of exterior silicone.
12. Create a simple drain-friendly standing area with gravel, pavers, or a slatted wood platform beneath the shower, then give the cedar a final wipe-down. Once everything is dry and tight, the shower is ready for pool days, gardening rinse-offs, and sandy summer feet.
Variations & Tips
Freestanding version: If you do not want to dig post holes, bolt the frame to a concrete patio or anchor it to an existing privacy wall with stainless lag bolts and proper blocking behind the boards.
Warm-water upgrade: If your plumbing layout allows, use a mixing valve with both hot and cold supplies instead of a cold-only line. It makes the shower much more comfortable in the shoulder seasons.
Copper finish choice: I like bright copper when it’s new, but if you prefer a softer, aged look, let it patina naturally outdoors. For a polished appearance, use a clear protective coating rated for exterior metal.
Wood alternative: Cedar is naturally rot resistant and my first choice here, but redwood or thermally modified wood also perform well outdoors if cedar is hard to find in your area.
Hole sizing tip: Drill the board openings only slightly larger than the fittings. That snug reveal is what gives this project its tailored, built-in look rather than a rough utility feel.
Drainage note: Avoid placing the shower where water will collect near foundations or create slippery mud. A gravel bed, dry well, or permeable paver base makes a big difference in long-term maintenance.
Winter care: In cold Midwestern climates, I would absolutely shut off and drain the line before freezing weather arrives. Outdoor plumbing lasts much longer when you treat winterizing as part of the project, not an afterthought.