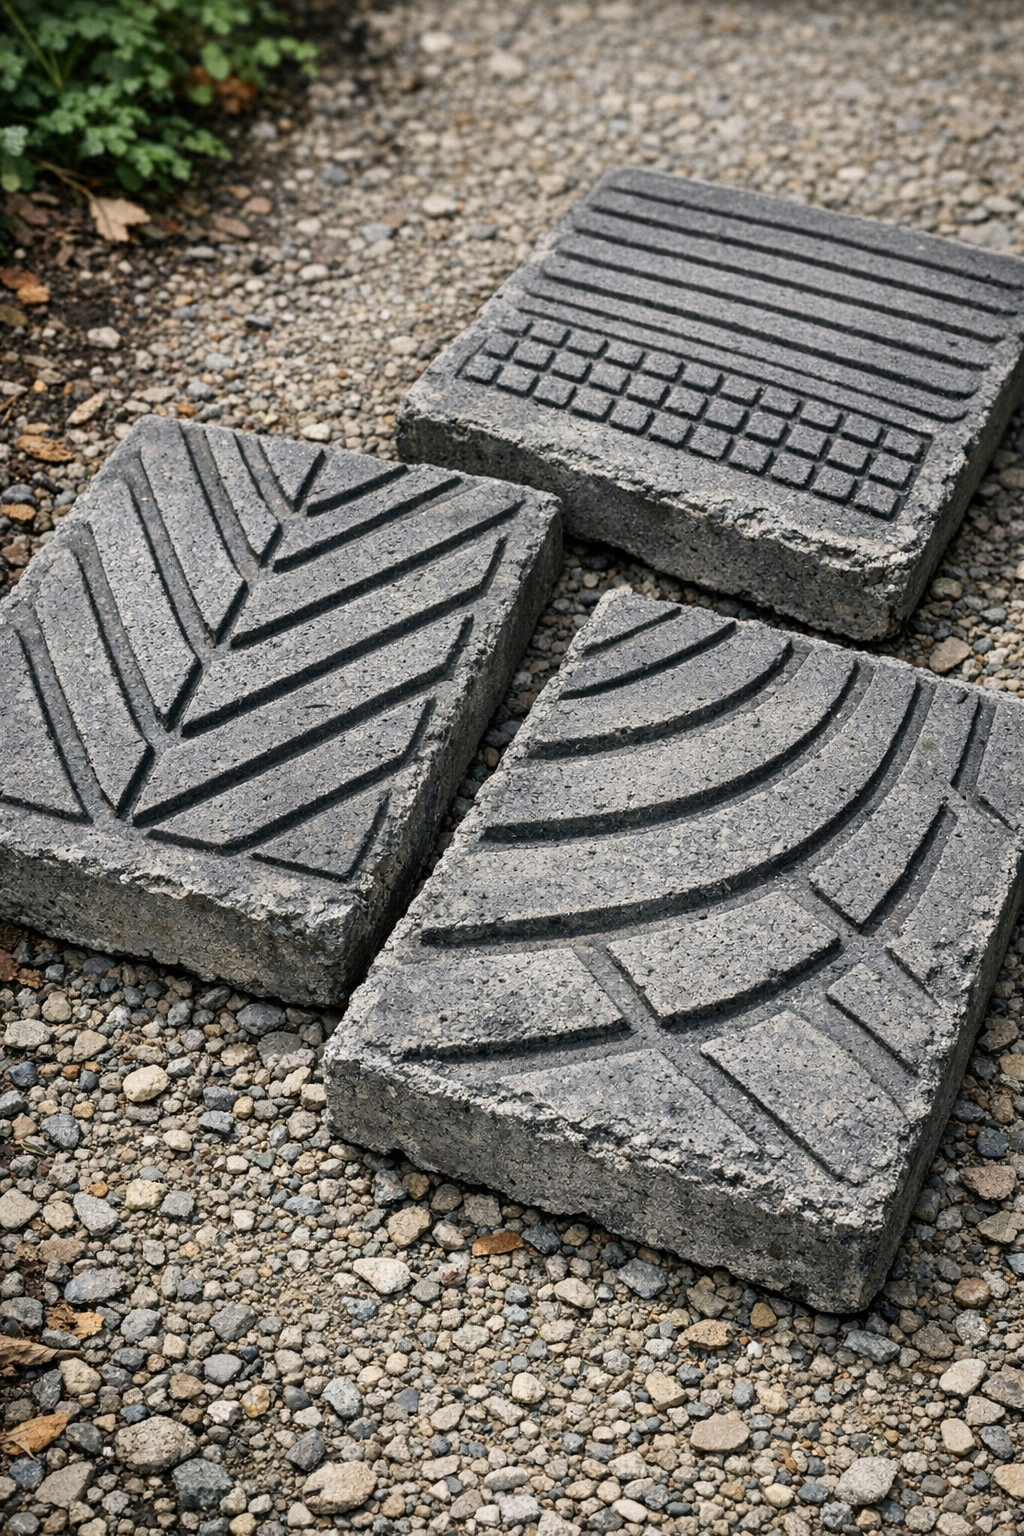
There are a lot of ways to make garden pavers, but this is one of my favorites when I want something sturdy, inexpensive, and a little unexpected. By using grooved rubber car mats as the texture mold and a pair of simple scrap boards as side forms, you can cast thick cement slabs with a bold pattern that looks far more custom than the materials suggest.
I like this project for patios, stepping paths, utility areas near a shed, or even as heavy bases under planters. It is especially good for beginners because the form is straightforward, the finish comes from the mat itself, and the results are durable enough to handle real outdoor use.
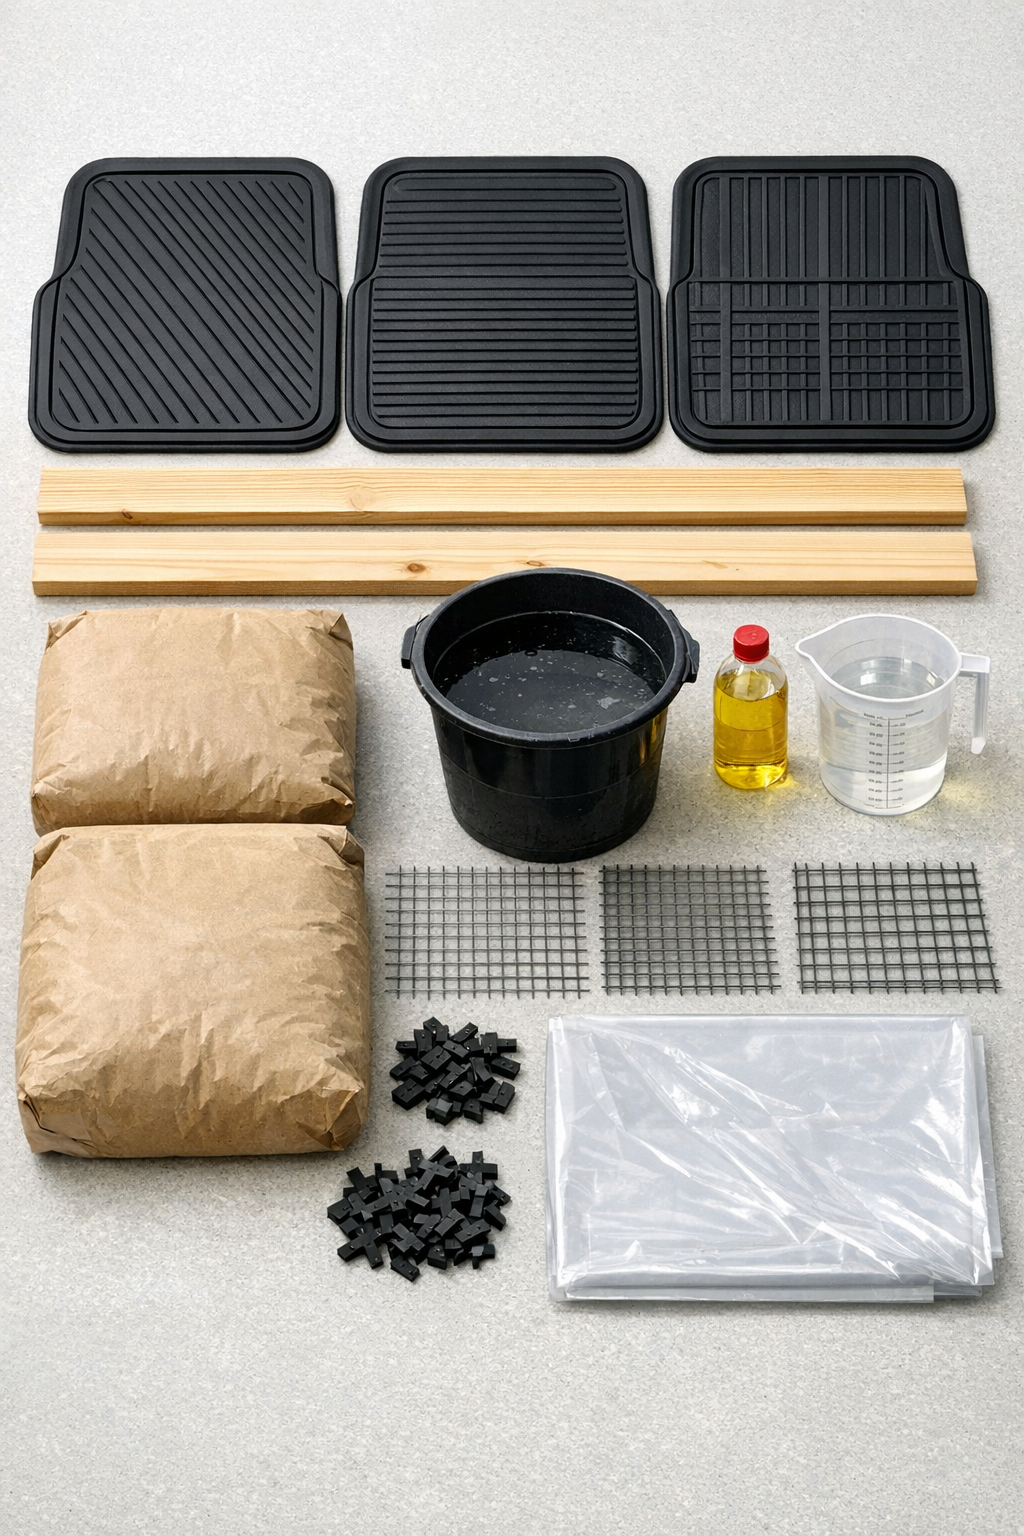
Materials
3 grooved rubber car mats, approximately 16 x 24 inches each
Instructions
1. Choose a flat work surface and cover it with heavy plastic sheeting so the mats and cement will not stick to the ground or table.
2. Set the three rubber car mats groove-side up on the plastic, and check that each mat lies as flat as possible without curled corners.
3. Lightly coat the patterned face of each mat with a thin film of vegetable oil or mold release, wiping away any puddles so the texture stays crisp.
4. Place the two scrap boards along the long sides of the first mat to act as side forms, and use shims underneath as needed to keep the slab thickness close to 1 1/2 inches.
5. Mix the concrete in a bucket or mixing tub according to the package directions until it is thick like brownie batter and holds its shape when scooped.
6. Pour cement onto the first mat between the scrap boards, spreading it to fill the textured area evenly and pressing it into the grooves with a trowel or gloved hand.
7. Lay one piece of galvanized hardware cloth onto the wet cement, keeping it about 1 inch in from all edges, then cover it with more cement until the slab reaches full thickness.
8. Screed the top by dragging a straight board or trowel across the side forms, then smooth the surface with a few light passes without overworking it.
9. Repeat the pouring, reinforcing, and smoothing process for the remaining two mats, using the same thickness for all three slabs.
10. Tap the sides of the form and gently lift one edge of each mat a fraction of an inch, then set it back down to help release trapped air and sharpen the pattern.
11. Let the slabs sit undisturbed until the concrete firms up, usually 24 to 48 hours depending on the mix and weather.
12. Remove the scrap boards, carefully peel back the rubber mats, and turn the slabs over to reveal the patterned face; then cure them in a shaded spot for another 3 to 5 days before heavy use.
Variations & Tips
Change the pattern: Different car mats create different surface textures, so I like to compare the groove depth before pouring. Deep channels usually give the most dramatic finished look.
Add color: You can blend a small amount of concrete pigment into the dry mix before adding water, or brush masonry stain onto the cured slabs later for a richer stone-like finish.
Make them thicker: For areas that get more weight, increase the slab thickness to 2 inches and keep the reinforcing mesh centered in the pour.
Use them in a series: Three matching slabs make a nice stepping path, but they also work well as a single grouped landing in front of a garden bench or hose area.
Prevent cracks: Don’t make the mix too wet. In my kitchen and in the workshop, the same principle applies: too much liquid weakens structure, whether it is dough or concrete.
Cure slowly for strength: If the weather is hot or windy, cover the slabs loosely with plastic after demolding so they do not dry too fast and become brittle.
Clean the mats right away: Wash the rubber mats before the cement fully hardens on them, and you can reuse them for another batch or a companion set.