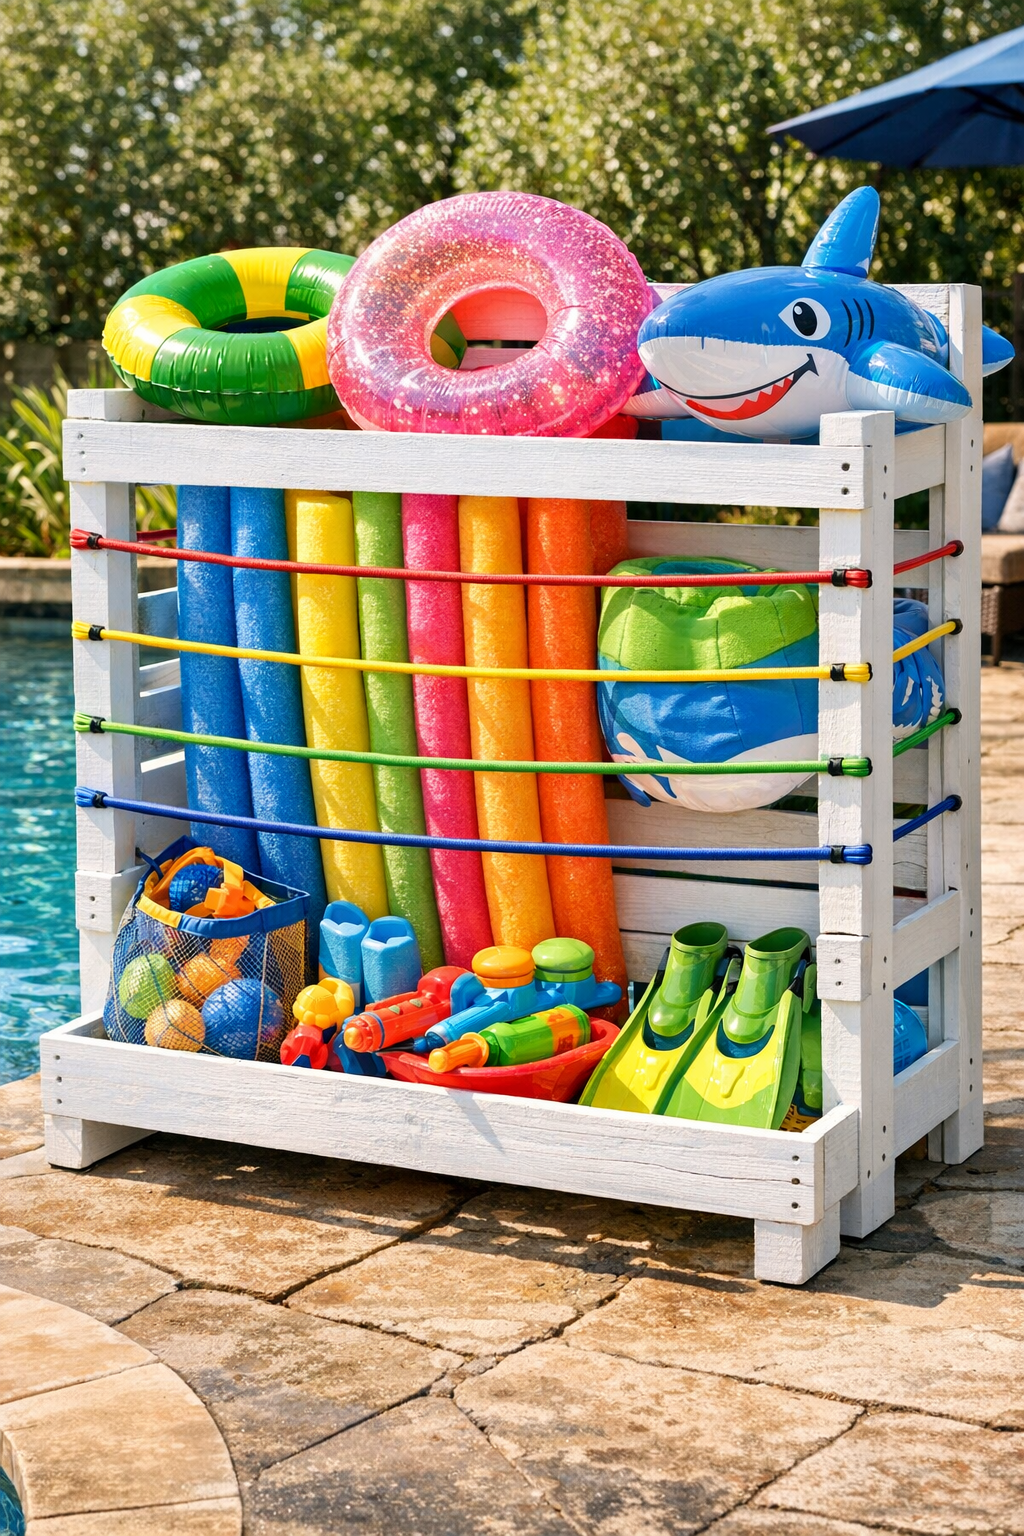
When summer gets going out here, pool noodles, floaties, and water blasters seem to multiply like zucchini in August. This pool toy storage rack is a simple way to keep all those wet, oversized toys up off the ground and in one easy spot, and it uses a painted wooden pallet frame with colorful bungee cords stretched across the opening to make a flexible holding wall. It is one of those practical yard projects that looks cheerful, works hard, and makes the whole pool area feel more put together.
I especially like this project for families who want something sturdy without spending a fortune on plastic storage bins that crack in the sun. The bungee cords let toys dry out with good airflow, and the pallet frame gives you a nice solid structure that can lean against a fence, mount to a wall, or sit beside the pool shed. It reminds me of the old farm habit of making something useful out of what you already have, only with a brighter coat of paint and a little summertime fun.
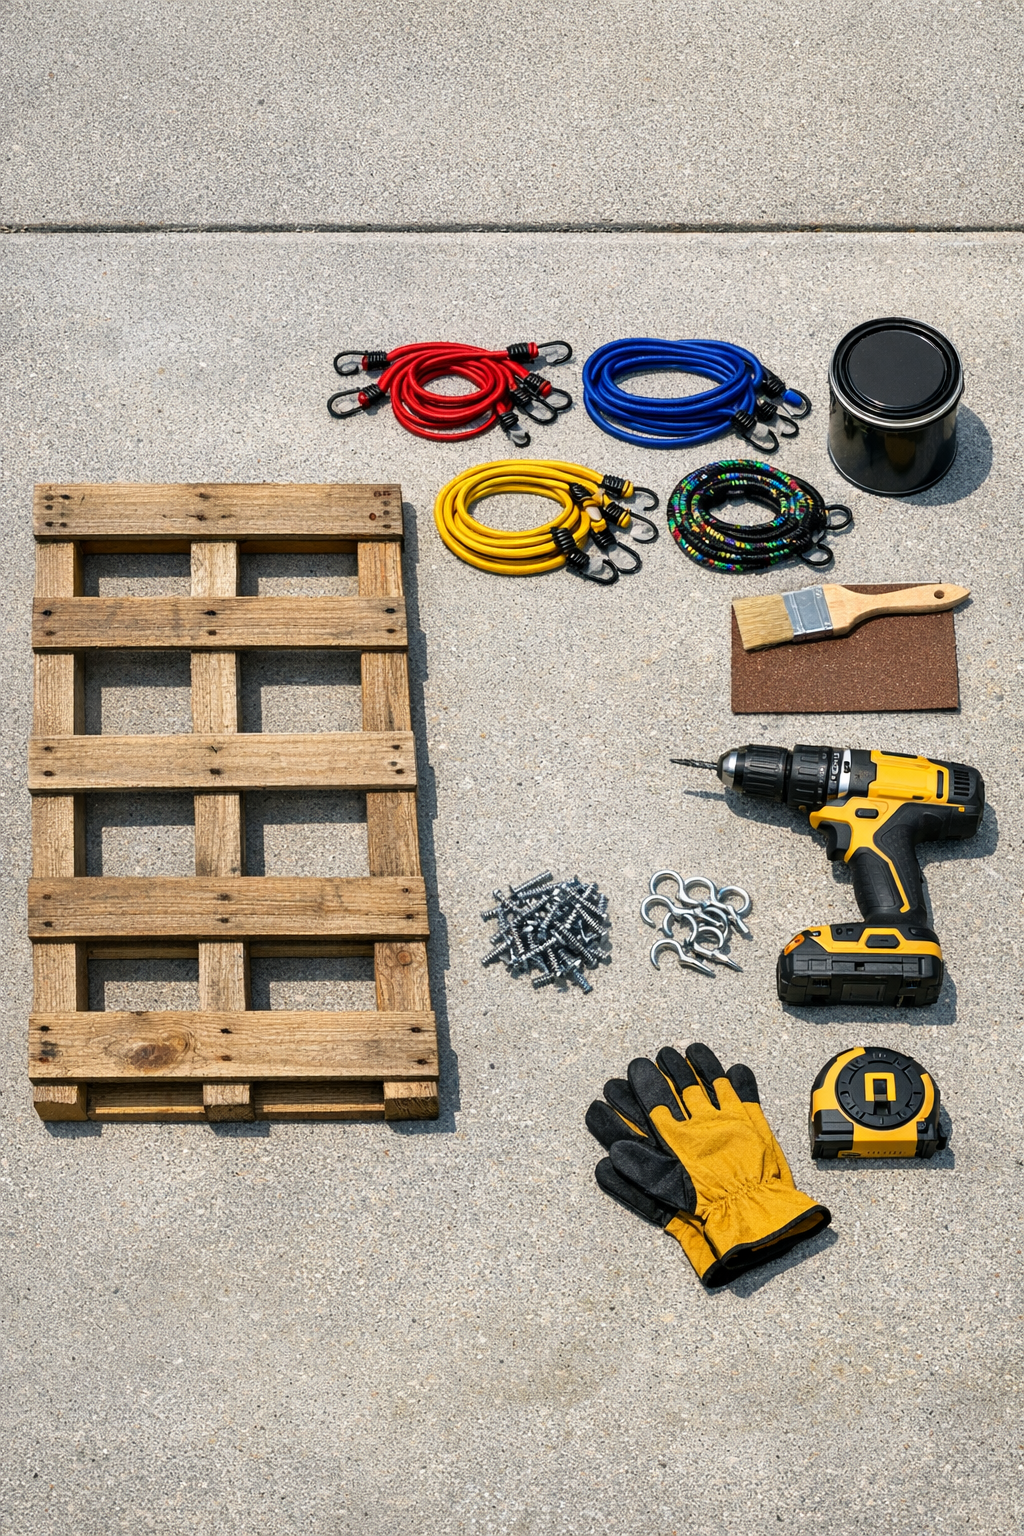
Materials
1. Choose a sturdy pallet with solid side rails and top and bottom boards, then remove any extra back slats until you have a strong open frame with room for toys to slide behind the bungee cords.
2. Sand the entire pallet with 80-grit paper first, then smooth it with 120-grit paper, paying special attention to splinters and rough corners where wet hands might reach.
3. Fill any deep gouges or old nail holes with exterior wood filler, let it dry fully, and sand those spots flush so the finished rack looks tidy and the cords sit evenly.
4. Prime the pallet frame on all sides and let it dry according to the label, because outdoor projects last much longer when that first coat is not skipped.
5. Paint the pallet frame with 2 coats of exterior paint, allowing proper drying time between coats, and make sure you cover the inside edges where splashes and sun will hit hardest.
6. Measure the open section of the pallet and mark evenly spaced points for the bungee cords, placing marks 4 to 6 inches apart down both vertical sides so the cords will stretch straight across.
7. Drill small pilot holes at each mark and twist in the screw hooks, keeping them aligned directly across from one another so the cords sit level and hold toys neatly.
8. Stretch each bungee cord from one side to the other, securing one end to a hook and pulling the cord snug to the matching hook across the frame; repeat from top to bottom until you have a flexible, colorful barrier.
9. Test the spacing by tucking in a pool noodle or inflatable toy, then tighten or reposition any cord that feels too loose or leaves a gap wide enough for smaller toys to slip through.
10. Seal the painted wood with a clear exterior sealer once the paint is fully cured, then attach rubber feet or bumpers to the back corners to protect the wall or fence behind it.
11. Set the rack beside the pool, lean it securely against a fence or wall, or fasten it with exterior screws into studs or proper anchors so it cannot tip when children pull toys in and out.
12. Load in pool noodles, kickboards, floaties, and water blasters by slipping them behind the cords, leaving enough open space for air to circulate so everything dries between swims.
Variations & Tips
Use a freestanding version: If you do not want to mount it, attach two 2 x 4 legs cut to 24 inches each across the back at the bottom to help the pallet stand more securely on its own.
Choose cord spacing by toy size: For mostly large pool noodles and rafts, 5- to 6-inch spacing works well; for smaller blasters and dive toys, bring the cords closer to 3 or 4 inches apart.
Remove metal hooks for safety: Some bungee cords come with bulky end hooks, and I prefer removing them and tying secure looped ends if needed so there are fewer hard edges around children.
Paint with purpose: Bright blue, aqua, sunny yellow, or coral all suit a pool area nicely, but a darker color can hide scuffs better if your storage rack will sit near gravel or a busy gate.
Add a bottom shelf: If your pallet has enough depth, screw in one extra slat across the lower front to create a little ledge that helps heavy balls and rolled floats stay put.
Check pallet quality carefully: I always avoid pallets with cracked rails, strong chemical odors, or signs of rot, because outdoor storage should be sturdy and safe from the start.
Make cleanup easier: Leave a little room at the top so children can toss toys in without fighting the cords; the easier it is to use, the more likely everybody is to put things away.