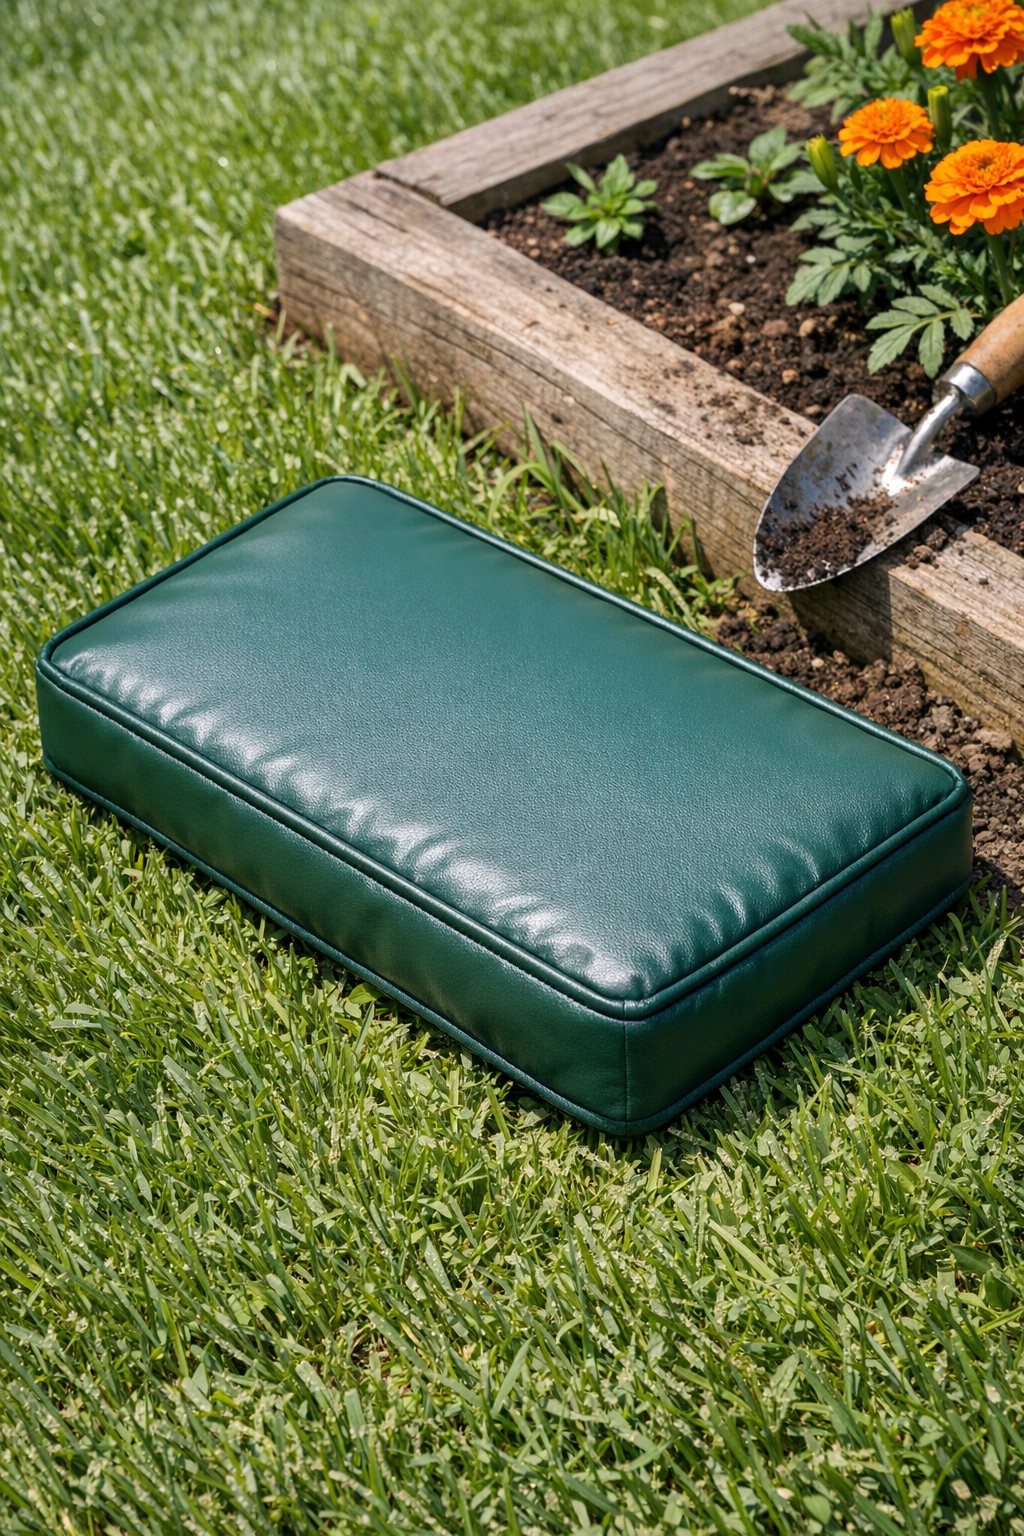
I love a backyard project that solves a real problem in under an hour, and this DIY garden kneeler is exactly that kind of win. It’s basically a thick foam pad tucked into a simple waterproof vinyl pouch, but the result feels surprisingly polished and makes weeding, planting, and edging so much easier on your knees.
As someone who tries to squeeze garden time in between work and dinner prep, I’m always looking for projects that are practical, fast, and durable. This one is great for beginners because it uses straightforward cutting and sewing, and if you’ve got a small pile of utility fabric scraps or leftover foam, it’s an easy way to turn them into something you’ll actually use all season.
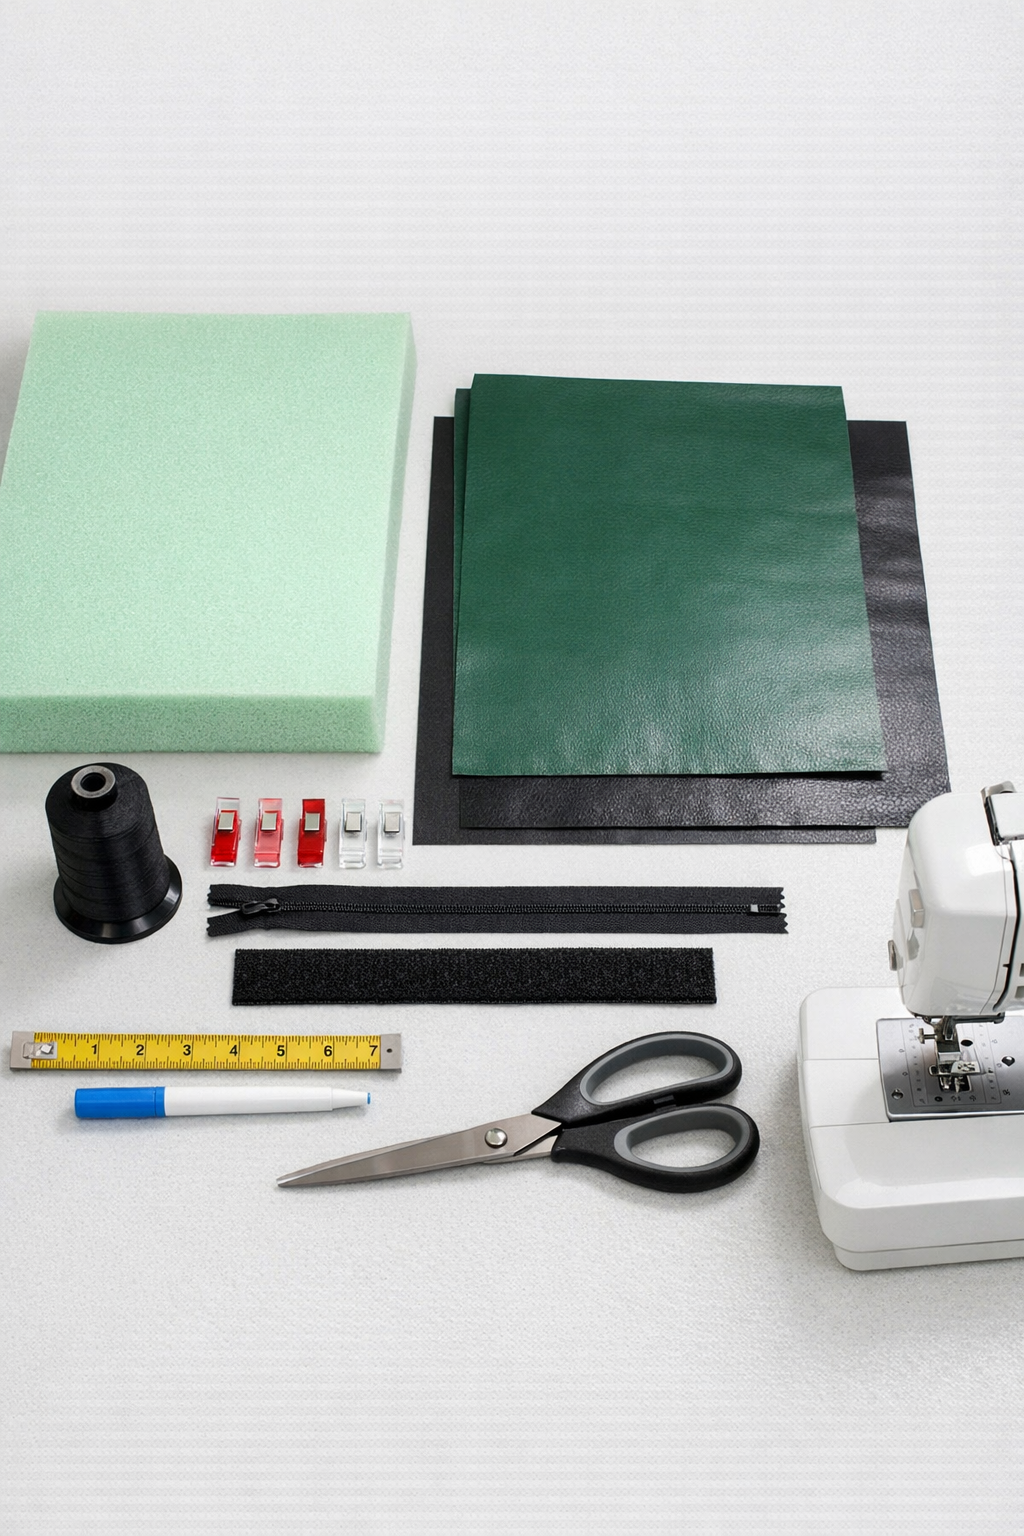
Materials
Waterproof vinyl fabric — 2 rectangles, each 16 inches x 11 inches
Instructions
1. Cut two rectangles of waterproof vinyl fabric to 16 by 11 inches, and cut the foam to 15 by 10 inches so it will slide inside without bunching.
2. Mark a 1/2-inch seam allowance around the vinyl pieces, and on one short side of each piece mark a 1-inch opening area for the closure.
3. Attach the hook-and-loop tape to the wrong side of the marked opening edges, sewing one side to the inside of the front panel and the matching side to the inside of the back panel.
4. Place the vinyl pieces right sides together, clip around the edges, and stitch the two long sides and one short side with a 1/2-inch seam allowance.
5. At the sewn corners, trim the seam allowance diagonally without cutting the stitches to reduce bulk and help the pouch turn neatly.
6. Turn the pouch right side out, push out the corners with your fingers, and check that the foam fits before inserting it fully.
7. Compress the foam slightly and slide it into the pouch, working one end in first and smoothing the vinyl as you go so the pad sits flat.
8. Close the hook-and-loop opening, then topstitch 1/4 inch from the outer edge around the kneeler to help the cover hold its shape and keep the foam from shifting too much.
Variations & Tips
Add a carry handle: Sew a 6-inch loop of 1-inch nylon webbing into one short seam before assembling the pouch if you want to hang the kneeler in the garage or carry it around the yard easily.
Use a zipper instead: If you prefer a more secure closure, swap the hook-and-loop tape for a 12-inch outdoor zipper on one short side. I’d do this if I expected to remove the foam often for cleaning or replacement.
Double up the foam: For extra knee support, use two 1-inch foam layers instead of one 2-inch piece. That can be easier to source, and it lets you mix a firmer base with a softer top layer.
Wipe-clean fabric matters: Marine vinyl or outdoor utility vinyl works best because damp grass and muddy knees are basically guaranteed. I’ve learned the hard way that absorbent fabric gets grimy fast in the garden.
Go bigger for longer tasks: If you spend a lot of time harvesting or planting, increase the finished size to about 18 by 12 inches and cut the foam 1 inch smaller all around than the cover pieces for the same snug fit.
Sewing tip for vinyl: Use sewing clips instead of pins, since pins leave permanent holes. A slightly longer stitch length also helps the seams look cleaner and prevents the vinyl from puckering.