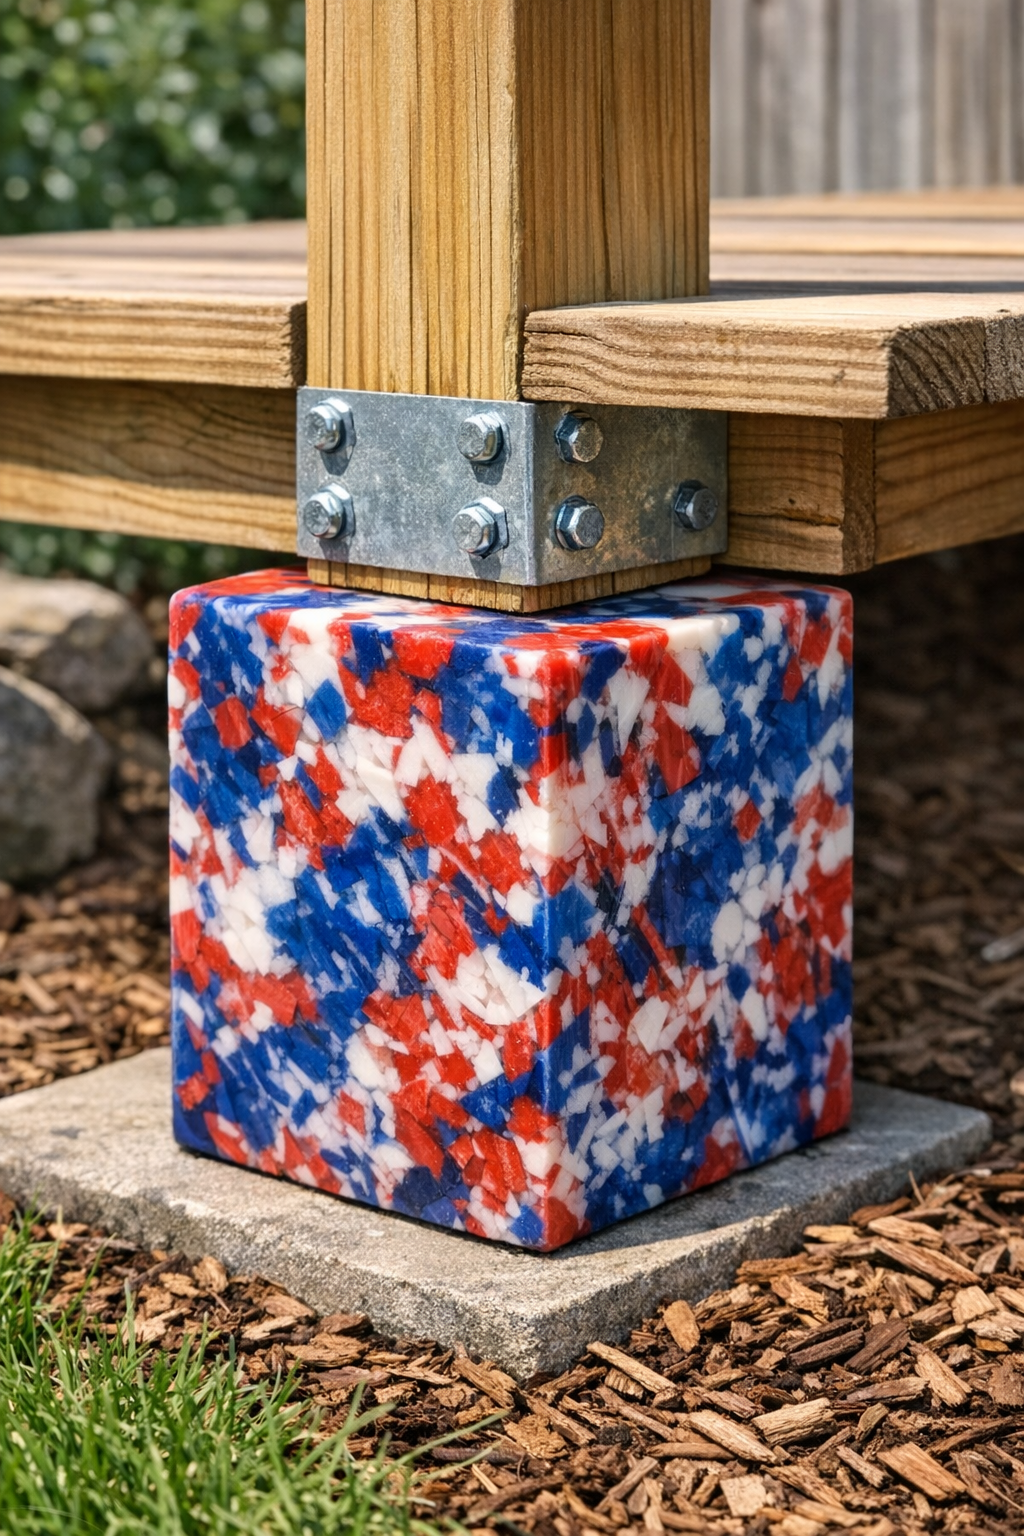
I’m always a little too excited when a project solves two problems at once: using up something headed for the trash and making a genuinely useful piece for the house. These DIY deck supports do exactly that by turning chopped red, white, and blue plastic frisbees into tough spacer blocks you can use under planters, small platform sections, storage shelving, or light-duty deck accessories that need a little lift off the ground.
This is a great weekend project if you like simple upcycling and don’t want a giant tools-and-sawdust situation. I’m writing this with busy people in mind, because that’s usually me too—I love a project that can be done in short bursts between work, laundry, and figuring out dinner. The result looks surprisingly polished, and the marbled patriotic color mix is the part nobody expects.
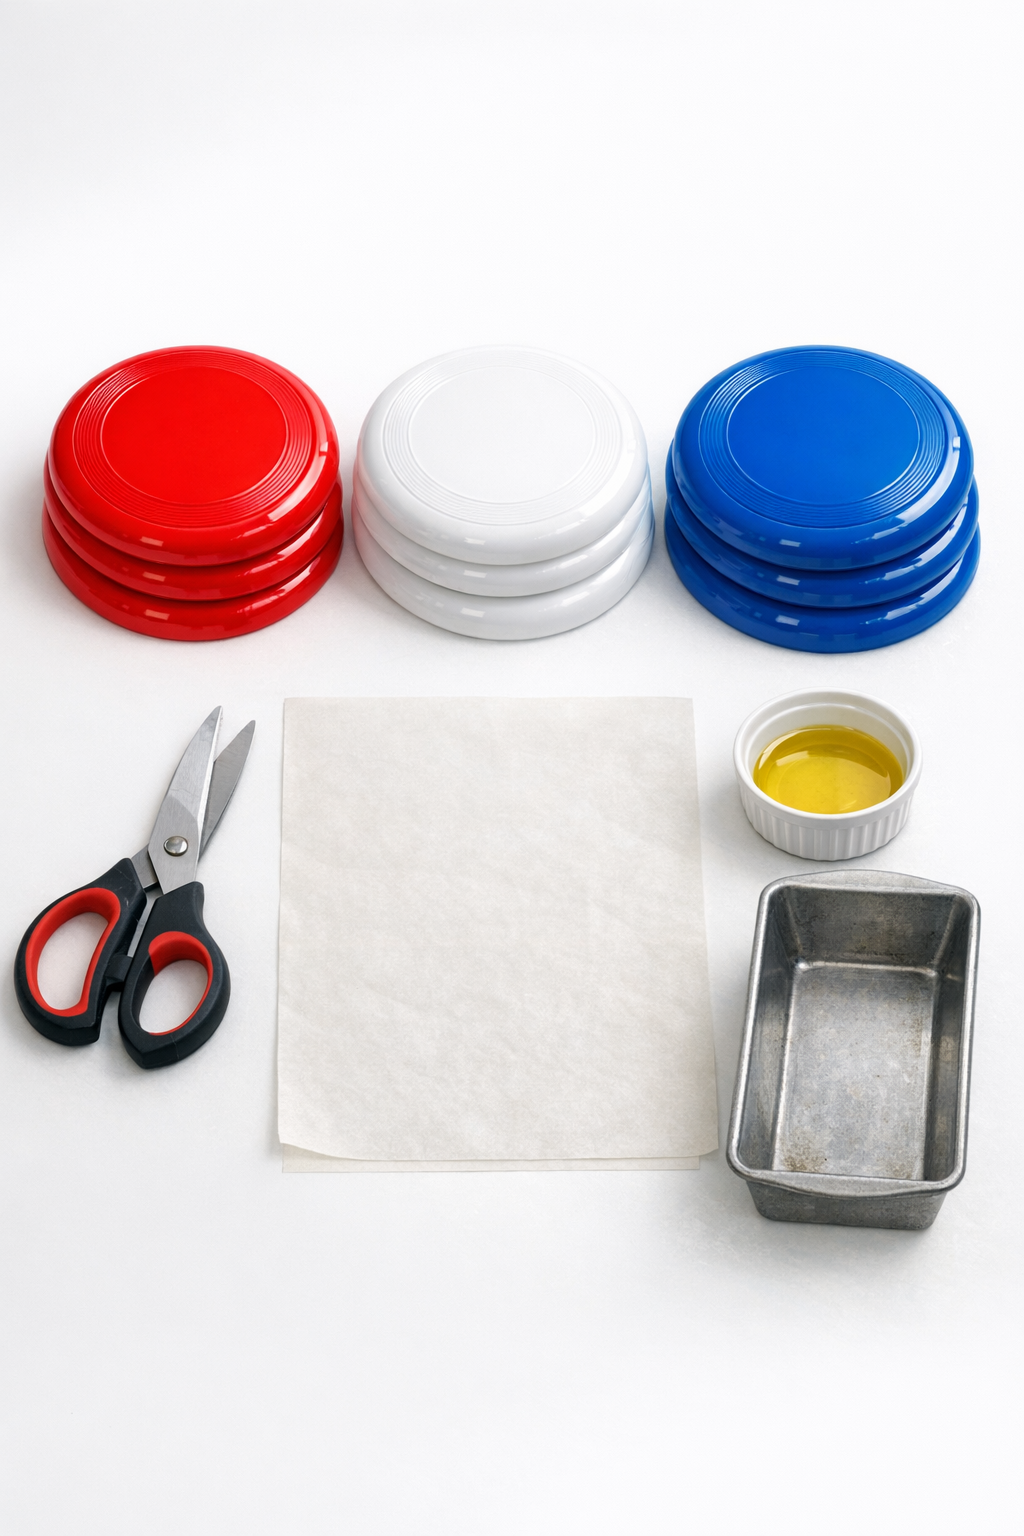
Materials
Instructions
1. Wash and dry all 9 frisbees so no dirt, stickers, or moisture gets trapped in the melt. If there are printed labels, remove as much of the surface film as possible.
2. Cut the frisbees into small pieces about 1/2 to 1 inch wide using heavy-duty scissors. Mix the red, white, and blue pieces together in a bowl so the finished supports get a marbled look instead of color layers.
3. Line a metal loaf pan with parchment paper and lightly rub the paper with 1 teaspoon of oil. This keeps the softened plastic from bonding to the pan and makes the block easier to remove.
4. Fill the lined loaf pan with the chopped plastic, packing it down firmly by hand so there are fewer air pockets. Slightly overfill it, because the plastic will compress as it melts.
5. Heat the packed pan until the plastic softens and fuses into a solid mass, checking often so it melts evenly without scorching. Work in a well-ventilated area and stop heating as soon as the pieces have bonded into one compact slab.
6. Press the softened plastic down firmly in the pan with a second metal pan or another flat heat-safe surface to densify the block. Let it cool completely before handling so it hardens into a sturdy support blank.
7. Remove the cooled block from the pan and peel away the parchment paper. Trim the edges with scissors while the surface is just slightly warm, or leave the rougher recycled look if you like it.
8. Cut or divide the block into equal support pieces sized for your project, such as four blocks about 2 x 2 x 1 1/2 inches each. Test them on a flat surface and sand or shave any wobbly spots so all supports sit level.
9. Place the finished supports under a small deck platform, planter frame, outdoor storage base, or other light-duty structure to lift it slightly off damp ground. Keep them out of direct flame and use them only where a compact spacer block is needed, not as a load-bearing foundation for major structural framing.
Variations & Tips
For a cleaner marbled look: Use equal amounts of each color and avoid overmixing once the pieces are in the pan. I like a swirled look more than a muddy blend, so I keep the colors loosely distributed.
For smaller support pads: Use a muffin tin or several mini loaf cavities instead of one larger pan. That’s a smart option if you need matching feet for planters or outdoor shelving.
For more even melting: Keep the chopped pieces close in size. When I rush this part, I always end up with a few stubborn thicker bits that take longer to fuse.
For safer prep: Always melt plastic with strong ventilation and dedicated project equipment, not cookware you plan to use for food later. This is one of those projects where a thrifted pan is absolutely worth it.
For better stability: Make the supports wider than they are tall. Short, broad blocks are much more reliable outdoors, especially on slightly uneven patio or deck surfaces.
For outdoor durability: Use these as moisture-resistant spacers, not structural posts. They’re ideal for keeping wood off the ground, which helps reduce rot and makes seasonal cleanup easier.