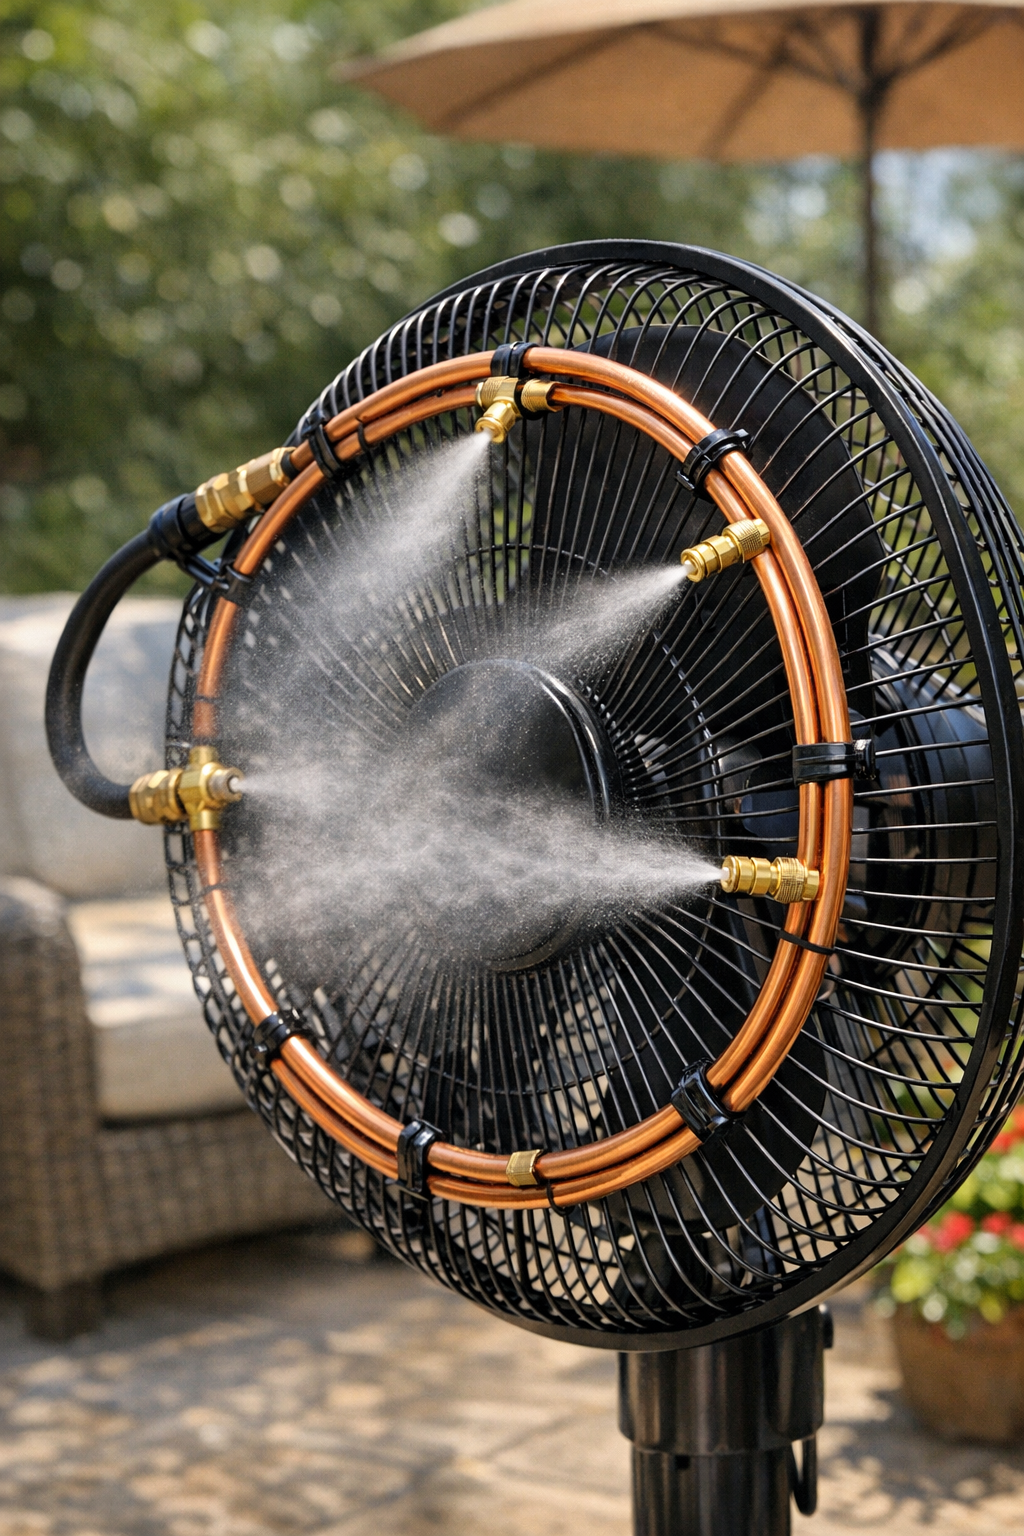
When the patio feels like an oven but I still want to sit outside with a cold drink after work, this is the kind of project I get irrationally excited about. This DIY outdoor fan mister turns a basic oscillating pedestal fan into a cooling station by routing thin flexible copper tubing around the fan cage and feeding it with fine misting nozzles. It looks clever, works surprisingly well, and costs a lot less than buying a prebuilt misting fan.
I like this project for anyone who wants better backyard comfort without a huge setup. If you’re comfortable making simple tubing connections and taking a little extra care around water and electricity, you can absolutely build this in an afternoon. The big key, from my experience, is mounting the mist ring to the fan cage only and keeping every bit of tubing well clear of the spinning blades and motor housing.
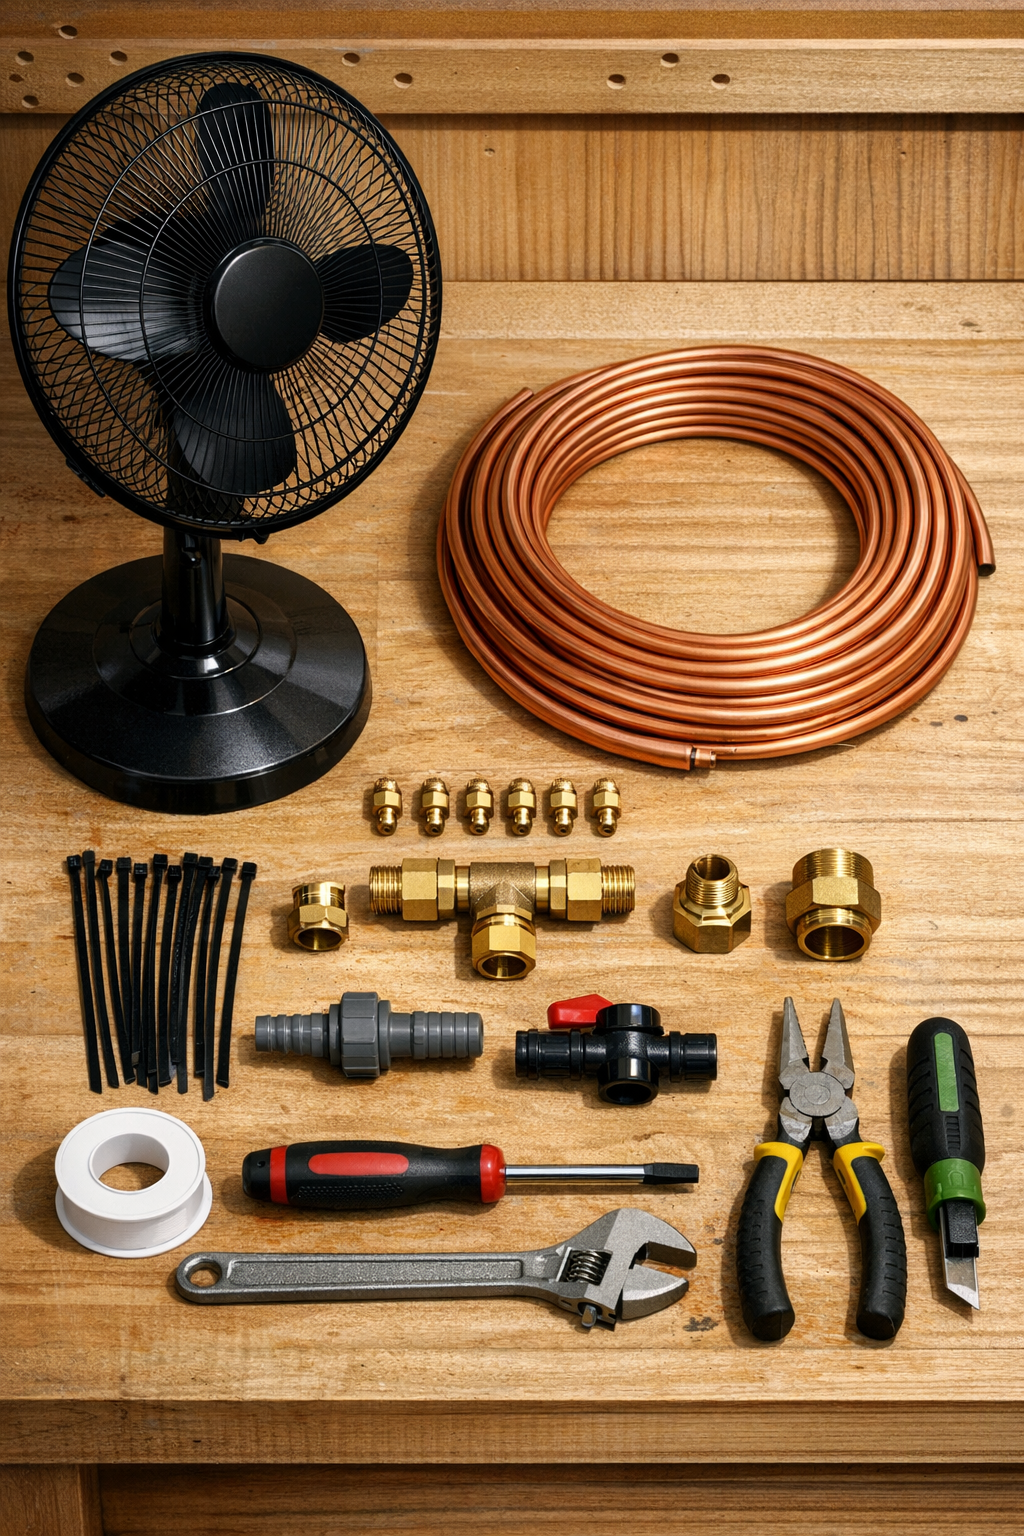
Materials
Instructions
1. Unplug the pedestal fan and move it to a sturdy work surface where you can access both sides of the cage. Confirm that the fan is rated for outdoor or sheltered patio use, and only plan to run this mister where the plug is protected by a GFCI.
2. Remove the front fan cage according to the fan’s design, usually by releasing perimeter clips or a locking ring. Clean both cage halves so the tubing and ties will sit flat and secure.
3. Measure a path around the inside perimeter of the front cage, keeping the future mist ring at least 2 inches away from the blade tips. This clearance matters more than anything else, because the tubing must never flex into the spinning blades.
4. Uncoil the 1/4-inch copper tubing slowly and shape it into a wide circle that matches the fan cage. Bend it gradually by hand so you don’t kink it; I usually work in small sections like I’m easing ribbon into a wreath form.
5. Mark six evenly spaced nozzle positions around the ring, aiming them toward the center-front of the fan so mist will blow outward rather than back toward the motor. Keep the bottom nozzle positions slightly off center so water does not drip straight onto the fan hub.
6. Cut the tubing at the first nozzle location if needed and install the misting tees one at a time, following the fitting style you purchased. Wrap any threaded nozzle stems with PTFE tape, then screw the nozzles into the tees until snug.
7. Add the inline shutoff valve at a convenient lower side section of the ring or on the supply line just before it reaches the fan. This makes it much easier to fine-tune the mist level once everything is running.
8. Position the completed tubing ring on the front cage and attach it to the wire frame with zip ties and rubber-coated clips. Fasten at regular intervals so the ring cannot sag, twist, or migrate toward the blades during oscillation.
9. Route the supply end of the tubing down one outer edge of the fan cage and along the fan neck, securing it every few inches with zip ties or silicone tape. Leave enough slack at the oscillating joint for side-to-side movement, but not enough for the line to swing freely.
10. Reinstall the front cage and spin the blades by hand with the fan still unplugged. Watch from the side and front to verify that the blades clear the tubing, zip ties, and nozzle tips at every point.
11. Connect the water supply in this order: outdoor spigot, backflow preventer, pressure regulator, hose, then the garden hose to 1/4-inch tubing adapter. Tighten the compression fitting to the copper supply line and keep the hose connection below the fan motor area.
12. Turn on the water slightly with the fan still off and inspect every fitting for leaks. If you see dripping at a threaded nozzle or adapter, shut off the water, retape the threads, and retighten before moving on.
13. Open the inline valve gradually until the nozzles produce a fine mist instead of heavy droplets. If your water pressure is high, start low; too much flow will soak the cage and patio instead of cooling the air.
14. Plug the fan into a GFCI-protected outlet, switch it on at the lowest speed, and watch one full oscillation cycle. Make sure the mist blows away from the motor and controls, and adjust nozzle angle slightly if needed.
15. Increase to the fan speed that gives the best cooling without pushing water back onto the fan body. Once it’s dialed in, trim excess zip tie tails and wrap any exposed sharp tie ends with a bit of silicone tape for a cleaner finish.
Variations & Tips
Use nylon mist tubing instead: If you prefer an easier bend and lighter weight, 1/4-inch outdoor misting nylon tubing can replace copper. I still like copper for a more rigid ring, but nylon is simpler for beginners.
Keep the nozzle count modest: More nozzles are not always better. On a 16-inch to 18-inch fan, six fine-mist nozzles usually give better airflow and less dripping than packing the ring too densely.
Protect the motor: Angle every nozzle slightly forward and away from the center hub. The goal is to cool the person sitting nearby, not to bathe the fan motor.
Best placement: Put the fan under a covered patio or porch where the electrical parts stay dry, even while the mist blows outward. I would not leave this setup exposed to rain between uses.
For hard water areas: If your nozzles clog easily, add a small inline filter ahead of the mist line and soak the nozzles in vinegar occasionally. Midwest summer water can be pretty mineral-heavy, and tiny mist orifices show it fast.
Make it more portable: A short leader hose with quick-connect fittings makes setup much faster if you move the fan around the patio. That’s especially handy if, like me, you’re always dragging chairs around to chase the shade.
Safety first: Never drill into the motor housing, never route water over switches or plugs, and never use the mister without GFCI protection. If the fan vibrates, clips the tubing, or throws droplets onto electrical parts, shut it down and correct the setup before using it again.