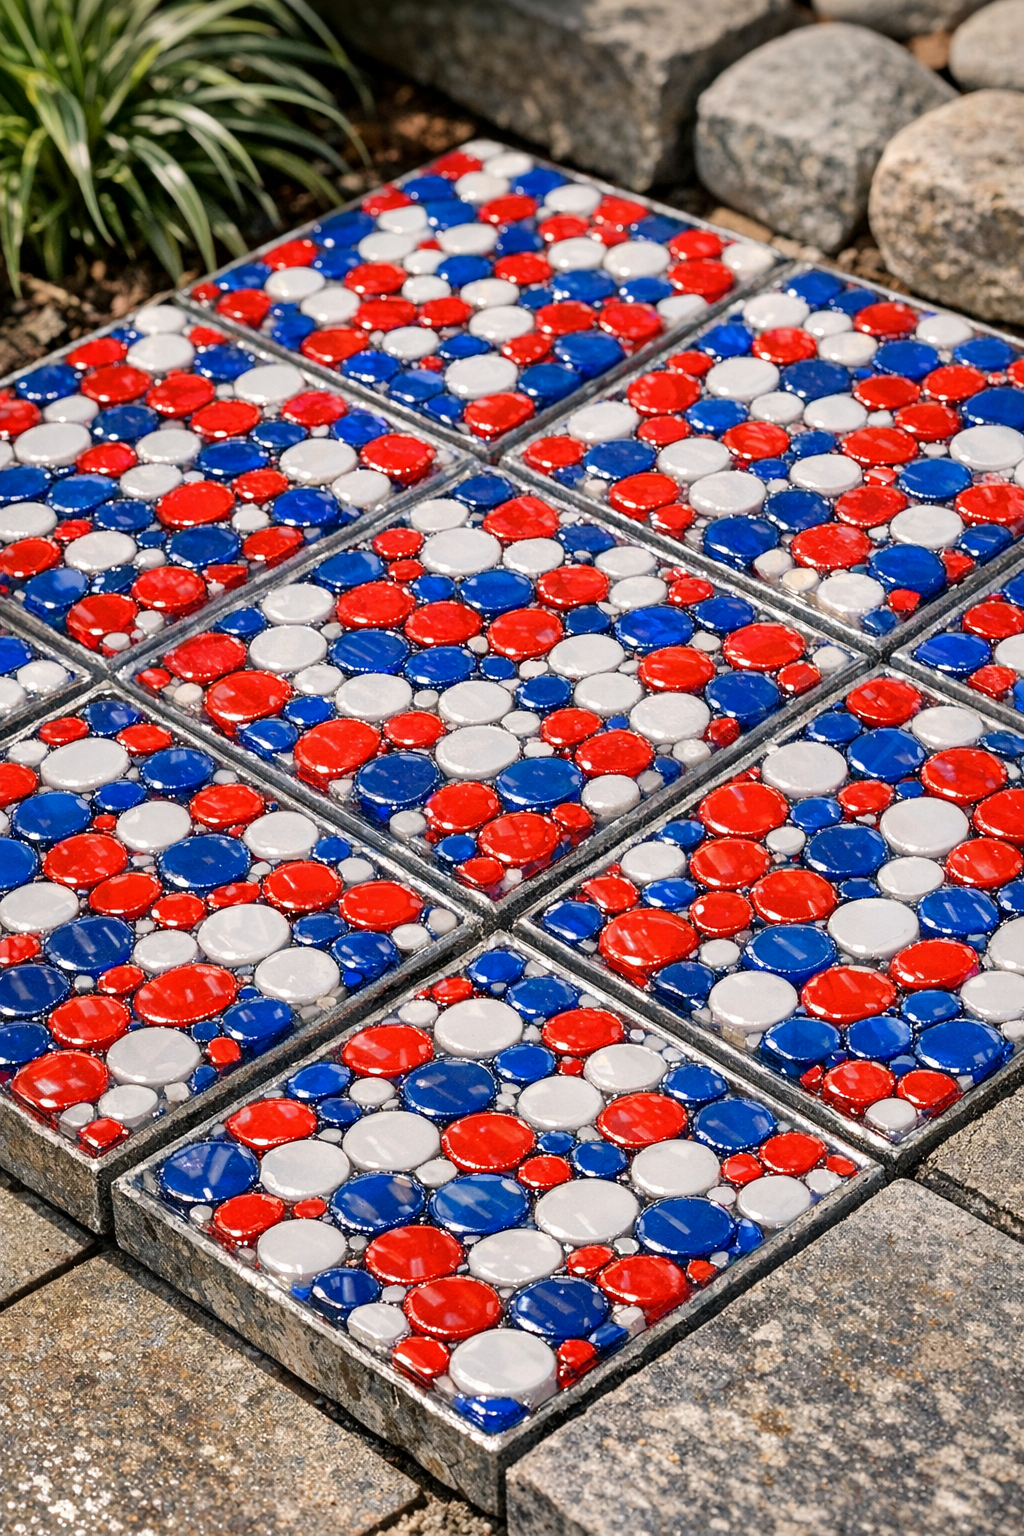
There’s something especially satisfying about turning a handful of humble plastic bingo chips into a finished surface that looks far more custom than the ingredient list suggests. In this project, I use red, white, and blue bingo chips, a clear binder, and a simple tile mold setup to make heavy-duty patio tiles with a bold mosaic look that holds up beautifully for decorative outdoor use.
I’m always drawn to projects that feel a bit like kitchen alchemy, and this one absolutely does. If you’re comfortable measuring, layering, and baking with care, this is a very approachable DIY. It’s a good fit for anyone who wants small accent tiles for a patio nook, container garden platform, or outdoor side-table top without getting into complicated stonework.
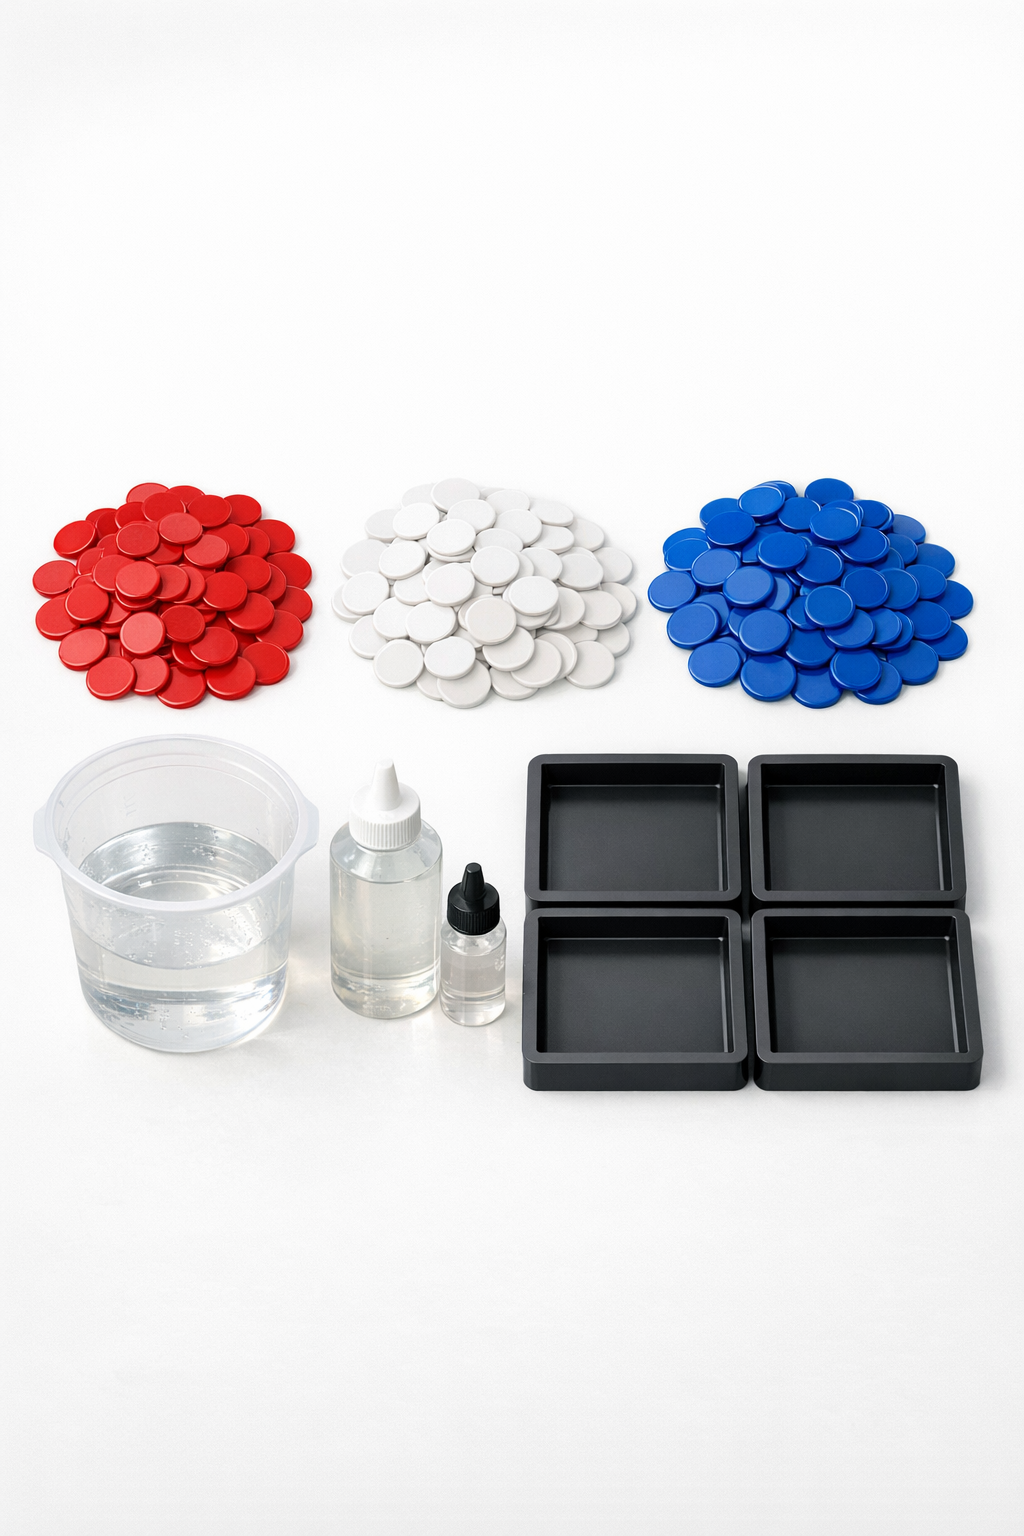
Materials
Instructions
1. Preheat your oven to 275°F and place the silicone tile molds on a flat, parchment-lined baking sheet so they stay level when moved.
2. Divide the bingo chips evenly among the 4 molds, arranging them in a single snug layer with the colors mixed or patterned as you like.
3. Bake the molds for 12 to 18 minutes, just until the chips soften and fuse together at the edges; watch closely so they melt into a solid layer without scorching.
4. Remove the tray from the oven and let the fused chip layers cool in the molds for 20 to 30 minutes, until firm enough to handle without shifting.
5. Mix the two-part epoxy resin according to the manufacturer’s ratio, preparing enough to pour a thin but complete top layer over each tile.
6. Slowly pour the clear epoxy over the cooled fused chips in each mold, spreading it to the corners so it fills gaps and creates a sealed, even surface.
7. Tap the baking sheet gently on the counter a few times to release trapped air bubbles, then leave the tiles undisturbed on a level surface to cure fully for the time specified on the resin packaging.
8. Once fully cured, flex the silicone molds to release the tiles and set them outdoors on a compact, level base or use them as decorative patio accents rather than structural pavers.
Variations & Tips
Pattern layout: For a more polished look, arrange the chips in stripes, a starburst, or color-blocked sections instead of scattering them randomly. I like planning the pattern before baking because once the chips soften, that arrangement becomes the permanent design.
Tile thickness: If you want a heavier tile, make the fused chip base slightly denser and pour the epoxy a bit thicker, but keep all tiles the same depth so they sit evenly together.
Outdoor use: These work best as decorative patio tiles, stepping accents between pots, or a tabletop inset rather than load-bearing pavers for a main walkway. In my experience, that gives you the best balance of durability and longevity.
Heat control: Ovens vary, so start checking a few minutes early. You want the chips softened and joined, not liquefied into a completely flat puddle.
Bubble reduction: Pour the resin in a thin stream and tap the mold after filling to help bubbles rise. If your resin instructions allow it, passing a heat source briefly over the surface can also help clear tiny bubbles.
Seasonal color swaps: The same method works with other chip colors for summer brights, Halloween orange and black, or neutral tones that mimic terrazzo. That flexibility is part of what makes this project so fun.