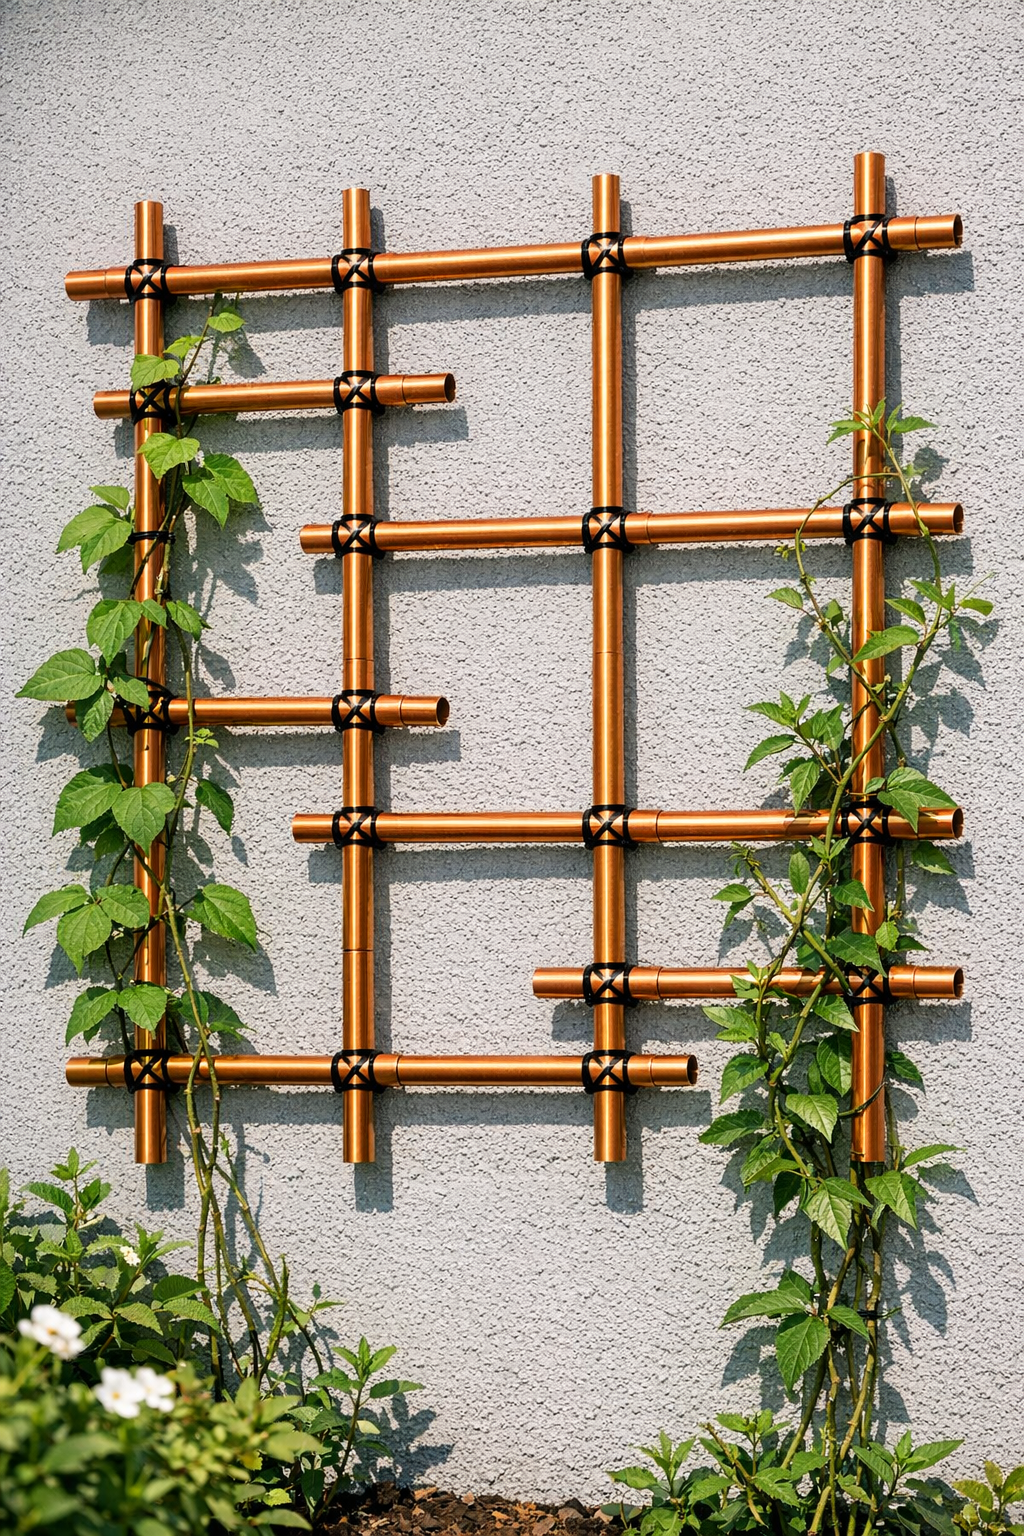
A simple wall trellis can make a whole garden corner feel finished, and this version has such a clean, modern look without being fussy or expensive. For this project, I’m using painted pipes and zip ties to build a geometric grid that gives climbing plants support while also turning a plain fence or garden wall into a real focal point.
I love projects like this because they come together with basic supplies and a little patience, not a full workshop of tools. If you want something beginner-friendly that still looks polished enough to make the whole space feel refreshed, this is a lovely weekend build.
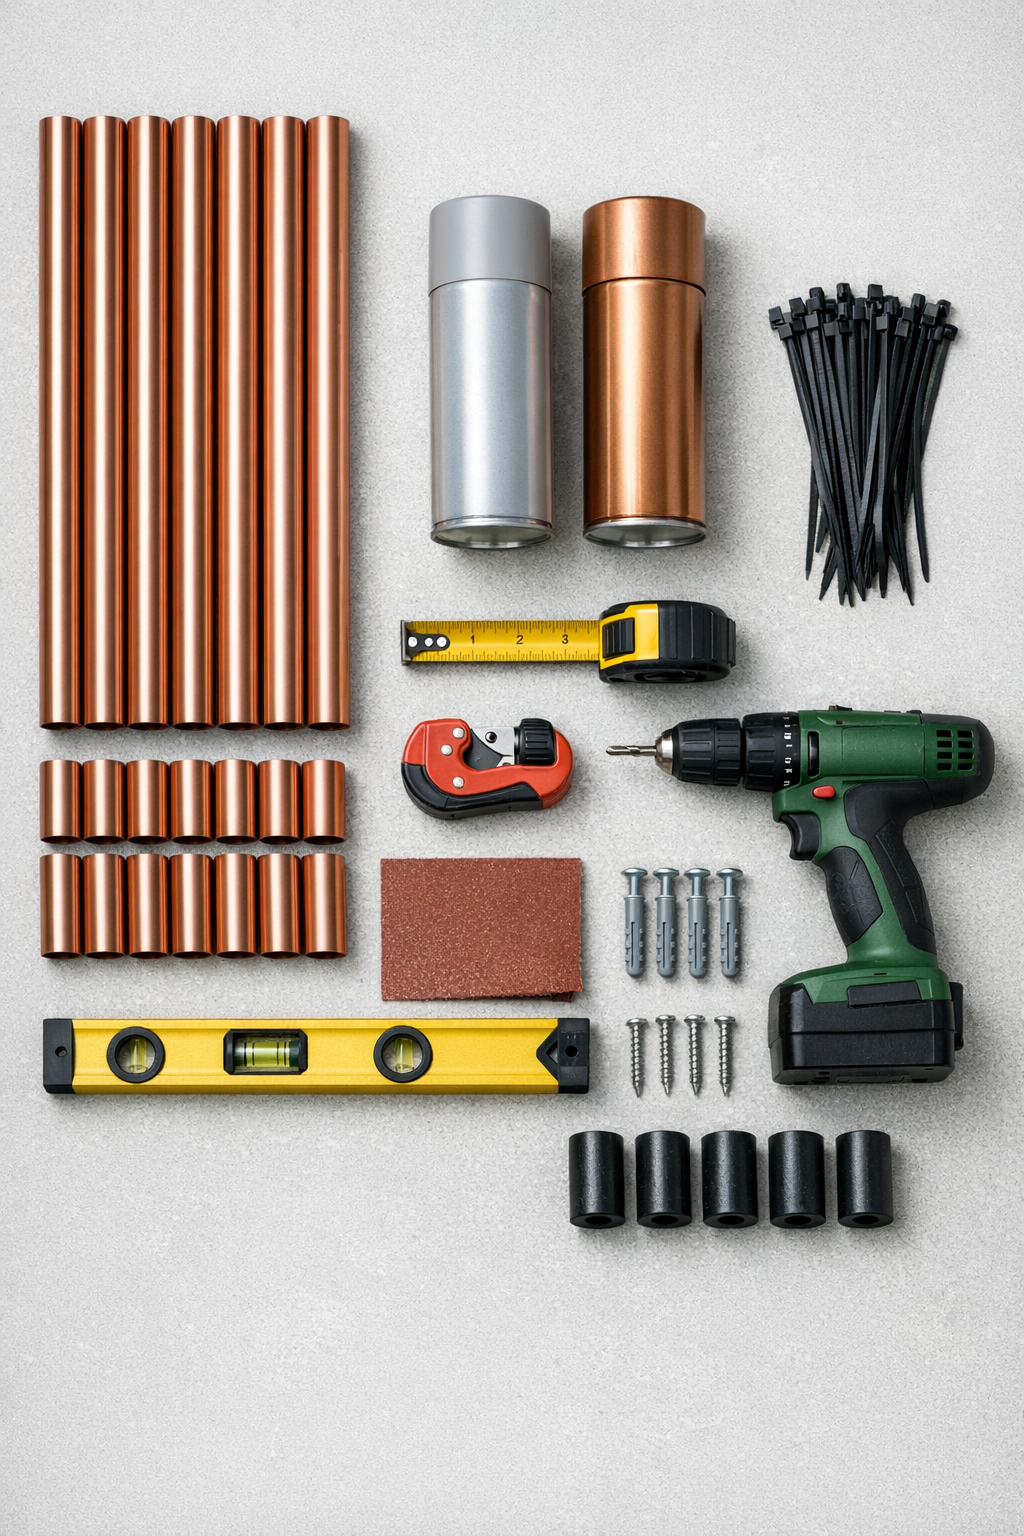
Materials
Instructions
1. Cut your pipes so you have sixteen 24-inch pieces and eight 12-inch pieces, then sand any rough edges until they feel smooth to the touch.
2. Lay the pipes on a drop cloth and apply a light coat of primer; let it dry fully, then spray on 2 thin coats of metallic copper paint for an even finish.
3. On a flat surface, arrange the longer pipes vertically about 8 inches apart to form the main grid, then place the shorter pipes horizontally and diagonally to create a geometric pattern you like.
4. Zip tie each intersection tightly, using one zip tie per joint for simple overlaps and two zip ties for spots that carry more weight or connect diagonal pieces.
5. Trim the zip tie tails close with scissors or snips so the finished trellis looks neat and won’t snag your hands while you work.
6. Hold the assembled trellis against the garden wall or fence, use a level to straighten it, and mark the 6 mounting points where the structure naturally meets the wall.
7. Drill the marked holes, insert the wall anchors if needed, and attach the wall spacers or pipe clamps with exterior screws, leaving enough room for the trellis to sit slightly off the wall.
8. Set the trellis into the mounted spacers or clamps and tighten everything so it feels secure but not crushed; the small gap behind it helps plants weave through more easily.
9. Guide lightweight climbing plants onto the grid with soft garden ties, spacing stems gently so they can spread across the pattern as they grow.
Variations & Tips
For picky plant growers: If you’re not sure what to grow on it, start with lightweight climbers like jasmine, black-eyed Susan vine, or young clematis. I always tell friends to avoid anything too heavy at first, because this style works best when the plant can be trained gently.
Color change: If copper doesn’t suit your garden, you can use matte black, soft sage green, or even brushed gold spray paint. Just be sure the paint is rated for outdoor use so your hard work lasts.
Stronger build: For a larger wall, use metal conduit instead of PVC or thin decorative tubing, and double up your zip ties at every intersection. That extra reinforcement is worth it if your trellis will support more mature vines.
Cleaner pattern planning: Before fastening anything, snap a quick phone picture of 2 or 3 layouts on the ground. I do this often with home projects because it helps me choose the prettiest pattern before I commit.
Wall protection: Keeping the trellis slightly off the wall improves airflow and helps prevent trapped moisture. It also gives tendrils more room to wrap around the grid instead of pressing flat.
Kid-friendly help: If you’re making this on a family weekend, younger helpers can sort cut pipes by length or hand over zip ties while an adult handles the cutting and mounting. It’s a nice way to turn a garden upgrade into a shared project.