Turning a few inexpensive plastic fly swatters into a sturdy little piece of garden mesh is exactly the kind of project I love: simple, resourceful, and surprisingly satisfying. When you melt chopped red, white, and blue fly swatters together with just two extra items, you get a colorful sheet of rigid mesh that can be used for plant supports, small trellises, cloche guards, or to keep curious critters out of tender seedlings.
I especially like this project for gardeners who enjoy upcycling and for families who want a quick weekend make. It does use heat, so this is one for adults to handle carefully, but the finished result looks so clever that people really do stop and ask what it’s made from.
Materials
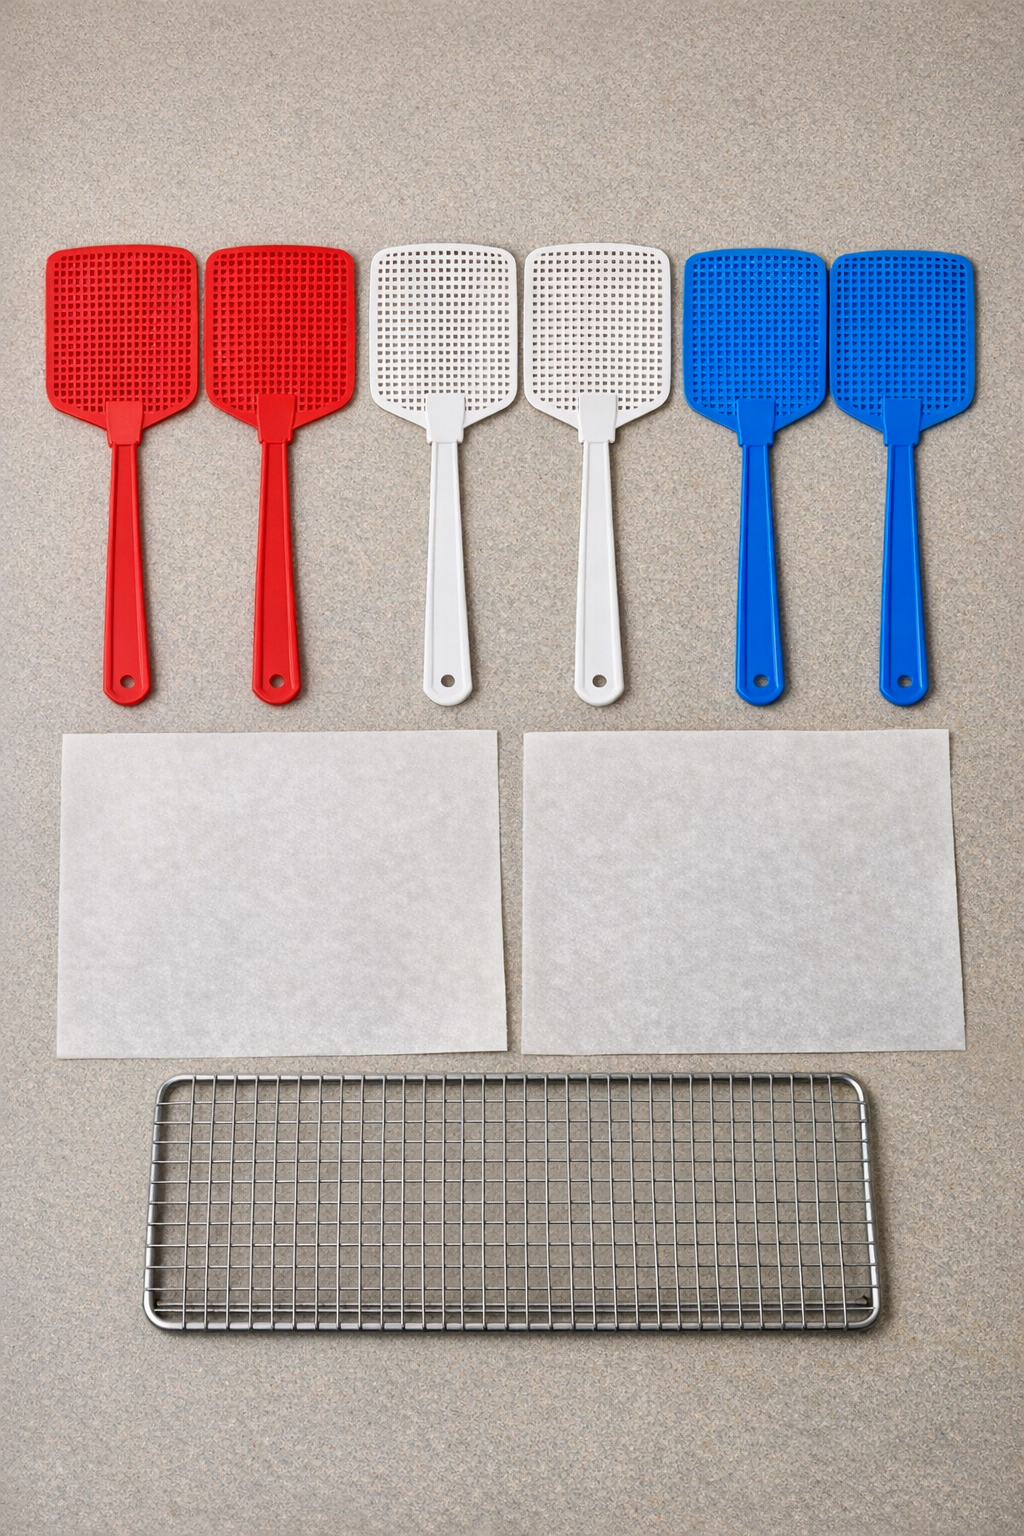
2 red plastic fly swatters, standard 18-inch size
Instructions
1. Wash and dry the fly swatters thoroughly, then cut the mesh heads off the handles and chop the plastic mesh into pieces about 1/2 to 1 inch wide.
2. Preheat your oven to 375°F and line the cooling rack with one sheet of parchment paper, making sure it lies as flat as possible.
3. Spread the chopped plastic pieces over the parchment in a thin, even layer, overlapping them slightly so they can fuse together; mix the colors for a marbled look or place them in sections for stripes.
4. Place the second sheet of parchment paper on top and press down gently with your hands so the plastic layer stays compact and fairly level.
5. Bake the layered plastic for 8 to 12 minutes, checking often, until the pieces soften and fuse but the holes of the original mesh pattern are still partly visible.
6. Remove the rack carefully and press the warm plastic sandwich lightly with a flat baking sheet or cutting board to help the fused mesh bond into a more uniform sheet.
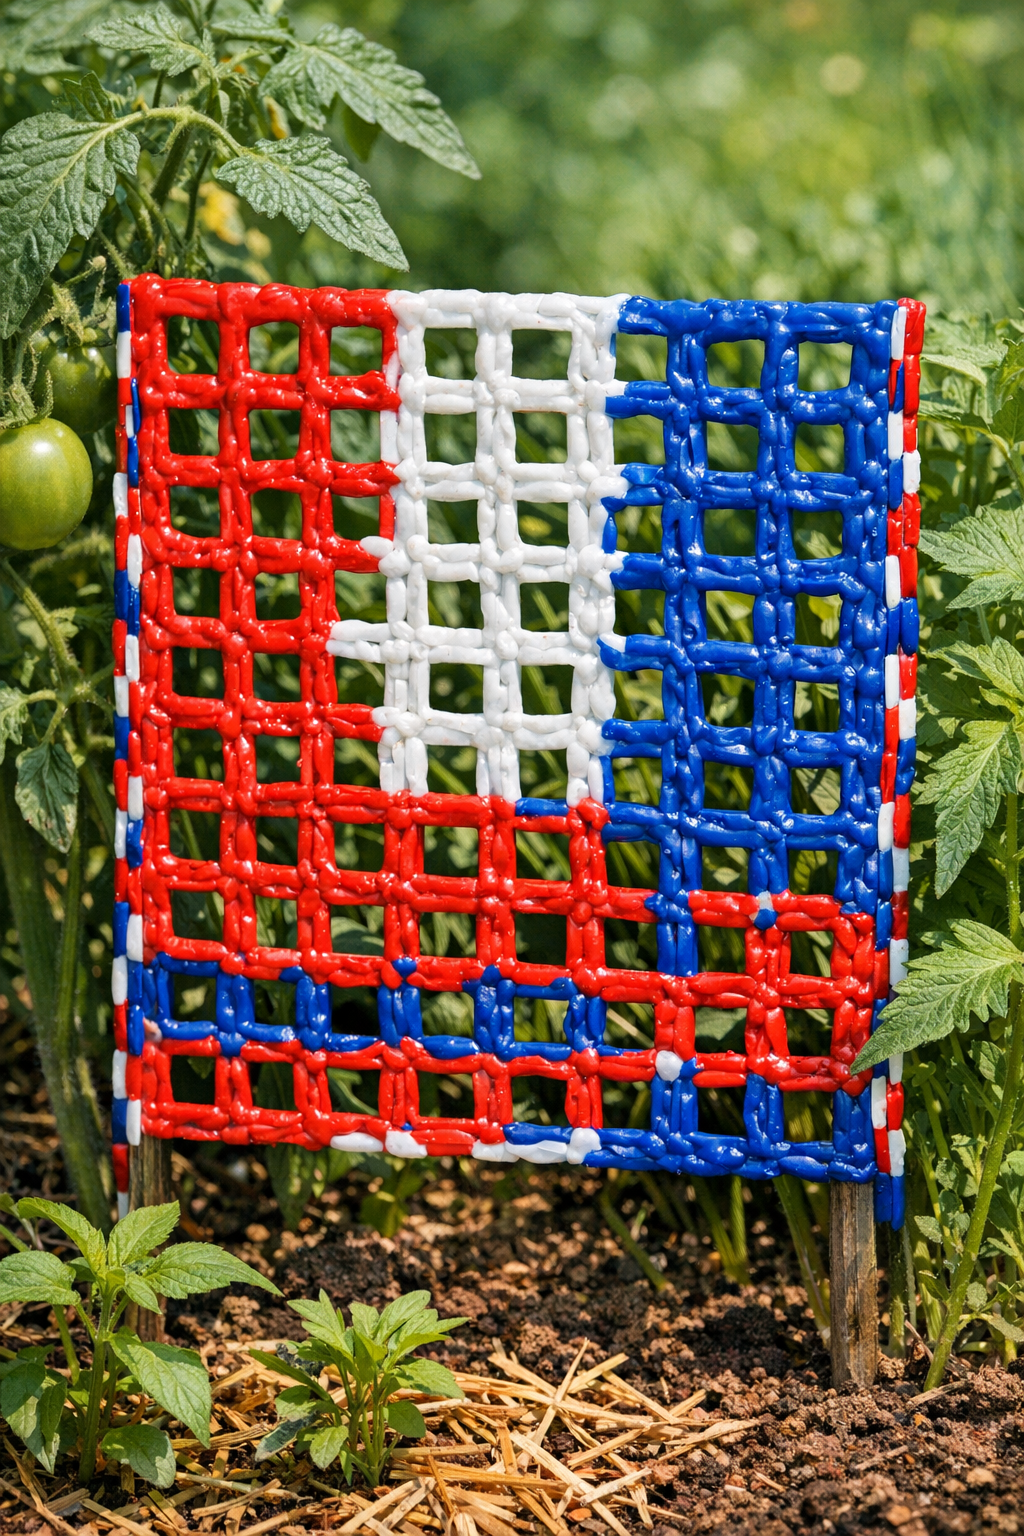
7. Let the piece cool completely, then peel off the parchment and trim the edges into the size and shape you want for your garden bed, planter, or small trellis panel.
8. Use the finished mesh as a rigid garden screen, a mini plant support, or a protective barrier by tying or clipping it to stakes, fencing, or a raised-bed frame.
Variations & Tips
For a sturdier panel: Make the plastic layer a little thicker before baking by adding more chopped pieces in the center. I do this when I want the mesh to stand up better around floppier plants.
For neat color blocking: Arrange the red, white, and blue in bands instead of mixing them together. That gives you a more flag-inspired look that’s especially cute in summer container gardens.
For picky gardeners who like a softer look: Use more white pieces on the top layer so the final mesh reads less bold. In my house, even décor has to pass the “will this overwhelm the porch pots?” test.
Watch the heat closely: Plastic can scorch fast, and every oven runs a little differently. Start checking early and pull it out as soon as the pieces are fused together.
Work with good ventilation: Open windows or use a well-ventilated space while heating plastic. I always treat projects like this with extra care, especially when I’m making something near the kitchen.
Best use size: This type of mesh works best for small supports, guards, and decorative panels rather than heavy structural jobs. It’s perfect for herbs, lettuce protection, and lightweight climbing seedlings.