Toolbox drawers have a way of turning into noisy little catch-alls, and I’m always looking for practical fixes that don’t require a trip to the hardware store for specialty supplies. This liner project uses red, white, and blue foam earplugs to create a cushioned, grippy surface that keeps small tools from sliding around, while also giving the drawer a playful, unexpected look. It’s a simple upcycling-style build that feels a bit like assembling a mosaic, but with soft materials instead of tile.
I like this project for anyone who wants a fast organization win without sewing, woodworking, or complicated measuring. If you can trim a sheet to fit a drawer and press pieces into place, you can make this. The finished liner is especially handy for pliers, screwdrivers, measuring tools, and other metal items that tend to clatter every time the drawer opens.
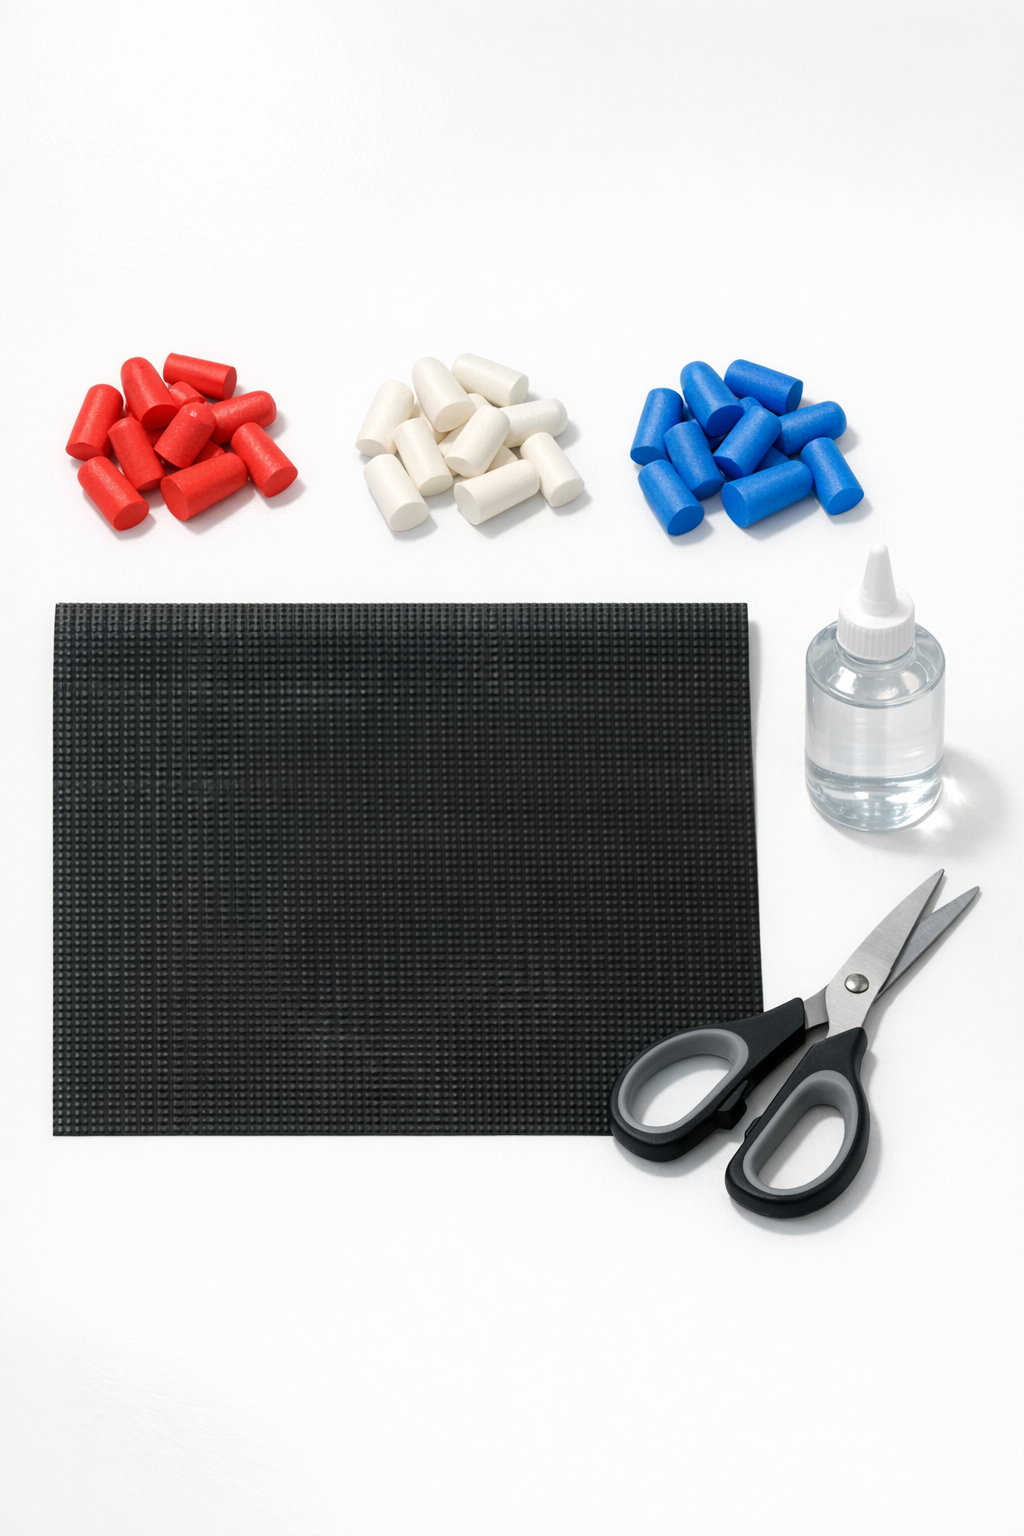
Materials
36 red foam earplugs, standard size, compressed then allowed to expand
Instructions
1. Empty the toolbox drawer and measure the inside length and width so you know the exact finished liner size.
2. Cut the rubber shelf liner to fit the drawer, leaving about 1/8 inch of space on each side so it drops in easily without buckling.
3. Roll each foam earplug firmly between your fingers to squash it, then cut each one in half crosswise to create short foam cylinders.
4. Let the cut earplug pieces expand back to shape for a minute, then sort them by color so arranging the pattern goes faster.
5. Squeeze a small section of craft glue onto one corner of the shelf liner and spread it lightly with the glue nozzle or a scrap earplug piece.
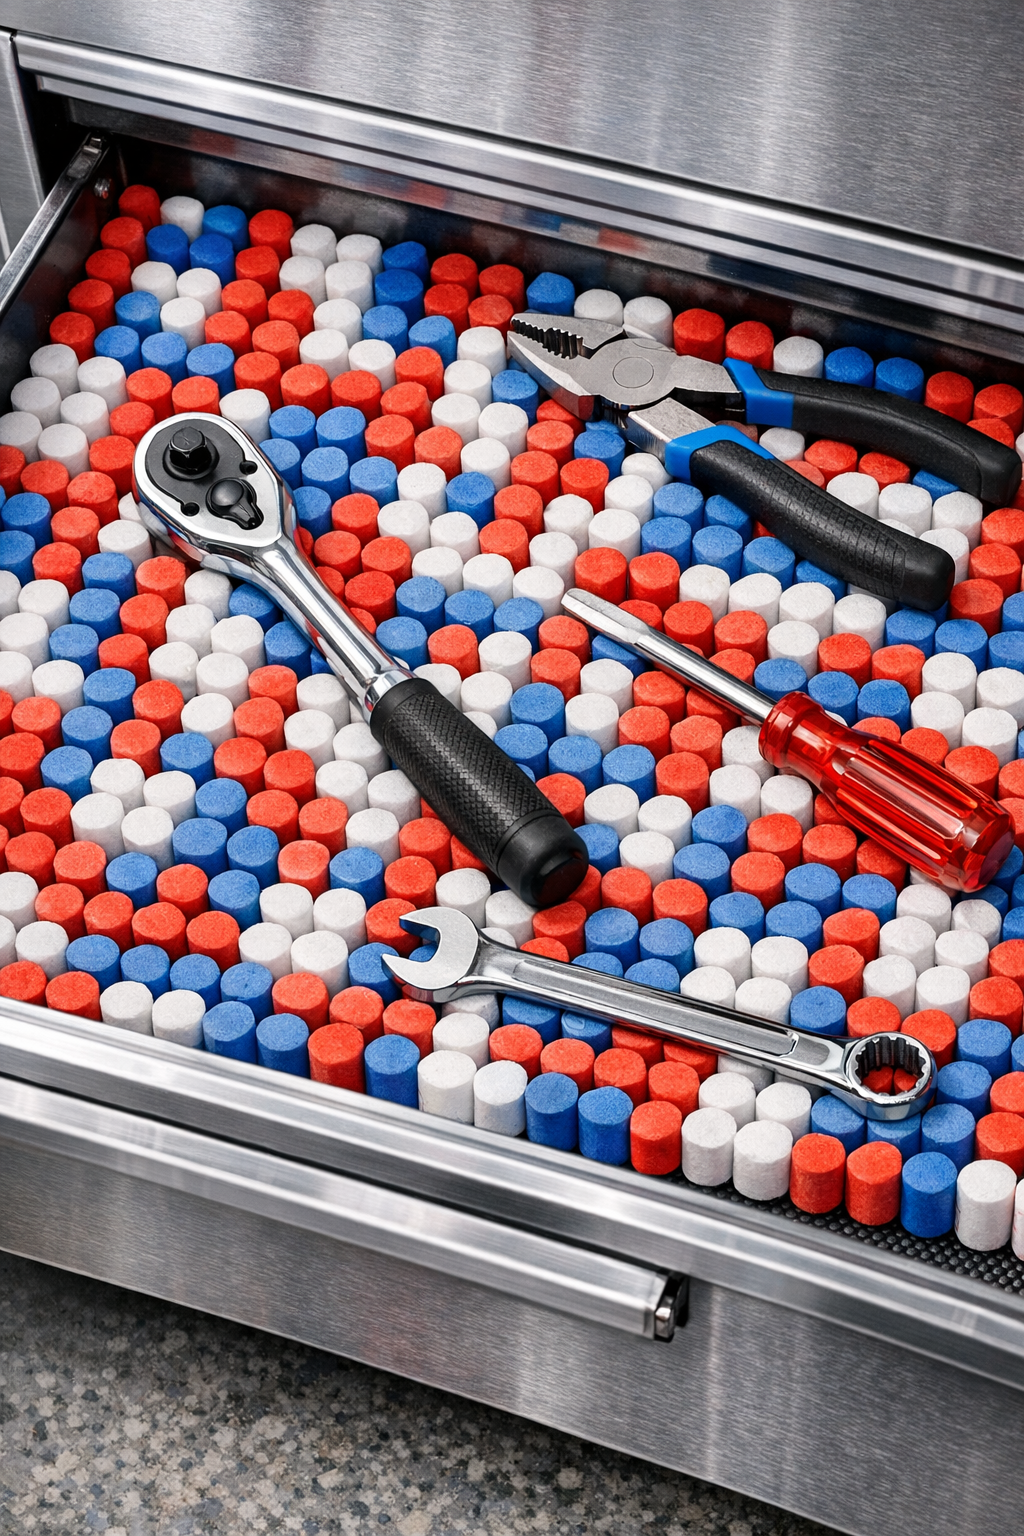
6. Press the earplug halves upright into the glue, placing them tightly side by side in rows so the cut ends sit down and the rounded tops face up.
7. Continue working in small glued sections, alternating red, white, and blue pieces in stripes, checks, or another simple layout until the entire liner is covered.
8. Trim a few earplug pieces as needed around the outer edges so the finished mat keeps a clean rectangular shape.
9. Let the glue dry flat for at least 8 hours, or according to the glue directions, before moving the liner.
10. Set the finished liner into the toolbox drawer and press it flat, then place your tools on top to test the cushioning and adjust spacing if needed.
Variations & Tips
Use a simpler pattern: If you don’t want to fuss with layout, make broad color blocks instead of alternating every piece. It still looks striking, and it goes much faster.
Match the drawer contents: I like using this style in shallow drawers for lighter hand tools. For heavier tools, keep the earplug pieces packed very tightly so the surface stays supportive.
Test your glue first: Some glues can melt soft foam or stay tacky on rubbery surfaces, so it’s worth gluing two or three pieces to a scrap first and checking them after they dry.
Keep the liner removable: Gluing the earplugs to the liner instead of directly into the toolbox makes cleaning much easier. You can lift the whole mat out, shake it off, and return it to the drawer.
Trim edge pieces neatly: A snug border makes the finished project look much more intentional. I usually save slightly uneven cut pieces for the perimeter where they’re least noticeable.