When we have friends over in the summer, somebody always ends up making a trip back into the kitchen for cold drinks, cut fruit, or extra ice. That is exactly why I love this patio ice table project. By embedding a galvanized metal trough right into a cedar plank tabletop, you get a sturdy outdoor table with a built-in chilled serving station that keeps everything right where the conversation is happening.
This is a wonderful project for anyone who wants a deck upgrade that is practical and beautiful. Cedar holds up nicely outdoors and has that warm, inviting look I always reach for when I want a space to feel relaxed and family-friendly. If you are comfortable with basic measuring, cutting, and drilling, you can absolutely build this over a weekend.
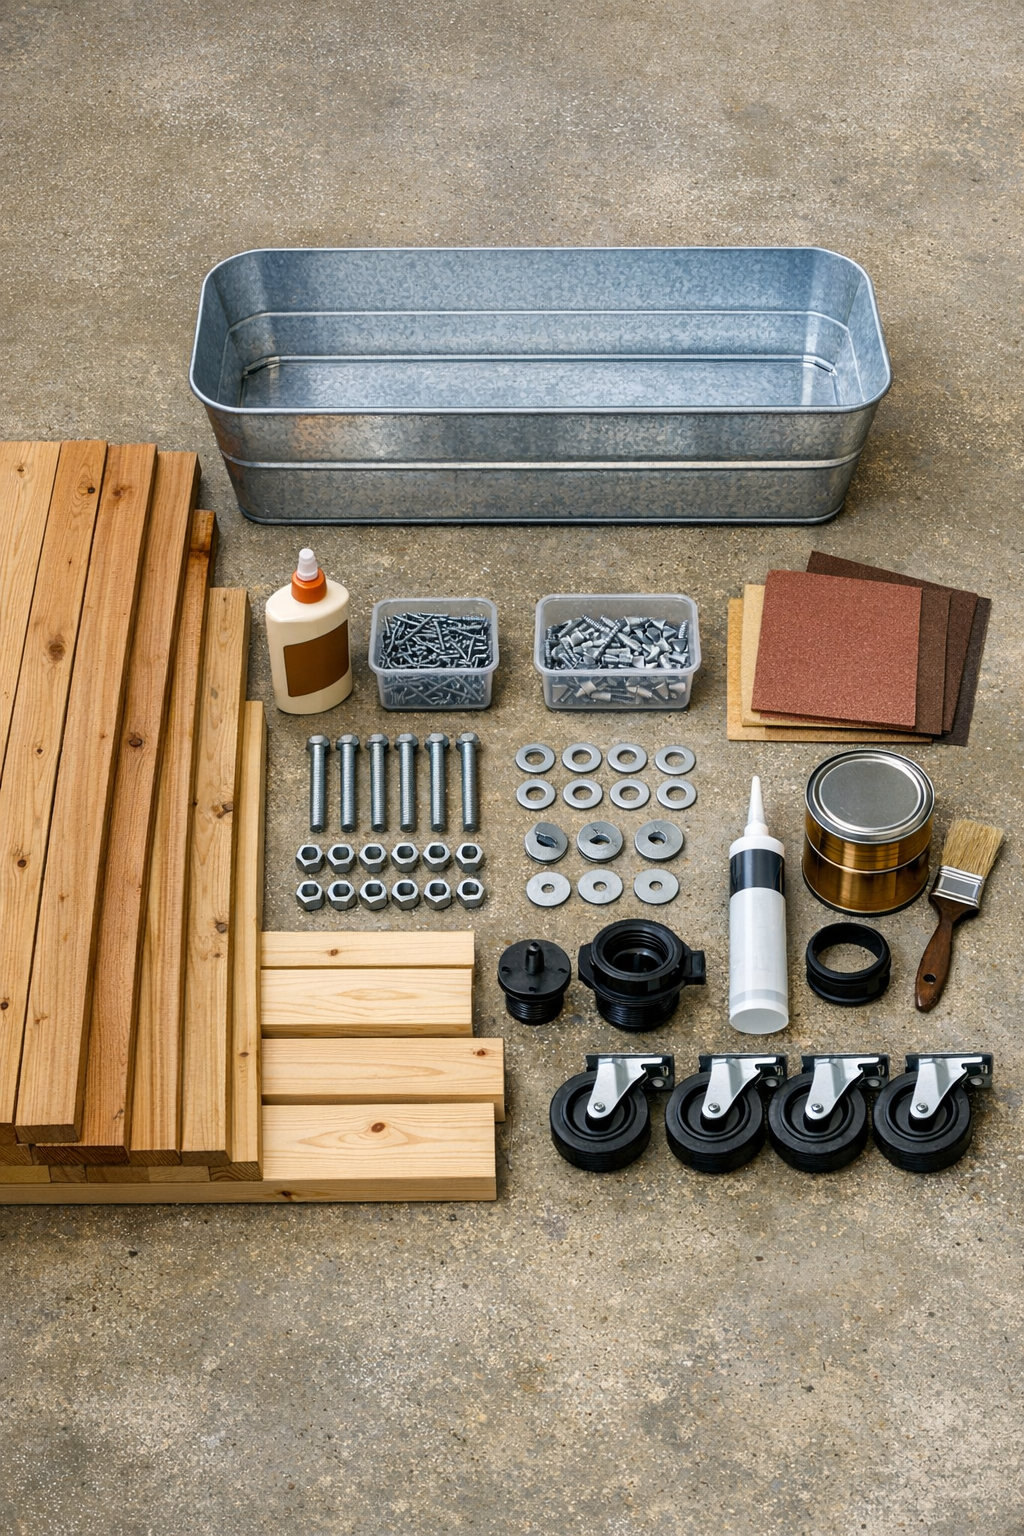
Materials
Instructions
1. Cut your cedar boards for the tabletop frame, legs, and lower supports based on the size of your trough, leaving a tabletop overhang of about 1 inch on all sides. Dry-fit everything first so the trough opening lands centered and balanced.
2. Build two rectangular leg frames from the 2x4 cedar boards, then connect them with long side aprons to create the table base. Check for square before tightening the screws or bolts so the table does not wobble later.
3. Add lower stretchers or braces between the legs for extra strength, especially if the table will be rolled around on a deck. Attach the locking caster wheels to the bottom of each leg if you want the table to be mobile.
4. Lay out the cedar planks for the top side by side and mark the exact opening for the galvanized trough in the center. Leave enough cedar around the opening so the top stays strong and the trough rim has solid support.
5. Cut the center opening carefully with a jigsaw or circular saw and finish the corners as needed so the trough drops in neatly. Test-fit the trough and trim the opening little by little instead of cutting too much at once.
6. Join the tabletop planks together from the underside with pocket holes, support boards, or battens, keeping the cutout aligned and the top surface flush. Add the cedar end trim pieces to frame the top and give it a cleaner finished look.
7. Install the 1x2 cedar cleats inside the opening beneath the tabletop so the rim of the trough rests securely on them. Set the trough in place and make sure it sits level and does not rock.
8. If your trough does not already have drainage, drill a hole for the 1-inch drain fitting near one end of the bottom. Seal the fitting with silicone caulk and tighten it firmly so melted ice can be drained easily after parties.
9. Fasten the completed tabletop to the base with exterior screws from underneath so no fasteners show on the top. Recheck that the trough can still lift out if you want it removable for cleaning.
10. Sand the entire table with 120-grit sandpaper first, then smooth it with 220-grit, paying extra attention to the cut edges around the trough opening. Wipe away all dust before applying finish.
11. Seal the cedar with two to three thin coats of outdoor sealer or spar urethane, letting each coat dry fully before adding the next. I like to be generous around the cutout and lower legs since those spots take the most moisture.
12. Once the finish has cured, fill the trough with ice and stock it with bottled drinks, canned soda, or little bowls of chilled fruit. Lock the casters, wipe down the top, and your patio table is ready for guests.

Variations & Tips
Kid-friendly serving setup: I love using this table for more than drinks. You can fill the trough with juice boxes, string cheese, cut watermelon, and little yogurt cups to make outdoor family dinners feel special without extra trips inside.
Removable bin option: If you want easier cleanup, do not permanently fasten the trough in place. A removable insert is especially handy when you need to dump melted ice or give everything a good scrub after a gathering.
No-caster version: If your deck has uneven boards or you prefer a heavier furniture feel, skip the wheels and use fixed legs. The table will feel even more solid, which is helpful if you plan to use it as a buffet station.
Drainage tip: If possible, position the drain end slightly lower by just a fraction so water runs out more easily. That small detail saves a lot of scooping later, and I always appreciate easier cleanup at the end of the evening.
Finish choice: Clear sealer keeps the cedar looking natural, but a lightly tinted deck sealer can help even out the color over time. Just make sure any finish you choose is rated for exterior use and safe once fully cured.
Entertaining variation: For adult gatherings, I like to use the trough for bottled sparkling water, soda, and lemonade so everyone can help themselves. For picky eaters or mixed-age groups, separate drinks by type in small bins inside the trough to keep things organized.
Winter storage: Even weather-friendly cedar lasts longer with a little care. If you can store the table under cover or use a fitted outdoor furniture cover in the off-season, it will stay prettier and sturdier for years.