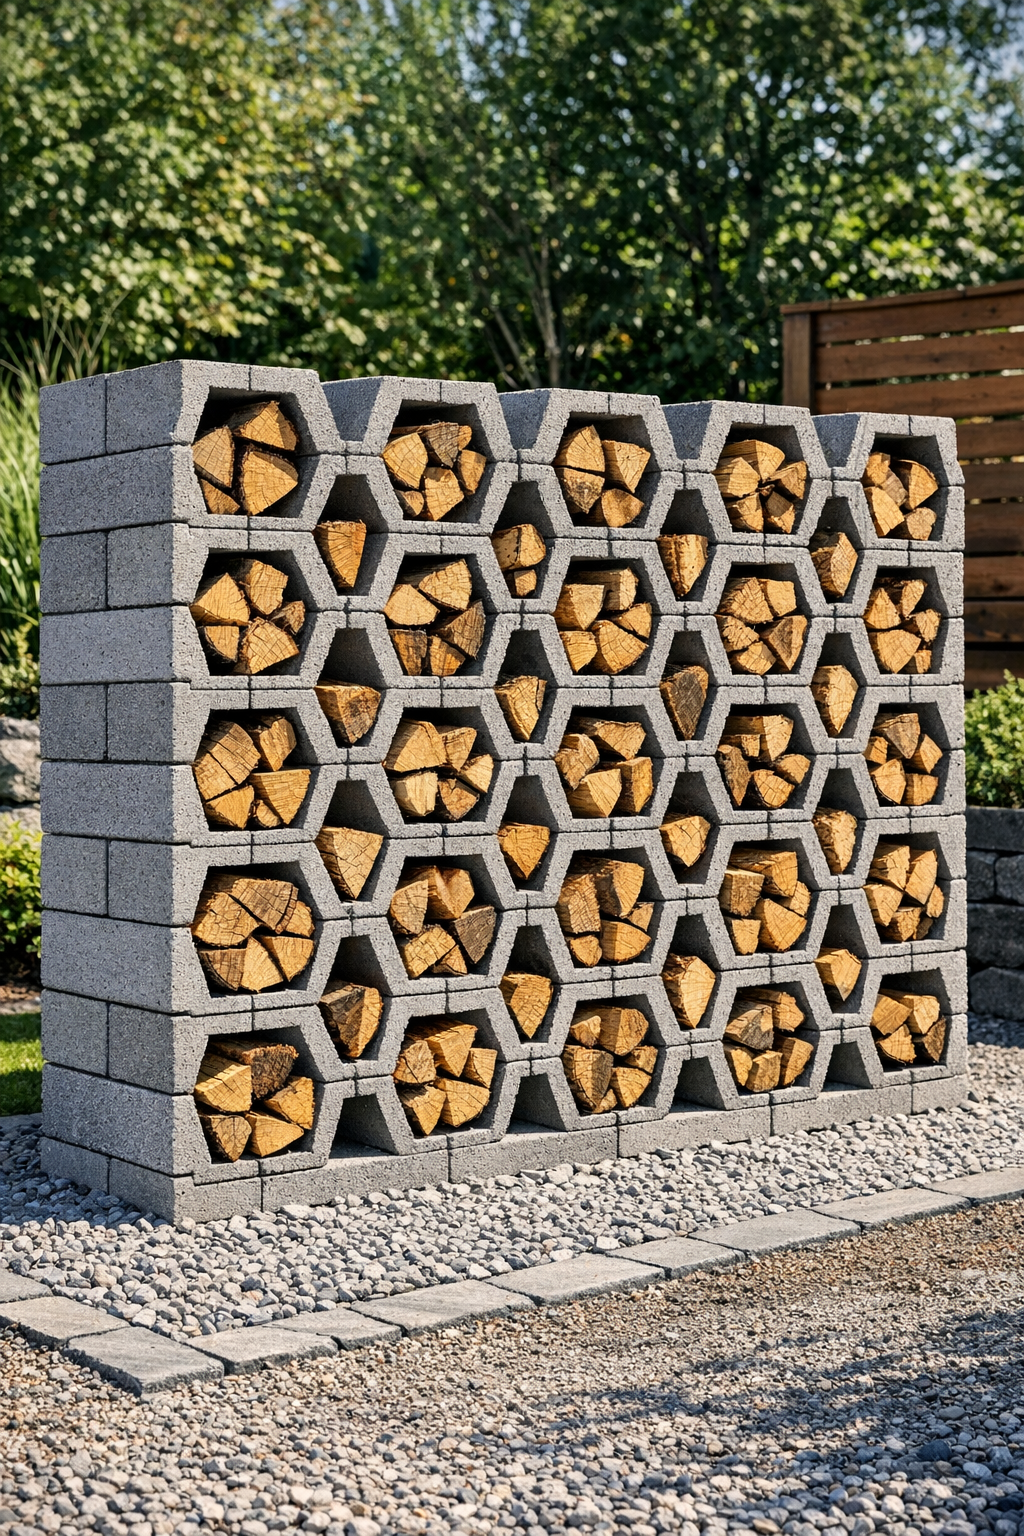
There’s something deeply satisfying about making a yard feature that looks polished and high-end, then realizing it came together from humble materials and a bit of steady hands-on work. This outdoor firewood storage does exactly that: by stacking concrete cinder blocks into a honeycomb-style pattern, you get a sturdy, sculptural place to keep firewood off the ground and close at hand.
I’ve always had a soft spot for practical things that are also pretty to look at. Out where I live, firewood storage has to work hard through every season, but that doesn’t mean it has to look plain. This project is a good fit for anyone who wants an affordable weekend build with no fancy carpentry required, just careful layout, a level base, and a little patience while stacking.
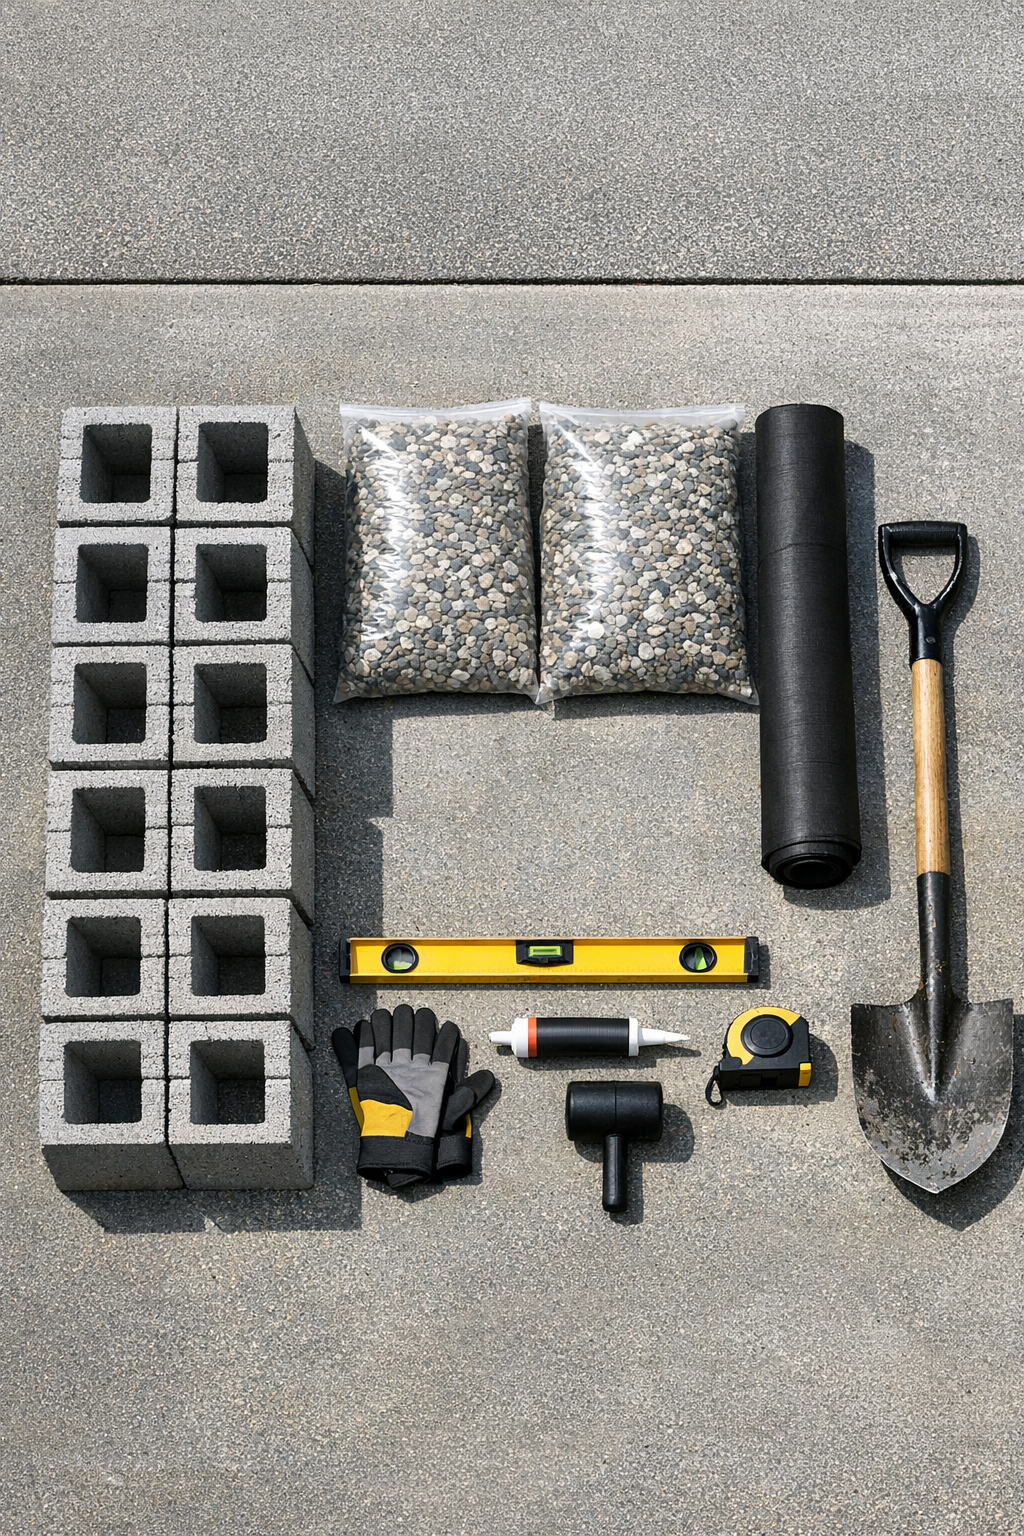
Materials
24 standard concrete cinder blocks, 8 in. x 8 in. x 16 in.
Instructions
1. Choose a flat outdoor spot with good drainage and at least 4 feet of clearance around the front so you can load and unload firewood comfortably.
2. Measure and mark a footprint about 48 inches wide by 32 inches deep, which gives you room for a honeycomb arrangement that feels substantial without overwhelming the yard.
3. Remove grass and loose soil from the marked area to a depth of about 3 to 4 inches, then rake it roughly level.
4. Lay down the landscape fabric over the cleared area and secure the corners so weeds stay down and the base stays cleaner over time.
5. Spread 2 inches of gravel over the fabric, then add a thin top layer of paver base or leveling sand and tamp everything firmly until the surface is compact and even.
6. Check the base with a level in both directions, and adjust low spots with a little extra sand until the surface is flat; this step matters more than any other for a stable stack.
7. Dry-stack the first row of blocks on their sides so the hollow openings face outward, arranging them in a tight cluster that begins the honeycomb pattern with interlocking hexagon-like cells.
8. Step back after placing the first 6 to 8 blocks and adjust spacing until the pattern looks balanced, with each block supporting the next and the front openings reading clearly as a honeycomb design.
9. Build the second and third layers by nesting each new block into the gaps created below, keeping the pattern tight and checking level every few blocks.
10. Tap blocks gently with a rubber mallet as needed so they sit snugly together without rocking.
11. If you want extra permanence, apply exterior block adhesive between contact points as you stack the upper layers, using a modest bead so it doesn’t squeeze out visibly.
12. Continue stacking until you have a finished unit about 3 blocks high, using all 24 blocks or stopping earlier if your pattern feels complete and stable for your space.
13. Let any adhesive cure according to the package directions before adding weight, especially if the weather is cool or damp.
14. Load firewood into the lower and middle openings first, distributing weight evenly so the stack stays balanced and the pattern remains crisp.
15. Fill the remaining cells with firewood, leaving a little breathing room in each opening so air can circulate and help keep the wood dry.
Variations & Tips
Make it taller carefully: If you want more storage, go wider before you go much taller. A low, broad structure is safer and usually looks better in the yard than a narrow tower.
Add a top cover: In wetter climates, set a simple metal or polycarbonate cover above the stack on separate stakes or brackets so rain sheds off without trapping moisture inside the wood.
Use matching blocks: Try to buy all your cinder blocks at once so the color and size stay consistent. That little detail makes the finished piece look much more intentional.
Consider drainage first: If your yard tends to stay soggy, add an extra inch or two of gravel under the base. Dry wood starts with a dry foundation, and that’s a lesson we’ve learned over many winters.
Soften the look: A few potted grasses or a bed of mulch around the base can make the concrete feel warmer and help the whole project settle nicely into the landscape.
Skip paint on the inside: I prefer leaving the blocks natural where the wood sits, since painted surfaces outdoors can peel over time. If you do want color, stain or paint just the outside faces with a masonry-safe exterior product.
Check local safety needs: If children climb in your yard or the ground freezes and shifts heavily in winter, secure the top courses with adhesive and inspect the stack from time to time to make sure nothing has loosened.