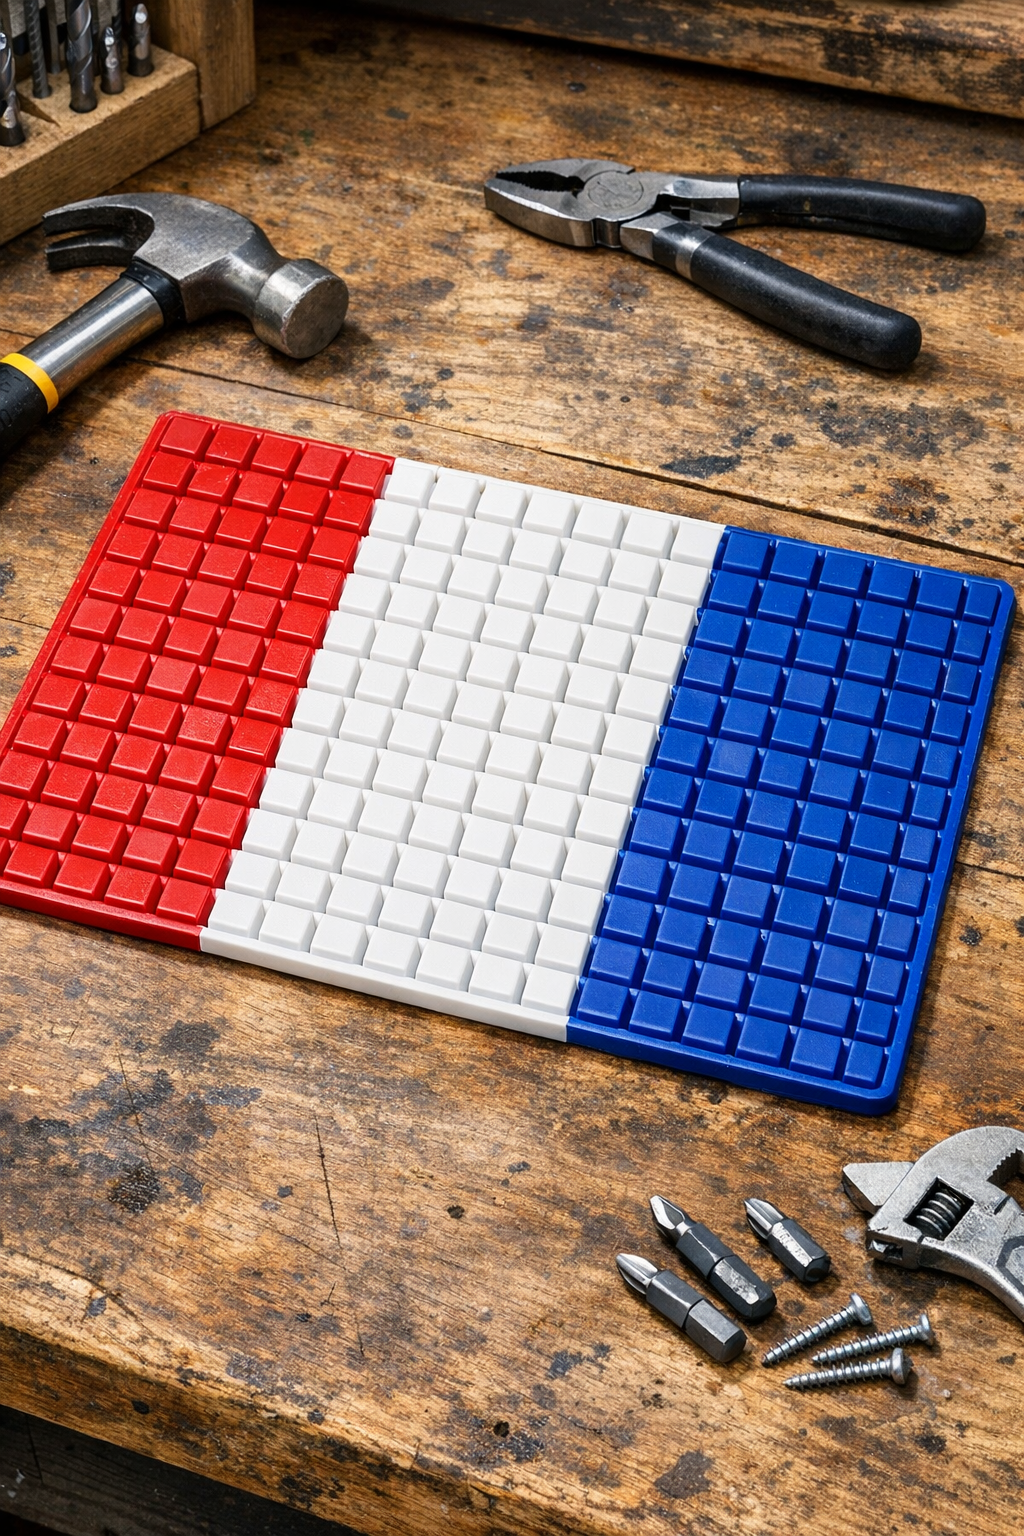
I love a project that uses up something inexpensive and slightly random, then turns it into something I’ll actually use every week. These DIY workshop tool mats are made by chopping red, white, and blue silicone ice cube trays and pressing the pieces into a simple base, which gives you a grippy, cushioned mat that’s great for protecting tools, catching small screws, or lining a workbench drawer.
This is the kind of practical make that fits real life, especially if you like your workspace to be functional without spending a lot. I’m always drawn to projects that feel a little unexpected, and this one definitely does. If you’re a beginner, don’t worry; the steps are straightforward, and the materials are minimal.
Materials
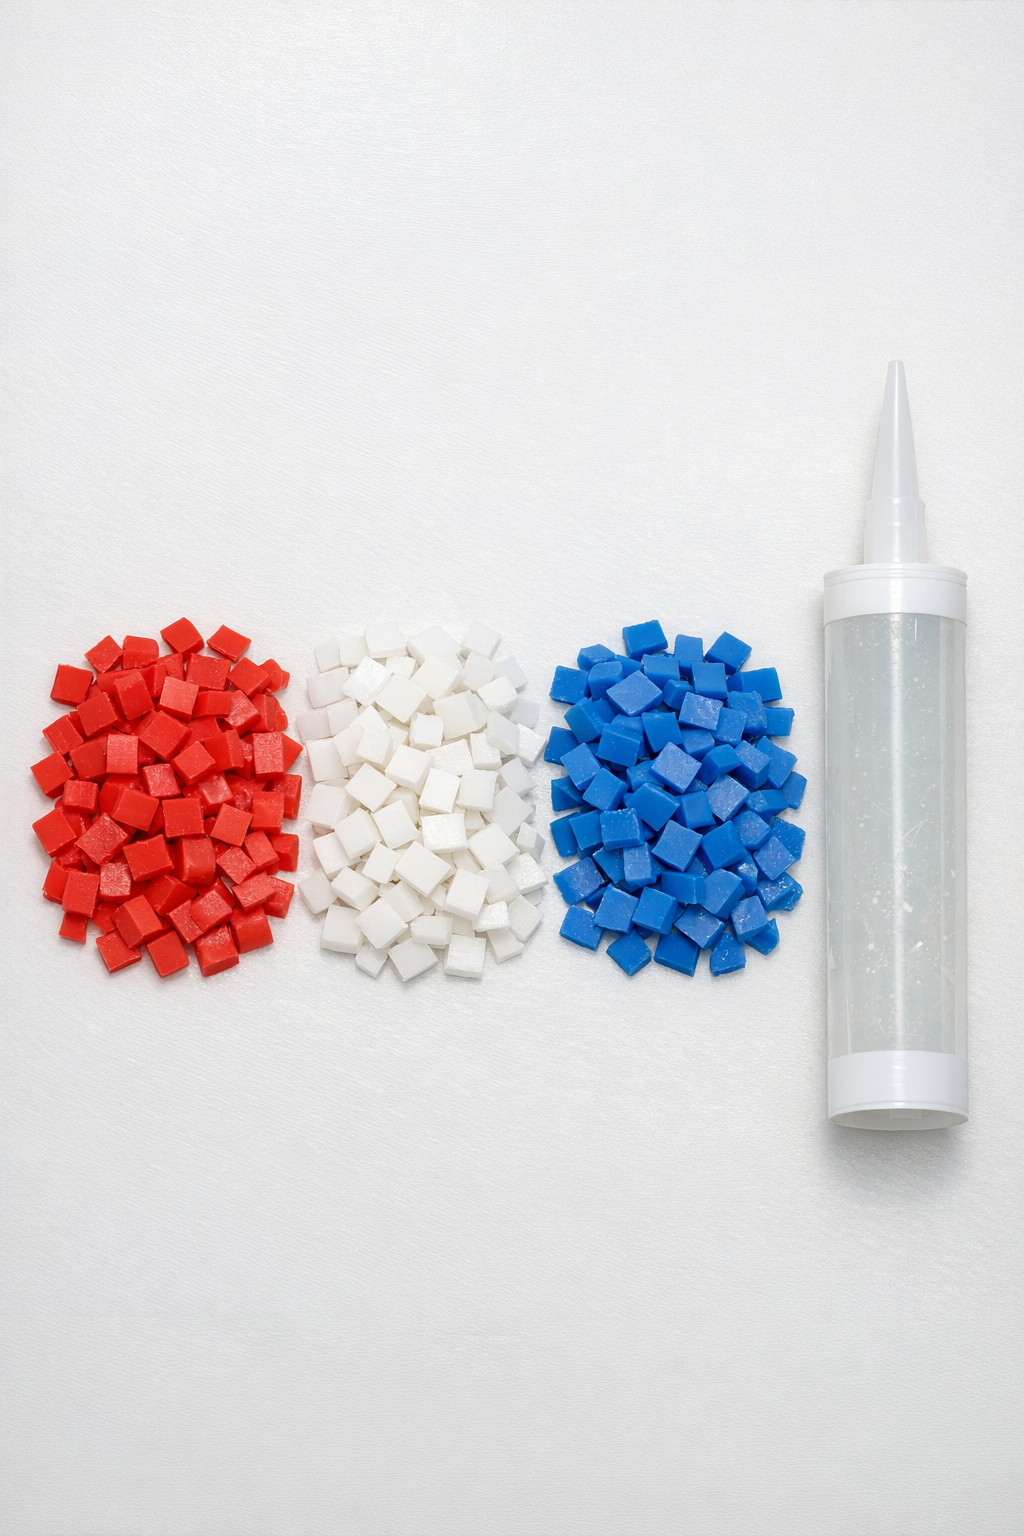
Red silicone ice cube tray pieces, chopped into 1/4-inch to 1/2-inch pieces, 1 tray
Instructions
1. Chop the red, white, and blue silicone ice cube trays into small irregular pieces about 1/4 inch to 1/2 inch wide so they press together tightly but still give the mat texture.
2. Squeeze the clear silicone sealant onto a flat protected work surface in a rectangle about 1/4 inch thick, sized to the tool mat you want to make.
3. Press the chopped silicone pieces into the sealant, alternating colors as you go and packing them close together so the surface becomes dense and even.
4. Add a little more sealant anywhere the pieces seem loose, then press again so the top feels level and the pieces are well embedded.
5. Square up the edges with your fingers or a scrap piece of cardboard, keeping the mat roughly even in thickness from corner to corner.
6. Let the mat cure completely for 24 hours, or according to the sealant directions, until it is firm, flexible, and no longer tacky.
7. Peel the finished mat up from the work surface and set it on your bench, tool cart, or inside a drawer with the textured side facing up.
Variations & Tips
Make it drawer-sized: Measure a tool drawer first and form the silicone base slightly smaller than the interior so the mat drops right in without curling at the edges.
Use a pattern: If you want a more polished look, arrange the red, white, and blue pieces in stripes or color blocks instead of mixing them randomly.
Keep the thickness even: Try not to pile the pieces too high in one area; a mat with a consistent thickness sits flatter and keeps small hardware from rolling.
Give it full cure time: I know it’s tempting to move it early, but letting it cure fully makes a big difference. I’ve rushed similar projects before on a busy weeknight, and the edges always end up messier than I want.
Use it beyond the workshop: This same mat works nicely under plant pots, on a garage shelf, or near a utility sink anywhere you want a washable, non-slip surface.