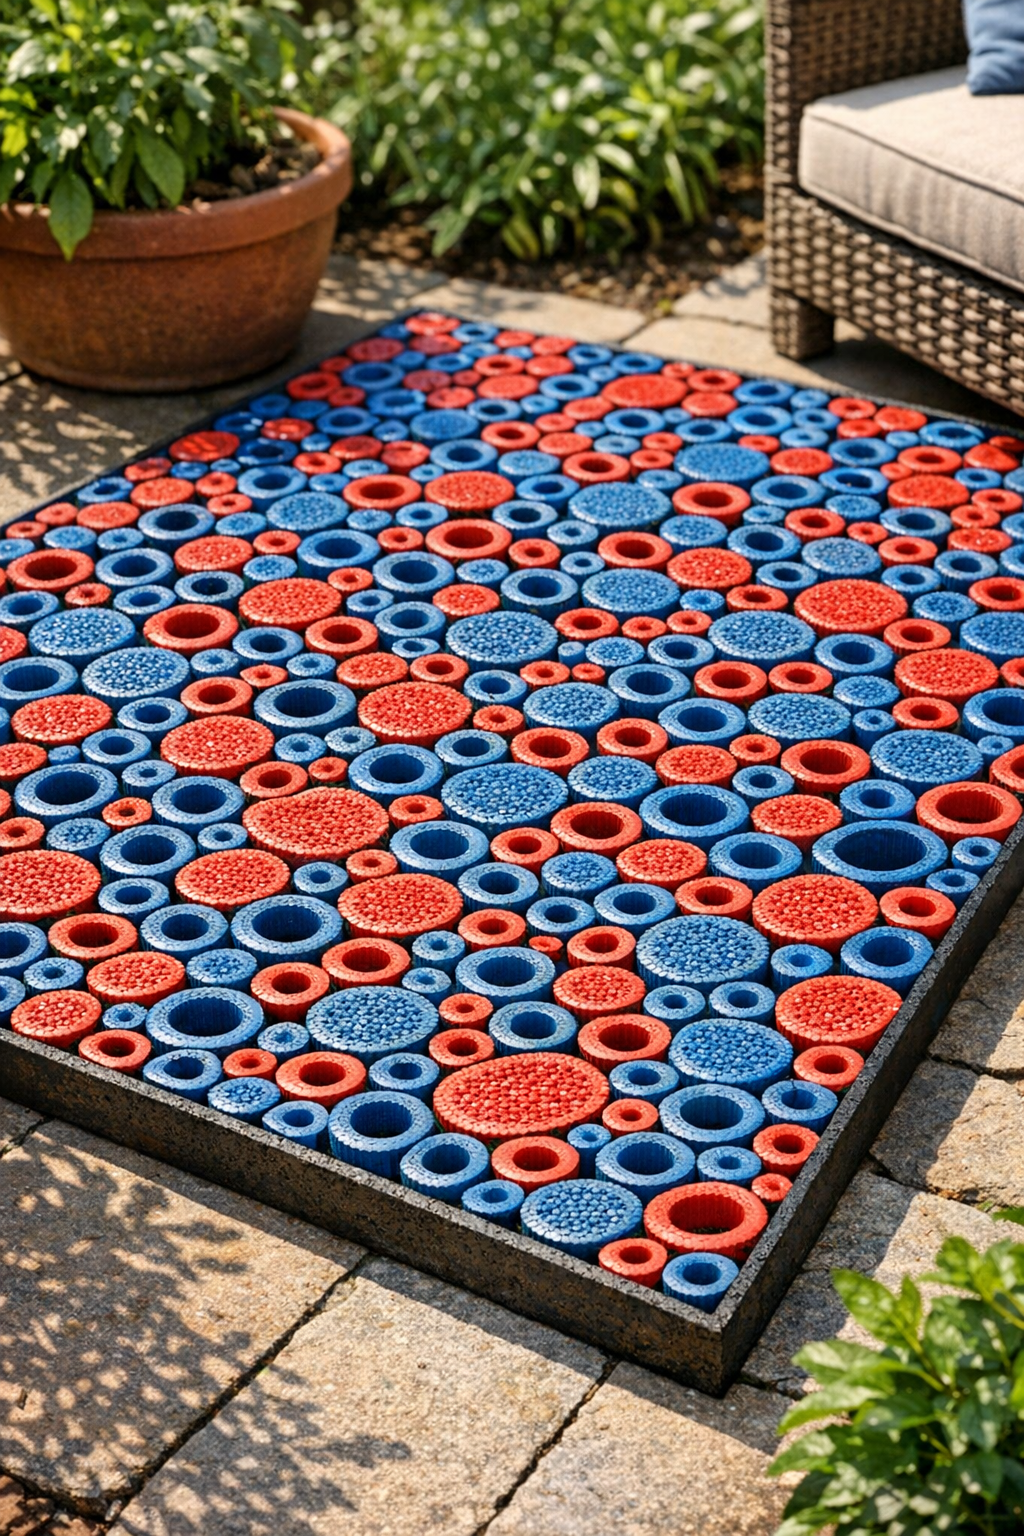
There is something deeply satisfying about taking a tired little patio corner and giving it new life with materials that most folks would never think to use this way. This textured patio surface uses sliced red and blue rubber garden hoses, outdoor construction adhesive, and a sturdy base panel to create a grippy, colorful mat-like surface that feels playful underfoot and looks far more custom than its humble parts would suggest.
I grew up believing that practical things could still be pretty, and around here we have always found ways to make do with what we had on hand. This project is a good one for anyone wanting to cover a small patio nook, balcony corner, potting area, or outdoor entry with something weather-friendly and full of character. It is especially nice for folks who enjoy upcycling and do not mind a little careful cutting work for a truly one-of-a-kind finish.
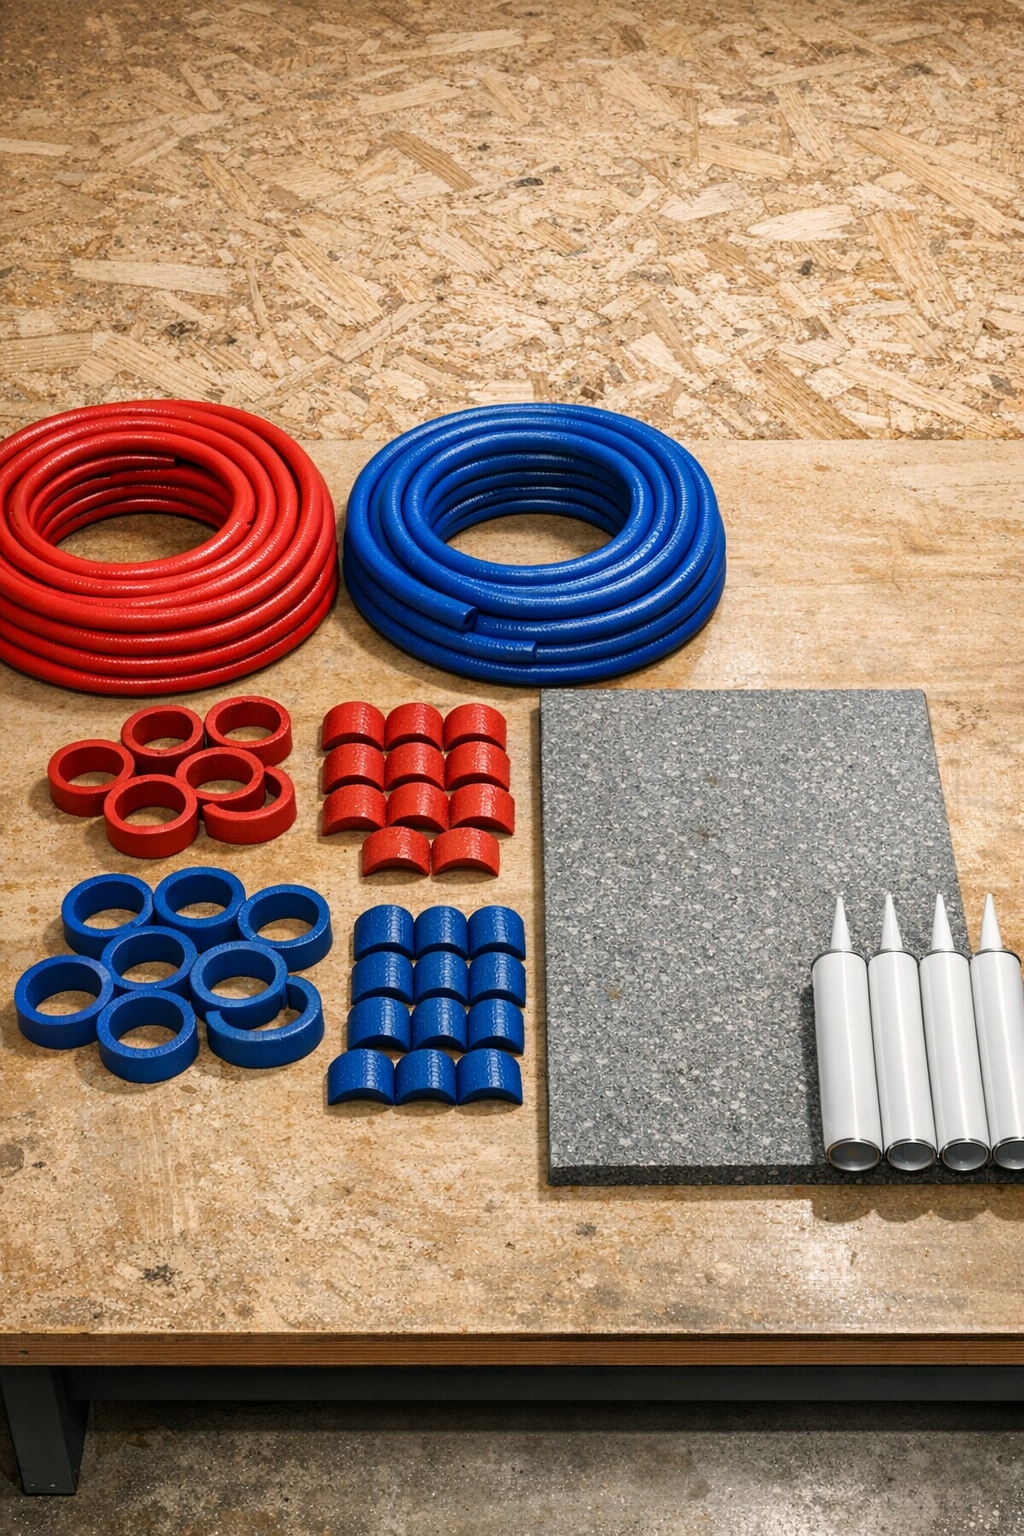
Materials
Instructions
1. Cut the plywood panel to 24 x 36 inches if it is not already sized, and brush away all dust so the adhesive bonds well.
2. Measure and mark your hose lengths into manageable sections about 24 to 36 inches long, which are much easier to slice cleanly than a full coil.
3. Slice each hose lengthwise with a sharp utility knife to open it into long curved strips, then cut some of those strips into 1-inch pieces for small textured accents.
4. Dry-fit the sliced hose pieces on the plywood before gluing, alternating red and blue and mixing long arcs with short pieces until the whole surface is covered.
5. Spread construction adhesive in a zigzag pattern over one small section of the panel at a time, working in areas no larger than 6 x 6 inches so it does not skin over.
6. Press the hose pieces firmly into the adhesive with the cut side down, keeping the factory outer surface facing up for the best texture and weather resistance.
7. Continue across the panel row by row, butting the pieces close together and trimming ends as needed so the pattern stays tight and even.
8. Fill small gaps with the 1-inch hose pieces, turning them in different directions to create extra grip and a pleasantly pebbled look.
9. Check the edges and add trimmed hose lengths anywhere the plywood still shows, then press everything down once more with your hands to seat it firmly.
10. Let the panel cure flat for at least 24 hours, or according to the adhesive directions, before moving it to your patio or outdoor work area.
11. Set the finished panel on a level surface and test it with a careful step; if any piece lifts, add a dab of adhesive underneath and allow it to cure again.
Variations & Tips
For a softer look: Lay the hose strips in gentle wave patterns instead of straight rows. That gives the piece a more relaxed, almost braided appearance.
For better drainage: Leave tiny channels every few inches rather than packing every piece tightly together. This works especially well if the panel will sit in a spot that gets regular rain.
For a more secure installation: If you plan to keep it in one place for the season, set the finished panel inside a shallow patio frame or against a curb edge so it cannot shift underfoot.
Color planning: Alternate the red and blue evenly for a checkerboard feel, or group colors in bands for something bolder. I find it helps to dry-fit the whole design first, just like piecing together a quilt on the kitchen table.
Cutting tip: Warm hoses are easier to slice than cold ones, so let them sit in the sun for a little while before cutting. That old Midwestern habit of working with the weather instead of against it still serves me well.
Best use: This project is ideal for small patio zones, greenhouse walkways, potting stations, and outdoor thresholds rather than large seating areas. Keeping it modest in size makes it sturdier and much easier to move if needed.