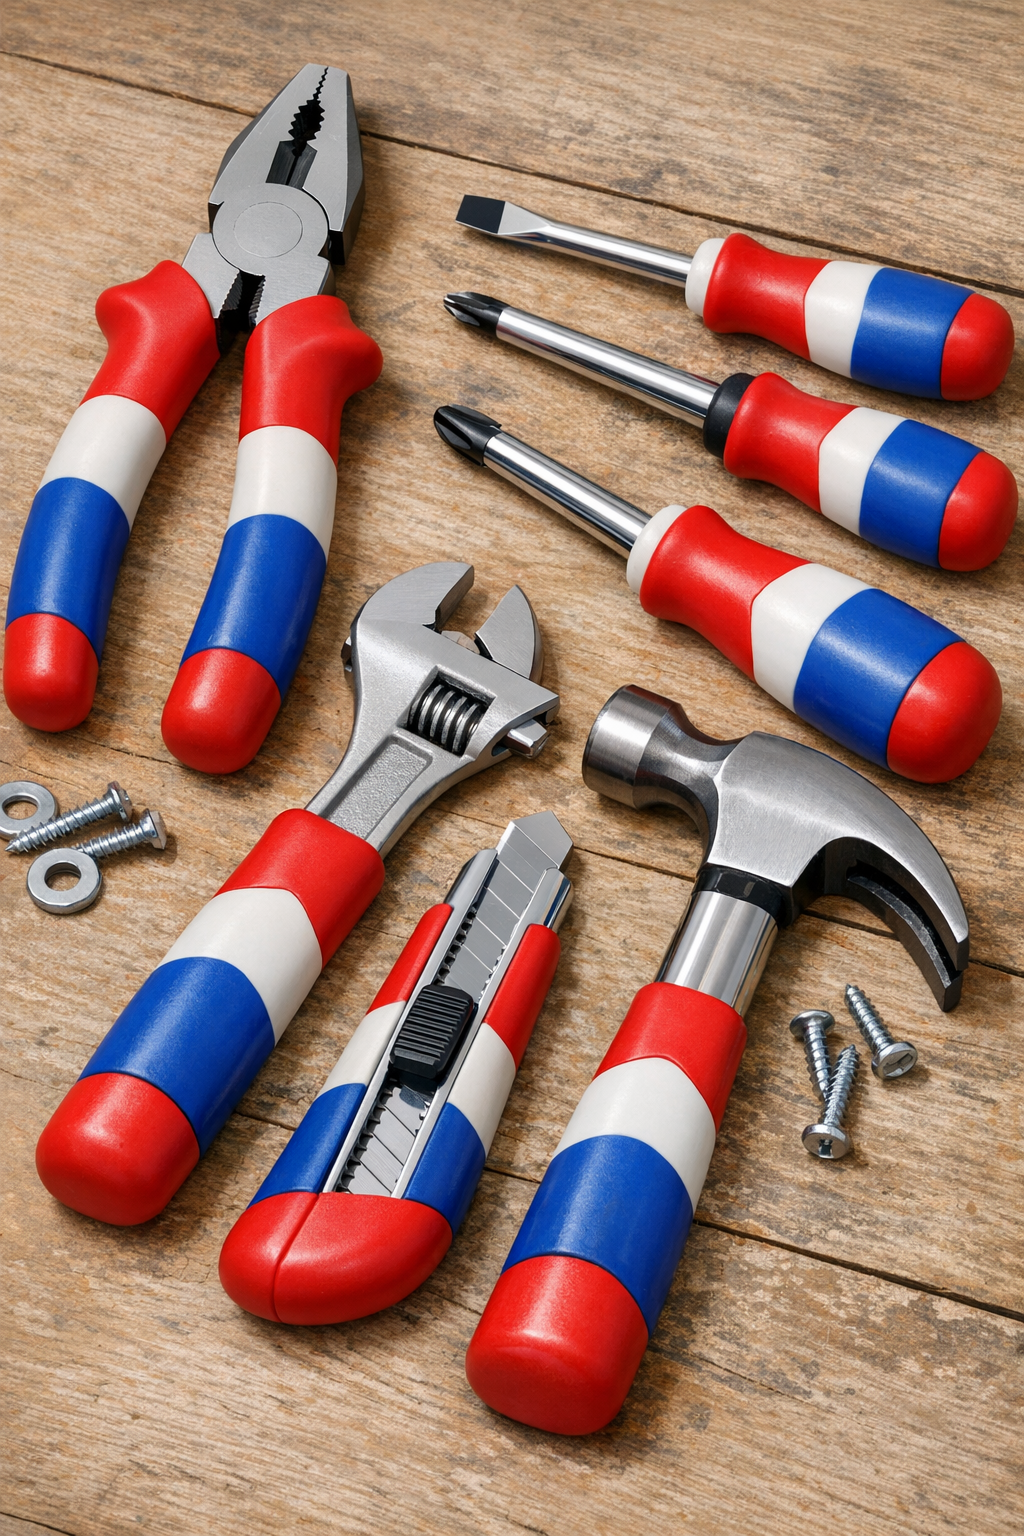
I love a practical DIY that feels a little unexpected, and this one definitely does. In this project, I’m turning plain rubber erasers and one common liquid into custom, shatter-resistant grips for hand tools. The finished grips add cushion, improve hold, and give older tools a fun red, white, and blue makeover without needing specialty molding supplies.
This is a great weekend project if you have a few metal-handled tools that feel slick, cold, or uncomfortable in your hand. As someone who’s always squeezing in projects between work and dinner prep, I appreciate anything that uses simple materials and doesn’t require a full workshop setup. If you’re patient with heating and shaping, this is a very doable beginner-friendly upcycle.
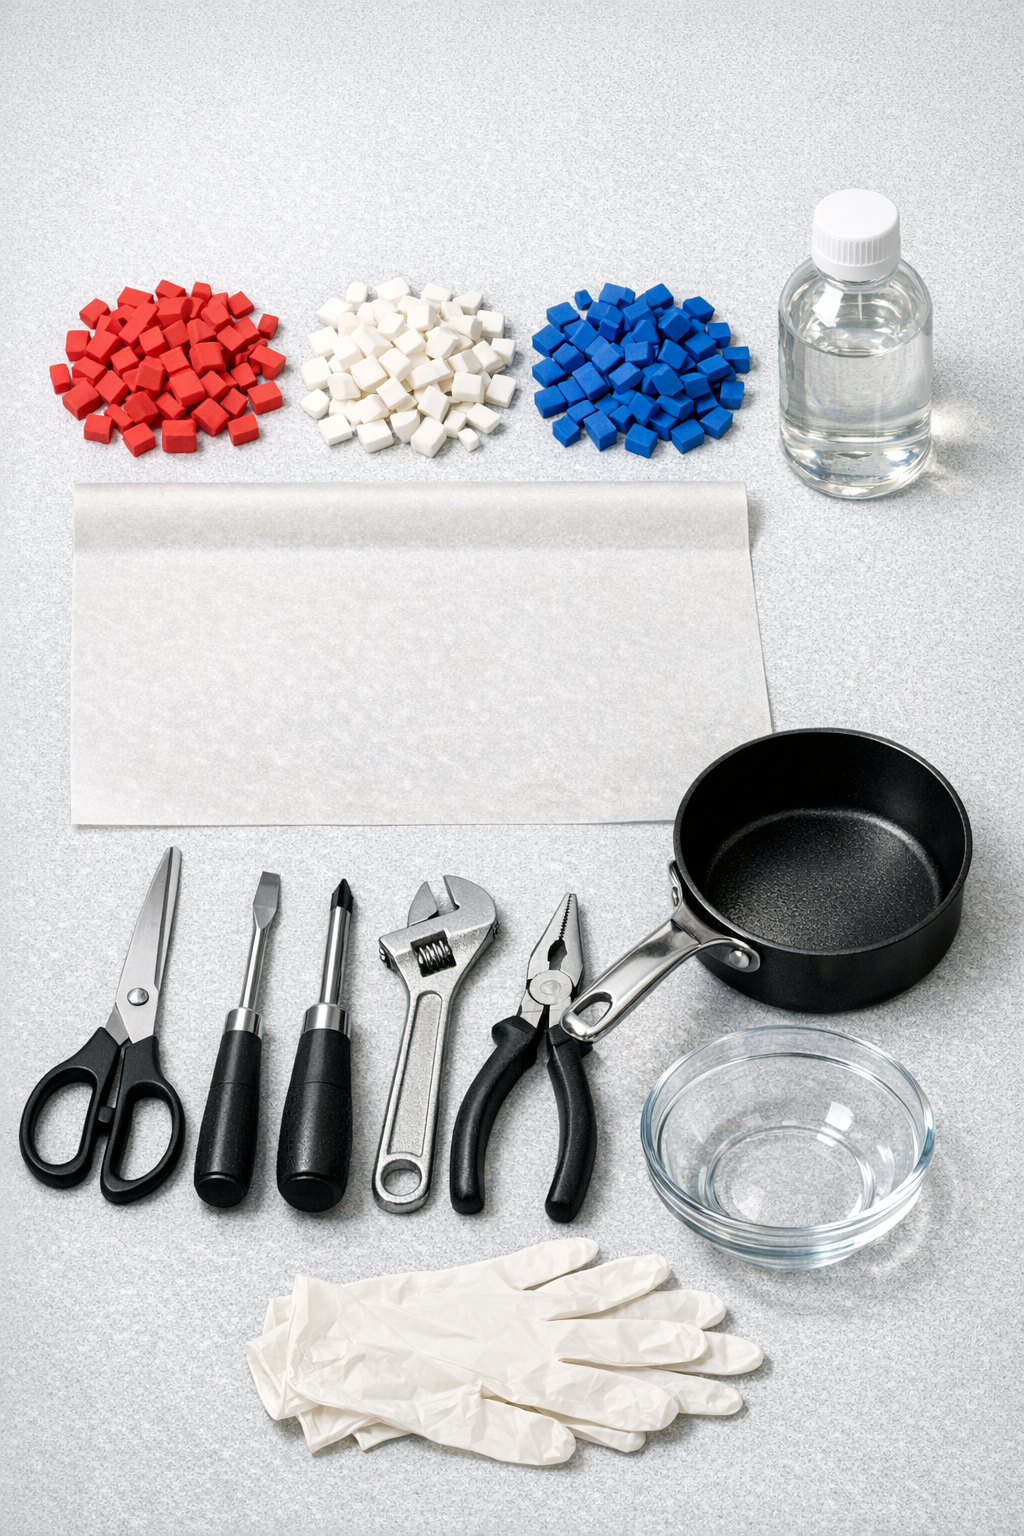
Materials
Instructions
1. Wash and dry the tool handles thoroughly, then lightly rough any glossy metal or plastic handle area with the edge of the craft knife or coarse side of a scrub pad so the new grip has more to hold onto.
2. Chop the red, white, and blue erasers into small 1/4-inch cubes so they soften evenly; keep the colors separated if you want a striped or swirled look.
3. Fill the saucepan with 2 inches of water and bring it to a gentle simmer, then set the heatproof bowl over the pan to make a simple double boiler.
4. Add the 1 cup of vegetable glycerin to the bowl, then stir in all the chopped eraser pieces and heat them gently for 12 to 18 minutes, stirring often, until they become soft and putty-like.
5. Remove the bowl from the heat and use tongs to lift out the softened rubber mass; let it cool on parchment for 1 to 2 minutes until it is safe to handle with gloved hands but still very pliable.
6. Knead the softened rubber briefly to combine it, either keeping the colors partially separate for a marbled pattern or blending more for a muted patriotic swirl.
7. Divide the rubber into portions sized for each tool handle, then roll each portion into a short rope or flat strip about 1/4 inch thick.
8. Wrap one rubber strip tightly around a tool handle, overlapping the edges slightly and pressing firmly so the material bonds to itself and conforms to the shape of your grip area.
9. Smooth the seam with your fingers, pinch the ends neatly, and shape finger grooves or a slight palm swell if you want a more ergonomic grip.
10. Repeat the wrapping and shaping for the remaining tools, reheating the rubber mixture over the simmering water for 2 to 3 minutes if it starts to stiffen before you finish.
11. Dip each wrapped handle into the bowl of ice water for 30 to 45 seconds to set the outer shape, then lay the tools on parchment to finish cooling for 1 hour.
12. Trim any uneven edges with scissors or a craft knife once fully cool, then leave the grips to cure at room temperature for 12 to 24 hours before heavy use.
Variations & Tips
For better grip: Make the wrapped layer slightly thicker in the center of the handle than at the ends; that little contour makes a surprising difference during longer use.
For a cleaner pattern: Press the colors together only lightly before wrapping if you want distinct red, white, and blue sections instead of a fully blended swirl.
For smaller tools: Use a thinner strip and keep the finished grip under 3/16 inch thick so precision tools like small screwdrivers still feel nimble in your hand.
To prevent slipping while shaping: If the rubber feels greasy from the glycerin, blot it quickly on parchment before wrapping so it grips itself better.
For durability: Let the grips cure overnight before putting them to work; I know it’s tempting to test them right away, but giving them that extra time helps them firm up and hold shape much better.
Tool choice tip: This works best on straight or slightly tapered handles; heavily contoured handles are harder to wrap neatly unless you build the grip in smaller sections.