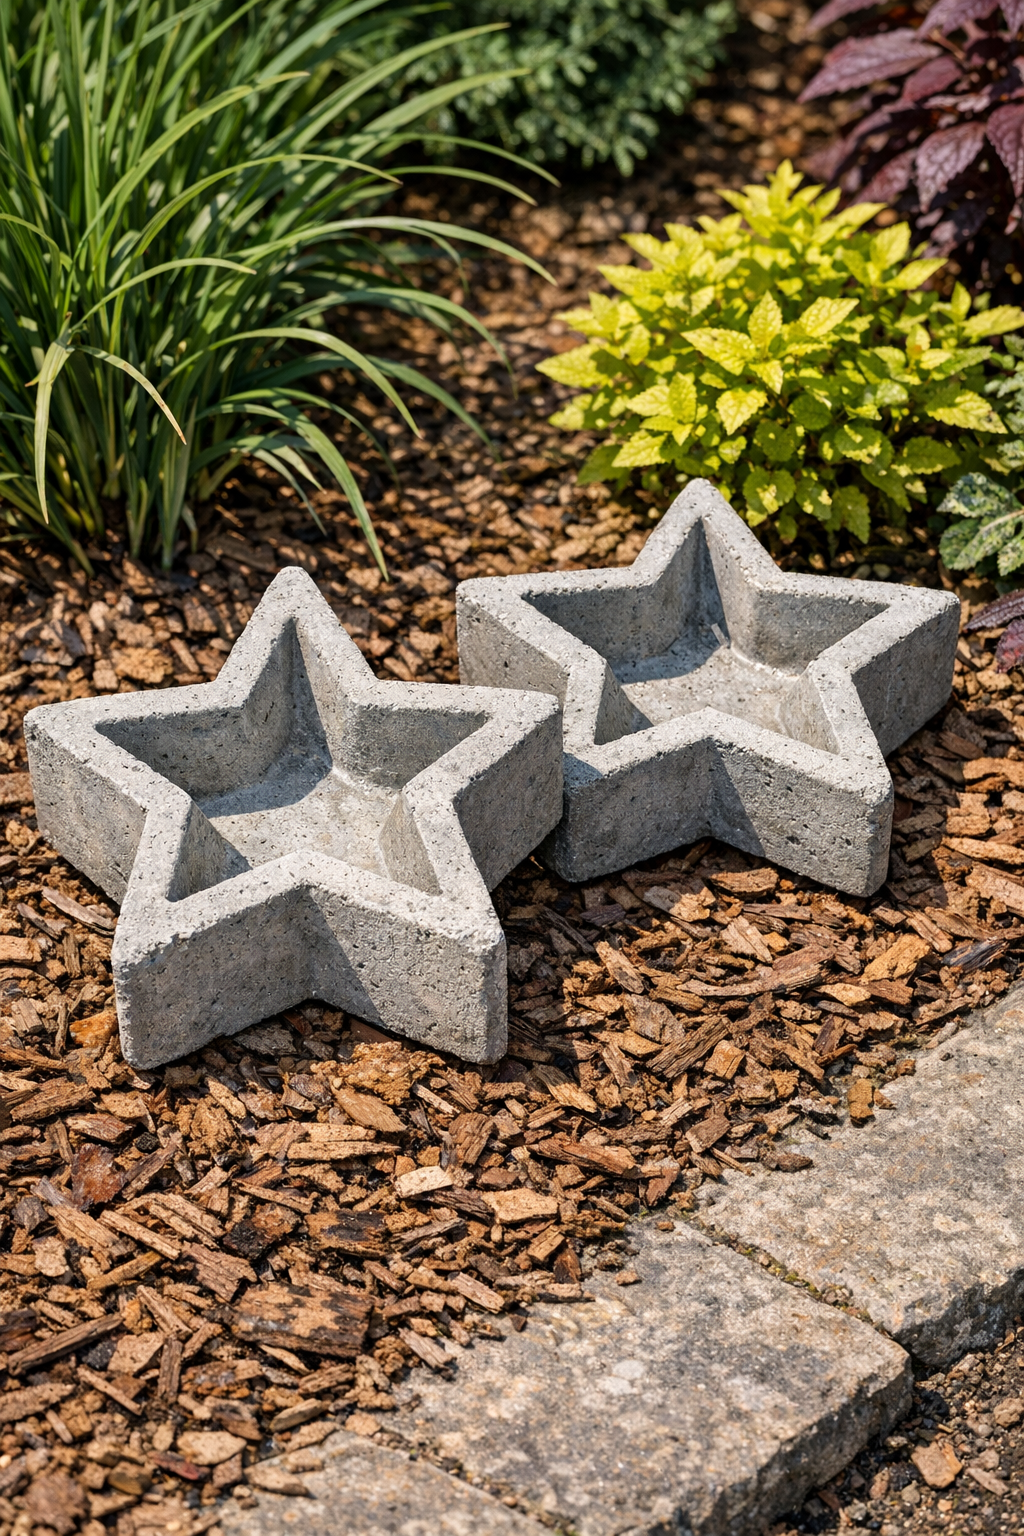
I love a project that feels a little unexpected, and this one absolutely does. By using inexpensive plastic star bowls as molds and pairing them with cement plus one very useful “secret” supply, you can make a pair of heavy decorative yard accents that look far more substantial than their humble beginnings suggest. The finished pieces work beautifully tucked into a garden bed, leaned against a porch step, or set beside potted plants for a bit of sculptural charm.
Because I spend so much time thinking about form, texture, and how materials transform with heat or time in the kitchen, I’m always drawn to outdoor projects that behave the same way. Cement has that same magic: fluid at first, then solid and enduring. This is a very approachable project for beginners, and if you can mix batter, you can mix cement.
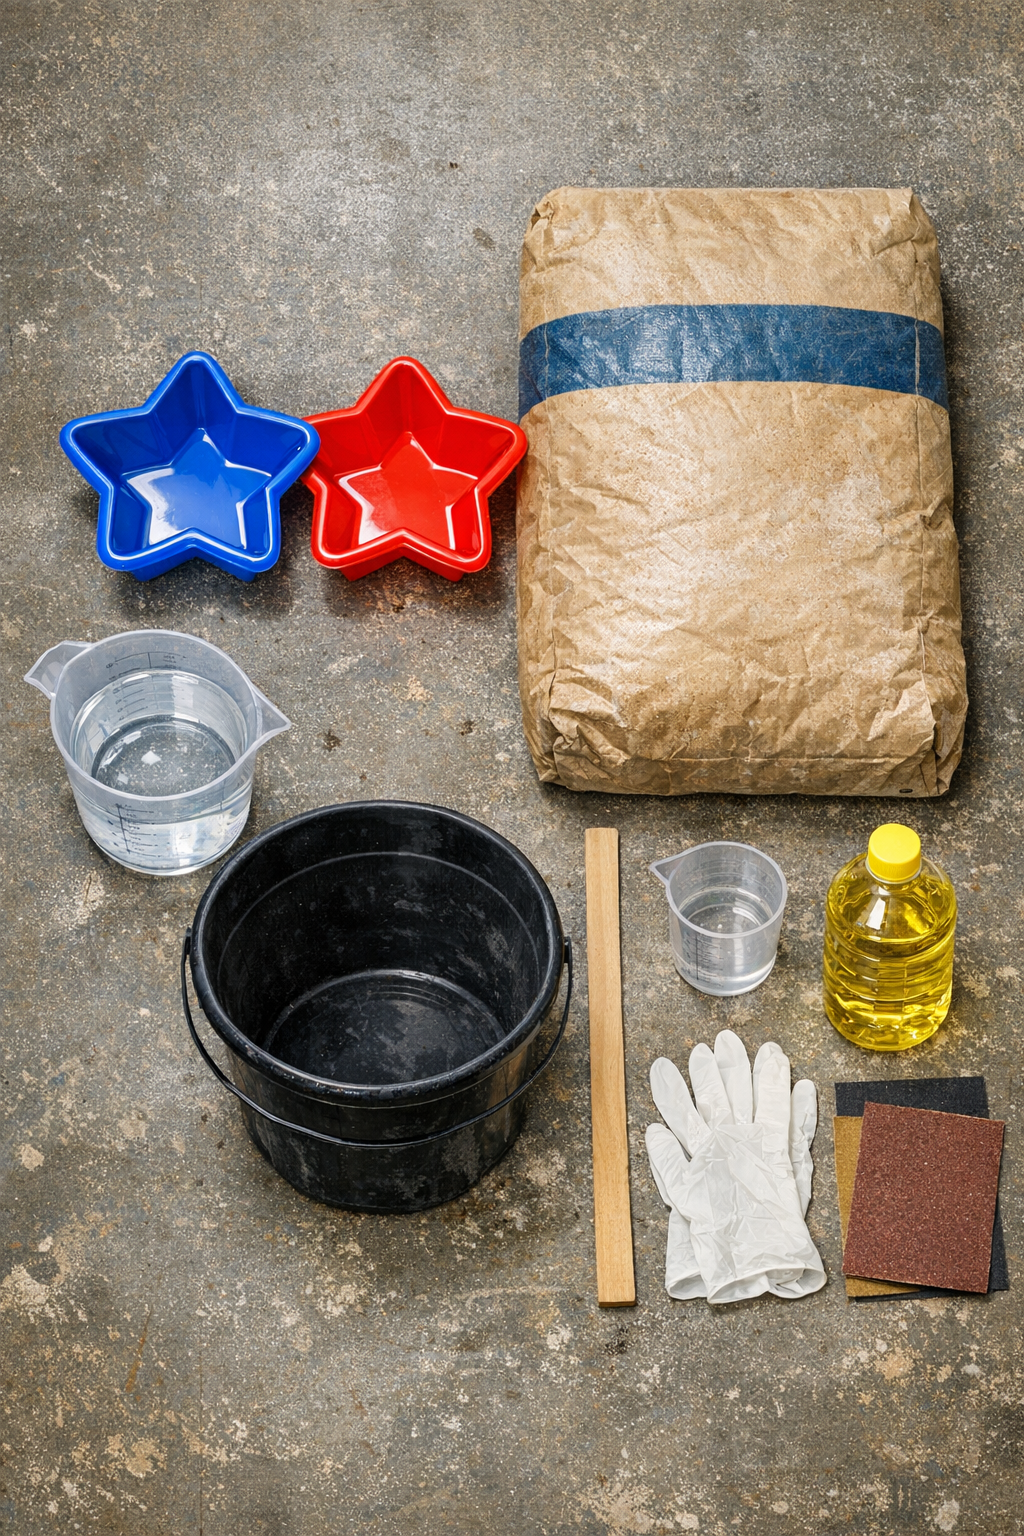
Materials
Instructions
1. Cover your work surface with a plastic drop cloth and set the two star bowls on a level surface where they can remain undisturbed while the cement cures.
2. Rub a thin, even layer of cooking oil inside each plastic star bowl, making sure to reach the points and sides; this is the secret supply that helps the cured cement release cleanly.
3. Add the cement mix to the bucket, then pour in water a little at a time and stir until the mixture reaches the consistency of thick brownie batter with no dry pockets remaining.
4. Let the mixture sit for 1 to 2 minutes, then stir again to smooth it out; this brief rest helps the powder fully hydrate and makes the pour easier.
5. Divide the wet cement evenly between the two bowls, filling each one about 1 1/2 to 2 inches deep, depending on the depth of your bowls.
6. Tap the sides and bottom of each bowl several times to bring air bubbles to the surface, then gently jiggle the bowls until the tops level out.
7. Smooth the surface with the stir stick or a gloved hand, especially around the points of the star, so the backs of the finished pieces cure flat and stable.
8. Leave the bowls in place to cure for 24 to 48 hours, or according to your cement mix directions, until the pieces feel hard and cool but fully set.
9. Flex the plastic bowls gently to loosen the cement, then turn each piece out onto a towel or padded surface to avoid chipping the edges.
10. Sand any rough edges or thin flashing with medium-grit sandpaper, then brush away dust and place your two finished decorative molds in the yard or garden.
Variations & Tips
For a smoother finish: After filling the bowls, tap them a bit longer than you think necessary. Those extra few seconds help release trapped air and give the cement a cleaner face.
For more rustic character: Don’t overwork the surface. A few natural imperfections can make these yard pieces look more like aged garden ornaments than freshly cast cement.
If your bowls are very flexible: Set each bowl inside a larger shallow container or nest it into a ring of towels before pouring. That keeps the star points from spreading outward under the weight of the cement.
To add color: Mix powdered concrete pigment into the dry cement before adding water, or dry-brush the cured pieces with exterior masonry paint after they have fully cured.
For safer handling: Wear gloves and lift from underneath with both hands once cured. These small pieces get surprisingly heavy, much like a dense loaf in a Dutch oven, and the points can chip if handled roughly.
Placement tip: These look especially good in pairs near entry paths, flower beds, or at the base of large planters. I like using repeating shapes outdoors because they give a garden the same visual rhythm that repeated garnishes bring to a composed plate.