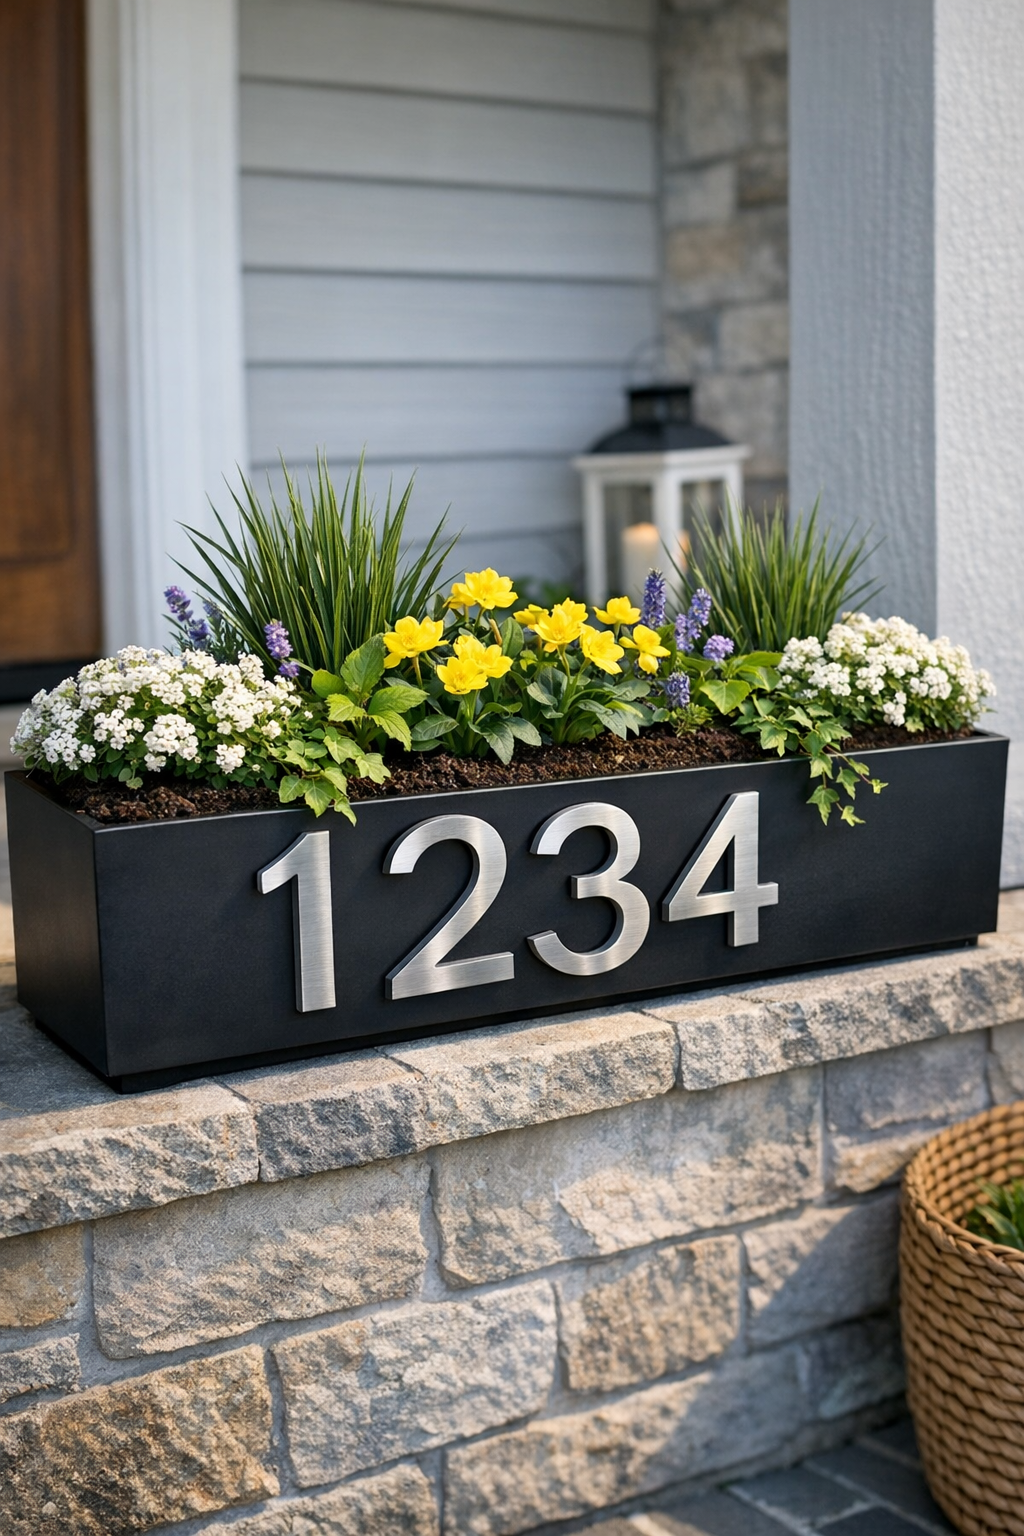
I love a project that makes the front porch look pulled together without turning into a full weekend renovation, and this outdoor address planter absolutely fits that category. It’s a long black window box planted with fresh greenery and flowers, with brushed metal house numbers attached right through the front so your address is easy to spot from the street and still looks polished up close.
This is a great DIY if you want curb appeal on a realistic schedule. I’m always drawn to projects that do double duty, and this one gives you a modern planter and a clear address marker in one simple build. If you’re comfortable measuring, drilling, and planting a container, you can make this in an afternoon.
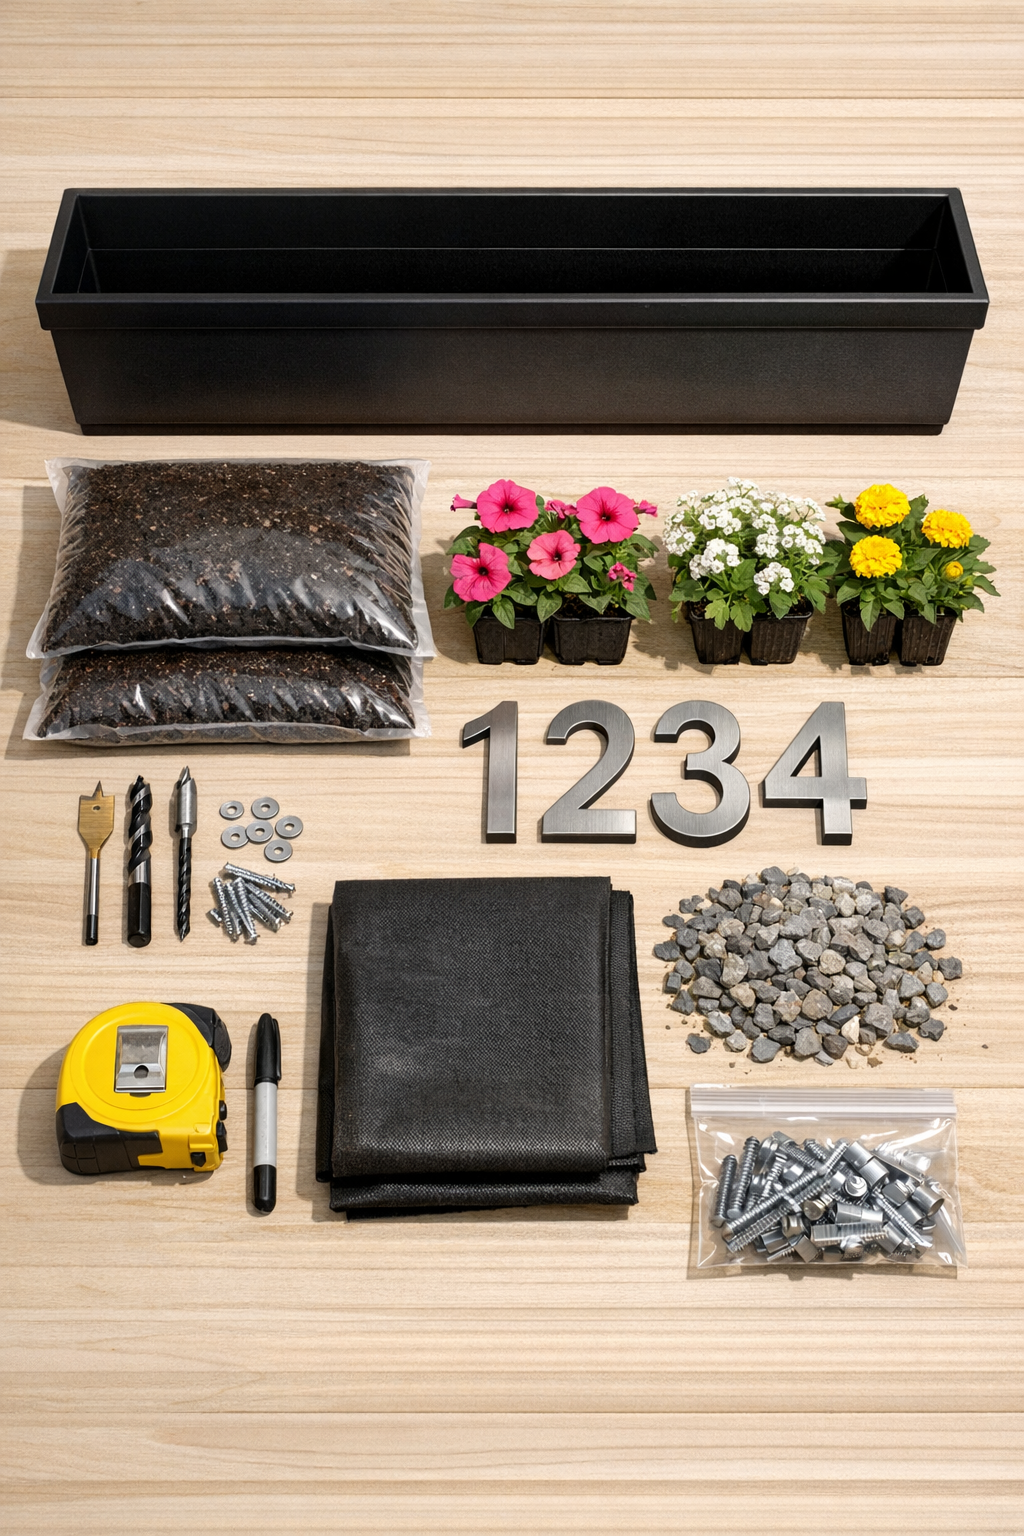
Materials
Instructions
1. Set the window box on a flat surface and decide where the numbers will sit across the front. Leave at least 1 1/2 inches of space above the bottom edge so the hardware doesn’t interfere with the soil line too much.
2. Measure the front of the planter and mark the center, then lay out your house numbers with even spacing. I like to step back a few feet at this point because numbers that look centered up close can read slightly off from the sidewalk.
3. Mark each mounting hole through the numbers onto the planter, then remove the numbers. Drill the holes slowly using a bit sized for your screws, keeping the planter steady so the plastic or composite doesn’t crack.
4. If your planter doesn’t already have drainage holes, drill 4 to 6 holes in the bottom, spaced evenly. Good drainage matters here, especially if your porch gets heavy rain like mine does in spring.
5. Attach the metal numbers to the front of the planter by feeding the screws through the number holes and planter wall, then securing them inside with washers and nuts. Tighten them until snug but not so tight that the planter wall bows inward.
6. If you want extra weather protection, add a small bead of exterior silicone around each front screw opening before fully tightening. This helps limit water seepage around the hardware without changing the look.
7. Line the inside front wall of the planter with the piece of landscape fabric, trimming around the hardware if needed. This keeps potting mix from pressing directly out through the screw areas.
8. Add 1 to 1 1/2 inches of pea gravel to the bottom of the planter, then fill it about two-thirds full with potting mix. Lightly level the soil without packing it down hard.
9. Arrange your plants while they’re still in their nursery pots, placing taller plants toward the back and trailing plants near the front corners. Once you like the layout, remove each plant from its pot and set it into the soil.
10. Fill in around the root balls with the remaining potting mix until the soil sits about 1 inch below the rim. Press gently around each plant to hold it in place, then water thoroughly until excess drains from the bottom.
11. Place the finished planter on your porch, steps, or near the front door where the numbers are visible from the street. Rotate the box slightly if needed so the address catches the light and is easy to read.
Variations & Tips
Plant Choice: Use sun-loving flowers like petunias, calibrachoa, or geraniums for a bright porch, or switch to ferns, heuchera, and ivy if your entry stays shady.
Planter Size: If your house number has 4 or 5 digits, choose a 30- to 36-inch window box so the numbers don’t look crowded.
Mounting Upgrade: For a heavier metal planter, use short bolts with locking nuts instead of basic mounting screws for a sturdier long-term hold.
Seasonal Refresh: I like to swap the plants instead of remaking the whole piece. In summer, go colorful and full; in fall, mums and ornamental kale look amazing; in winter, you can fill it with evergreen cuttings and faux berries.
Visibility Tip: Choose brushed metal numbers that contrast clearly against the black planter, and avoid letting trailing plants grow across the front and cover the address.
Watering Tip: Window boxes dry out faster than in-ground beds, so check moisture every day during hot weeks. A quick morning watering is usually enough to keep the planting looking fresh.
Rental-Friendly Option: If you don’t want to drill into a more decorative planter, use a basic nursery-style window box as an insert and keep the nicer outer planter untouched.