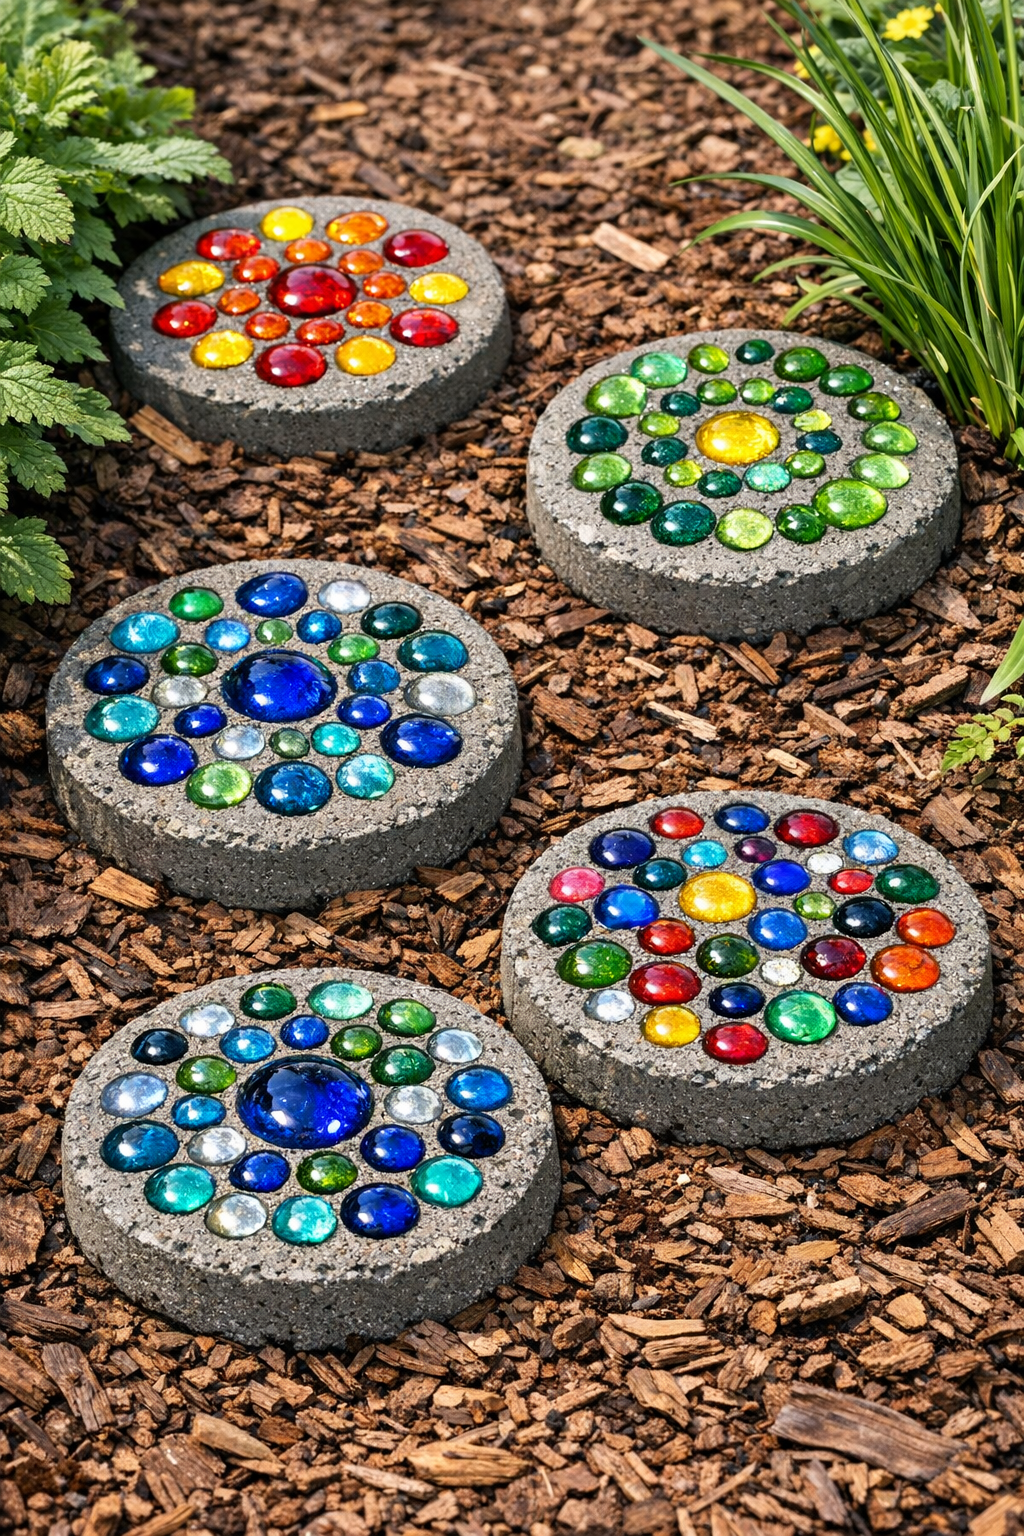
There’s something especially satisfying about a garden path that feels personal, and these gem-studded stepping stones do exactly that without requiring fancy molds or masonry experience. In this project, I use round cake pans as simple forms and press colorful glass gems into quick-set concrete to make decorative stones that brighten a bed, border, or lawn path.
I like this kind of weekend build because it sits right at the intersection of practical and pretty. If you’ve never worked with concrete before, this is a very forgiving place to start, and if you already garden, it’s a lovely way to add color and structure with materials that are easy to find at any home center or craft aisle.
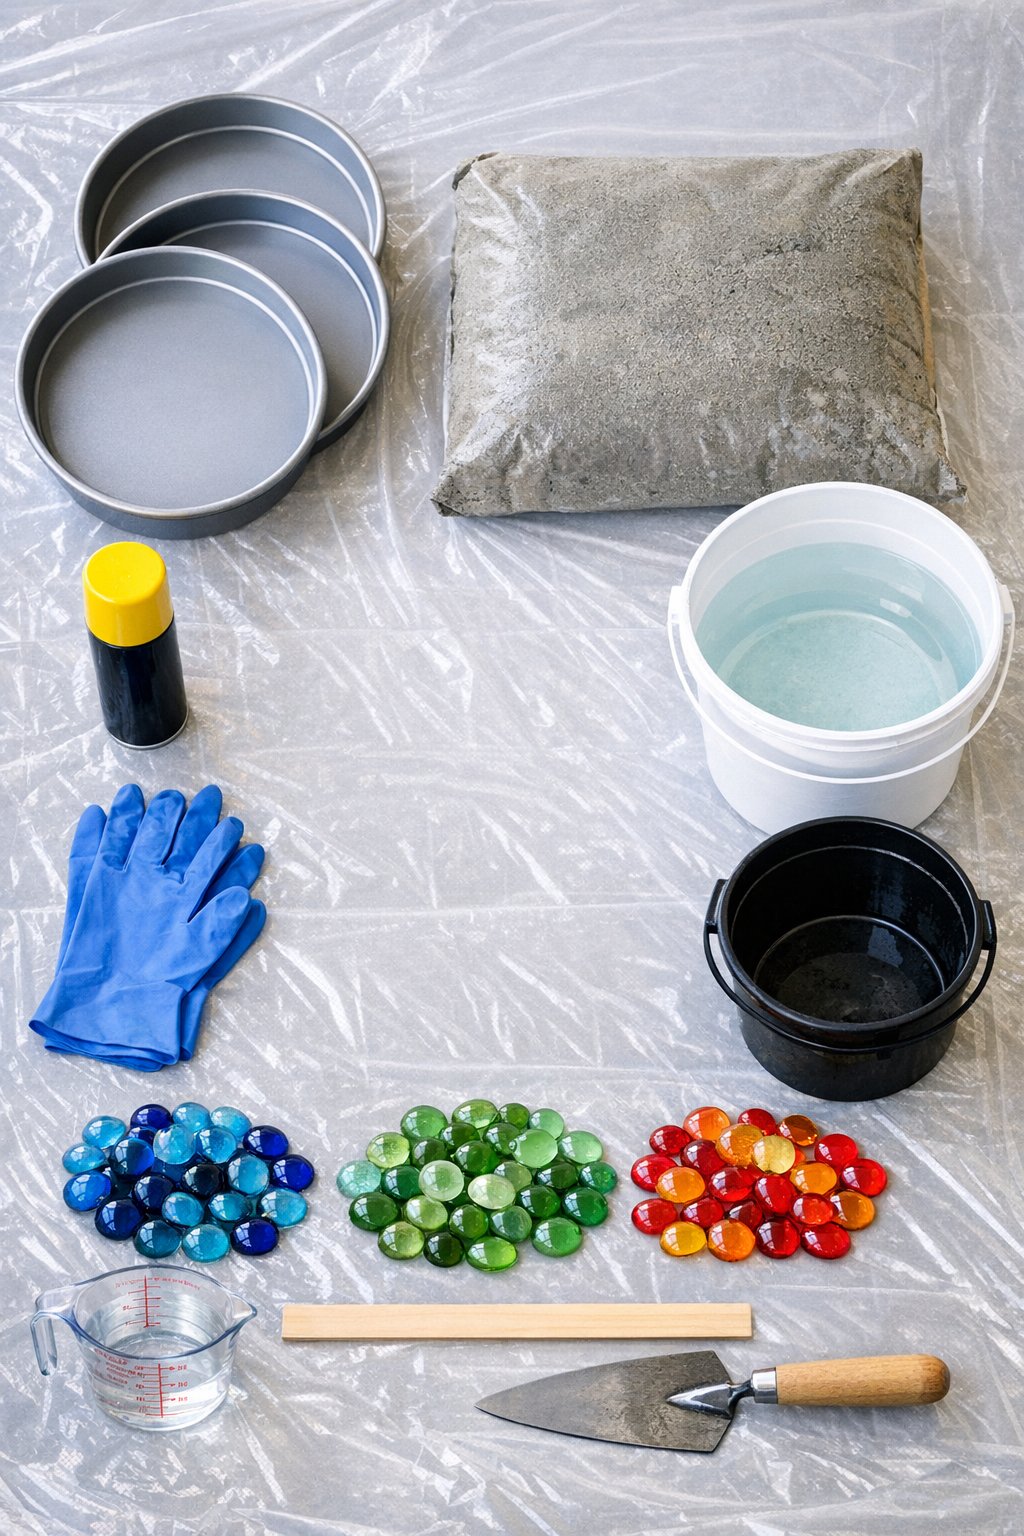
Materials
Instructions
1. Set up a flat work area in a garage, driveway, or patio and cover it with a plastic drop cloth. Place the cake pans on a level surface so the stones cure evenly.
2. Lightly coat the inside of each cake pan with nonstick spray or a thin layer of petroleum jelly. This helps the concrete release cleanly once it has hardened.
3. Pour quick-set concrete mix into the bucket and add water a little at a time, stirring until it reaches a thick brownie-batter consistency. Mix only as much as you can pour into the pans within the product’s working time.
4. Spoon or pour the concrete into the cake pans, filling each pan to about 1 1/2 inches deep. Tap the pans gently on the work surface to release trapped air bubbles and level the surface with a trowel.
5. Wait 5 to 10 minutes, until the concrete begins to firm slightly but is still soft enough to press. Starting in the center or around the outer edge, press the glass gems into the surface about one-third to halfway deep.
6. Arrange the gems in any pattern you like, leaving about 1/2 inch between pieces so the concrete stays strong. If any concrete pushes up over the tops, wipe the gems clean before the mix hardens.
7. Let the stones cure undisturbed according to the concrete package directions, usually at least 24 hours. Keep them in a shaded area during curing so the surface doesn’t dry too fast and crack.
8. Turn each pan upside down onto a folded towel and tap the bottom gently to release the stone. If needed, run a thin plastic tool around the edge rather than forcing it out.
9. Smooth any rough edges with 120-grit sandpaper or a sanding block while wearing gloves. Brush away the dust, then allow the stones to finish curing for another 24 to 48 hours before placing them in the garden.
Variations & Tips
Color palette: Use one color family for a more classic look, or mix jewel tones for a playful mosaic effect. In my own yard, I find blues and greens especially pretty near hostas and ornamental grasses.
Pan size: An 8-inch round pan makes a comfortable stepping size, but you can use 6-inch pans for tighter garden spaces or 9-inch pans for a broader path. Just keep the concrete thickness close to 1 1/2 inches so the stones stay strong.
Gem placement: Press the gems in after the concrete has started to set slightly, not immediately after pouring. If you add them too early, they can sink deeper than you want.
Release insurance: If you’re worried about sticking, line the bottom of the pan with a circle of plastic wrap before adding the concrete. It may leave a little texture on the back, but that won’t matter once the stone is in the garden.
Weather tip: Avoid making these on very hot or windy days, because quick-set concrete can dry faster than expected. A calm, mild afternoon gives you more time to arrange the gems neatly.
Installation: Set each stone into soil or mulch so it sits level and doesn’t rock underfoot. I like to nestle them slightly into the ground for a more natural, established look.