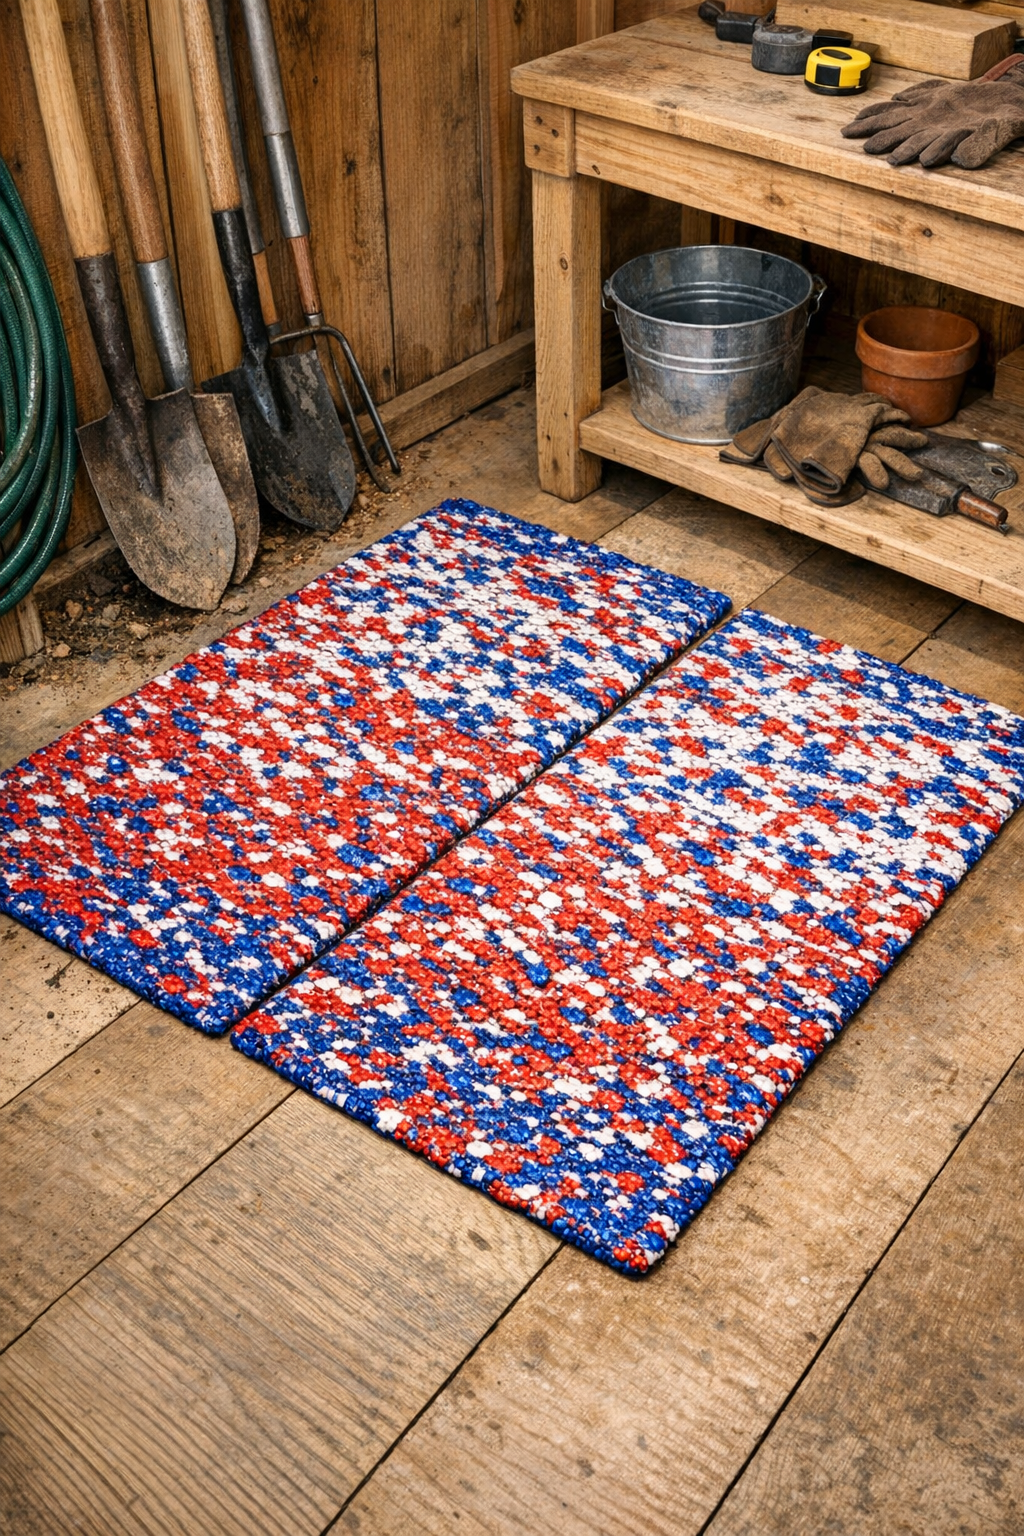
I love a project that turns something headed for the recycle bin into something I can actually use every day, and these ultra-tough shed floor mats do exactly that. By layering and fusing plastic grocery bags with one extra material, you can make durable, wipe-clean mats that hold up surprisingly well under muddy shoes, garden tools, and all the everyday messes that seem to follow me out to the garage and shed.
This is a great weekend project if you have a stash of red, white, and blue grocery bags taking over a cabinet like I always seem to. As someone who’s usually juggling work, dinner, and a running list of house projects, I appreciate that this one is inexpensive, practical, and satisfying in that “why didn’t I make this sooner?” kind of way.
Materials
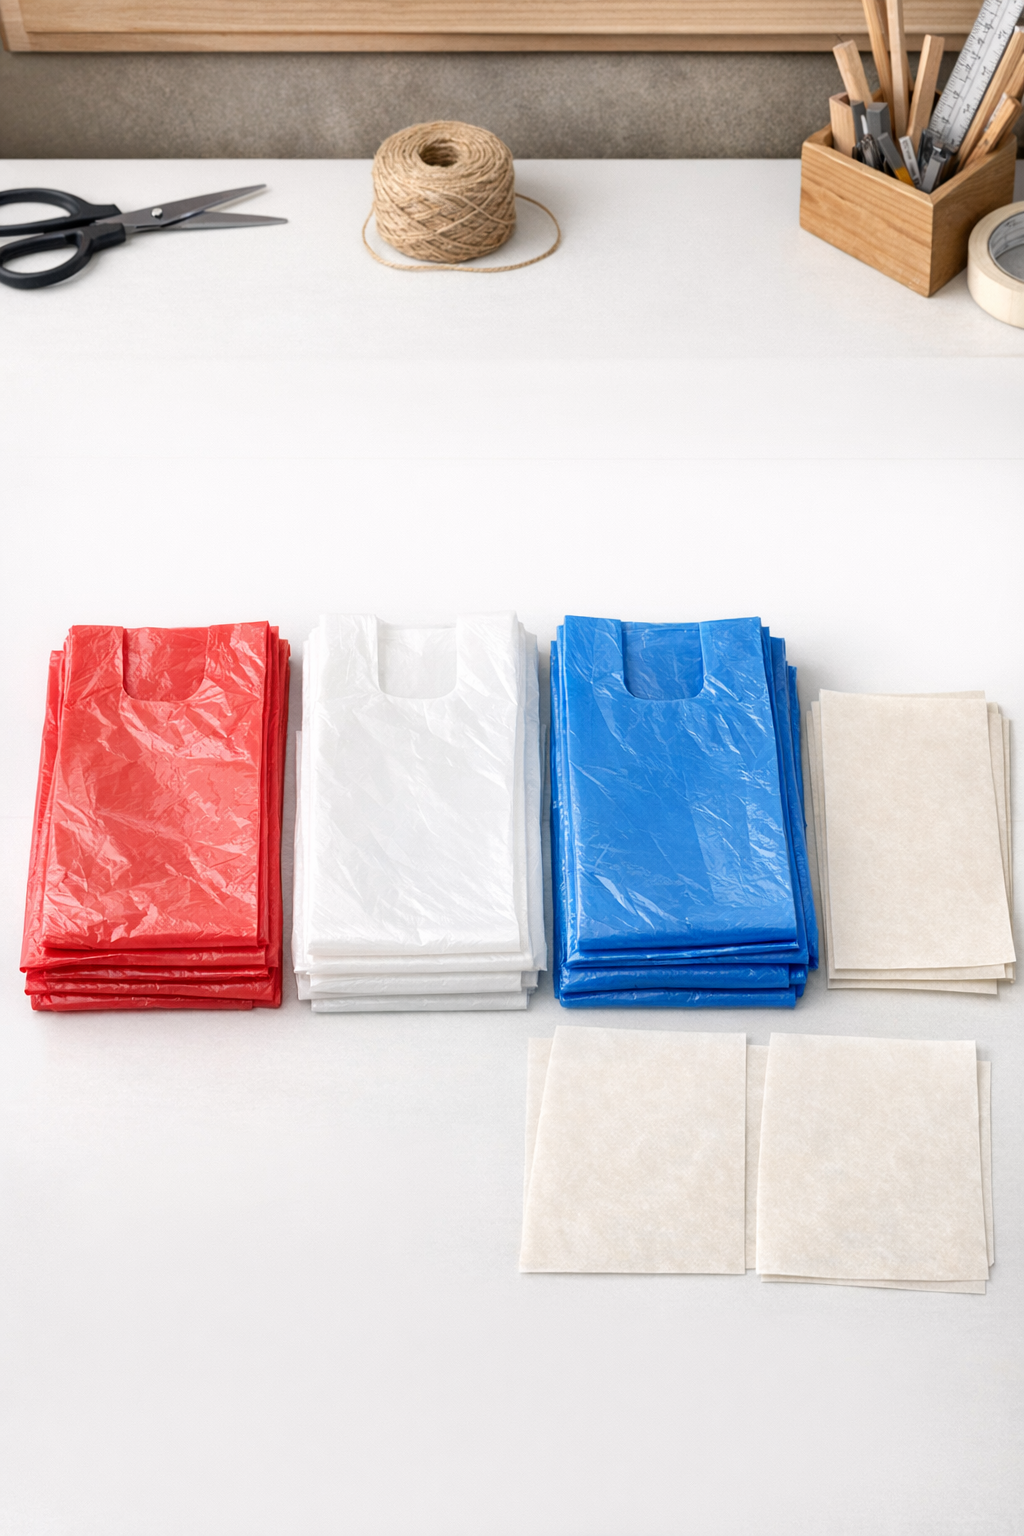
60 plastic grocery bags total: 20 red, 20 white, and 20 blue, clean and completely dry
Instructions
1. Sort the grocery bags by color, then shake out any crumbs or dust and make sure every bag is fully dry. Trim off the handles and bottom seams if they are bulky so the layers will fuse more evenly.
2. Crumple each bag loosely, then open it back up and flatten it by hand to create a wrinkled texture. I like this step because the extra texture helps the finished mat grip the floor a little better instead of looking too slick.
3. Lay one sheet of parchment paper on your ironing surface, then overlap 5 flattened bags into a rectangle about 18 x 24 inches. Alternate the colors as you go so the red, white, and blue pattern is spread across the whole mat.
4. Add a second layer of 5 bags on top, placing them in the opposite direction to cover weak spots and seams. Repeat until you have 4 total layers, using 20 bags for one mat.
5. Place another sheet of parchment paper over the top, then press with a dry iron set to medium heat using slow, steady passes. Keep the iron moving and work section by section until the plastic shrinks slightly and starts bonding into one thick sheet.
6. Lift the top parchment carefully and check for loose edges or puffy spots, then cover again and press those areas a second time. The mat should feel firm and unified, but not scorched or brittle.
7. Let the fused sheet cool flat for 5 minutes, then peel away the parchment. Trim the edges straight with scissors if needed.
8. Repeat the layering and fusing process twice more to make a total of 3 matching mats, using all 60 bags. This size works well for a shed walkway, in front of a potting bench, or by the door where I always seem to track in grass and dirt.
9. If you want extra thickness, stack two finished mats together with a fresh sheet of parchment on top and bottom, then fuse them lightly around the perimeter and in the center. This creates a heavier-duty mat that stays put better on concrete floors.
10. Set the mats in place and wipe them clean with a damp cloth after use. For muddy jobs, let the dirt dry first, then brush it off before wiping.
Variations & Tips
Make it thicker: For heavier foot traffic, use 5 or 6 layers per mat instead of 4. The mat will be stiffer, but it also holds up better in hard-working spots.
Change the size: You can make a narrow runner for a shed aisle or a small square mat for a workbench area by adjusting the number of bags in each layer. Just keep the layers evenly overlapped so there are no thin sections.
Use an ironing board cover you don’t mind protecting: I always add an extra layer of parchment under the project because melted plastic is not something I want anywhere near my regular household setup. A dedicated craft surface makes this a lot less stressful.
Keep the heat moderate: If the iron is too hot, the plastic can curl, thin out too much, or develop holes. Medium heat and patience give the best results.
Try a patchwork look: Instead of spreading colors evenly, group the red, white, and blue bags in sections for a striped or color-blocked mat. It’s an easy way to make the finished piece look more intentional.
Best place to use it: These mats are ideal for sheds, mudrooms, garage entry spots, or under potting supplies. I would skip using them in direct high heat or full sun for long stretches, since fused plastic can warp over time.