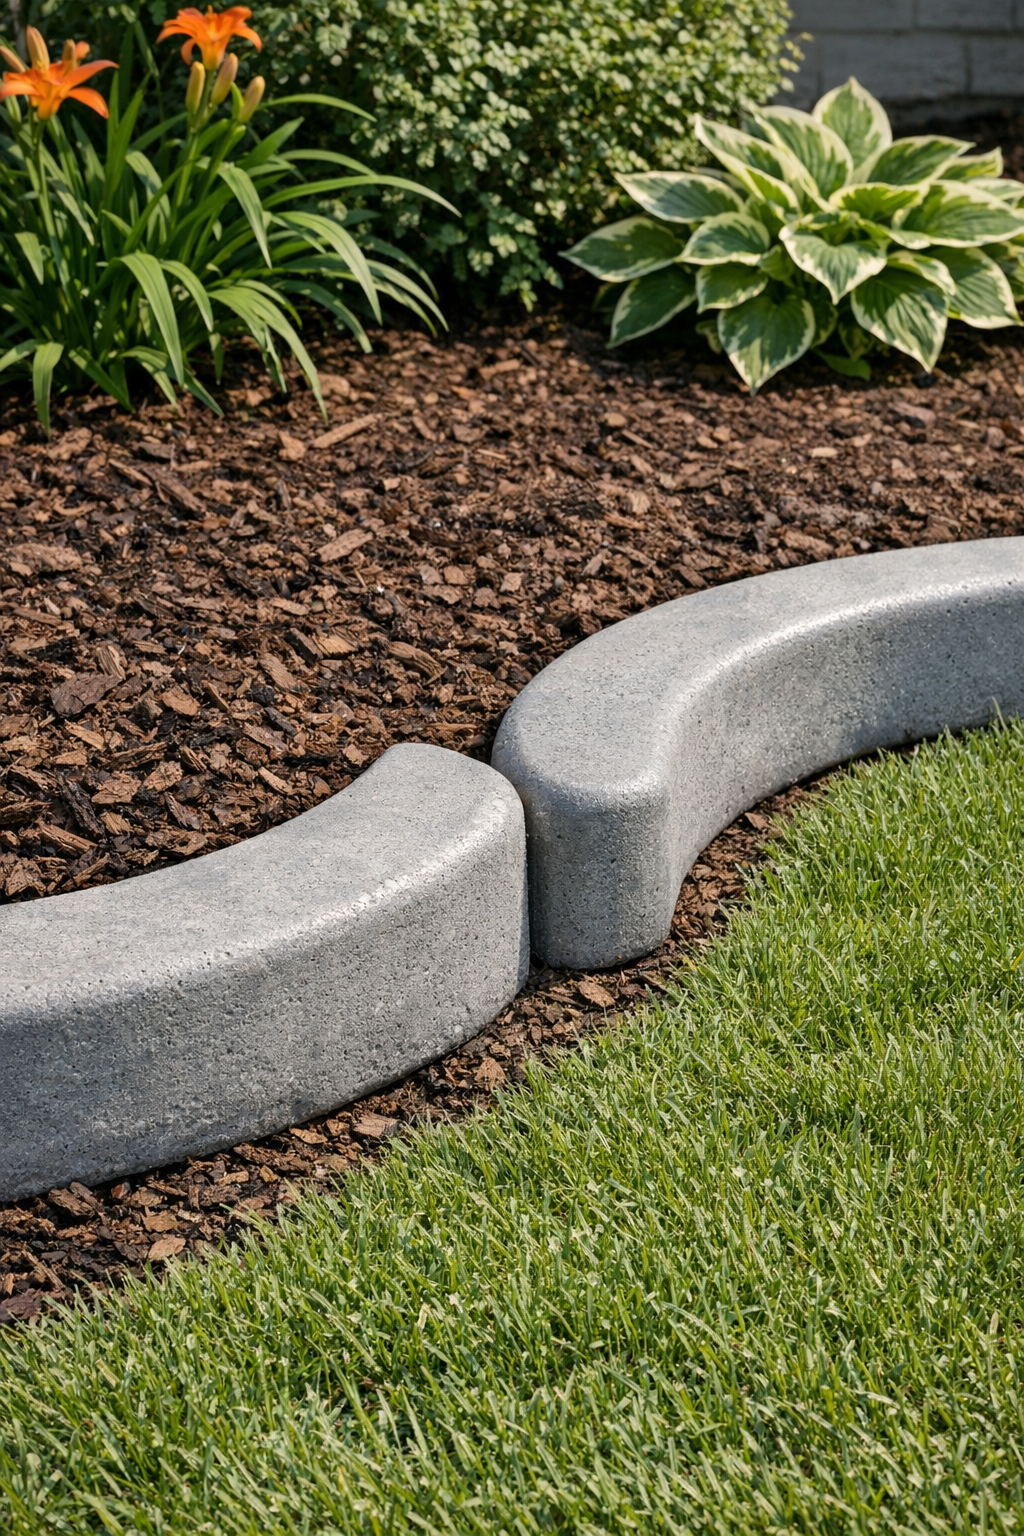
I love a backyard project that looks far more expensive than it actually is, and these heavy curved yard borders are exactly that kind of win. By using vinyl swim floaties as molds, you can make two chunky, arched cement border pieces that add a clean, sculptural edge to a flower bed, tree ring, or walkway without buying pricey premade landscape edging.
What really makes this project practical is that it fits into a busy weekend. I’m always drawn to projects I can chip away at after work, and this one is simple: mix, fill, let cure, and peel away the mold. The “secret ingredient” here is reinforcing fiber mixed into the cement, which helps the finished borders stay stronger and less brittle.
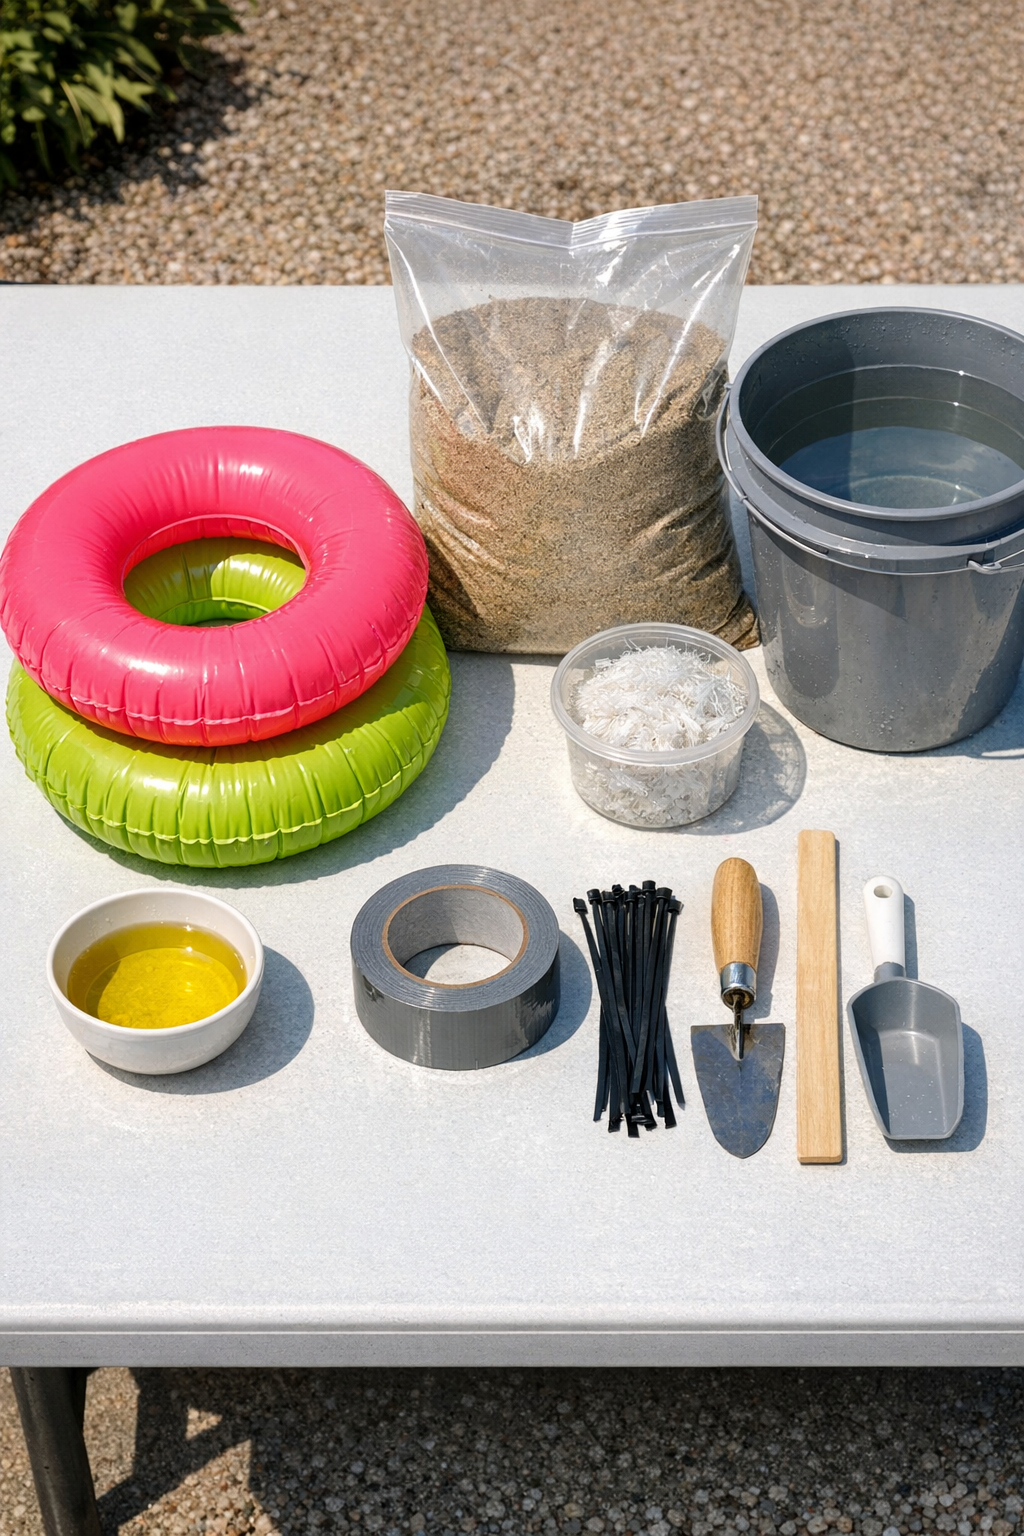
Materials
2 vinyl swim floaties, each about 48 to 54 inches long and 8 to 10 inches thick when inflated
Instructions
1. Spread the tarp on a flat work area outdoors or in a garage, and inflate both swim floaties until they are firm but still slightly squeezable so they can hold a gentle curve.
2. Shape each floatie into the curve you want for your yard border, then secure the shape with zip ties and a few wraps of duct tape so the ring cannot spring back while filled.
3. Rub a thin coat of cooking oil over the outside of each floatie so any spilled cement releases easily and the vinyl peels away more cleanly later.
4. In the mixing tub, combine the cement mix and reinforcing fiber, then stir them dry first so the fibers are distributed evenly through the whole batch.
5. Add water a little at a time and mix until the cement is very thick, like stiff cookie dough; it should hold its shape when scooped and not pour like pancake batter.
6. Deflate the first floatie just enough to open the valve area, then use the funnel to pack the thick cement mixture inside a little at a time, pressing and massaging the tube so there are no hollow spots.
7. Re-inflate slightly if needed to help the tube keep its rounded form, then seal the valve and repeat with the second floatie, dividing the cement as evenly as possible between both molds.
8. Gently roll and tap each filled floatie on the tarp to settle the mix, then reshape the curves so both pieces look balanced and sit flat on the ground.
9. Let the filled molds cure undisturbed for 24 hours, then lightly mist them with water and cover loosely with plastic for another 24 to 48 hours to slow drying and reduce cracking.
10. Once the pieces feel hard and solid, cut and peel away the vinyl carefully, then set the borders aside for a few more days to finish curing before placing them in the yard.
Variations & Tips
For a stone-like finish: After demolding, dab the surface with a damp sponge while the cement is still slightly green to soften the texture and make it look more like carved stone.
For a darker border: Mix in a small amount of concrete pigment before adding water if you want charcoal, terracotta, or earthy brown edging that blends into the landscape more naturally.
For easier handling: Make shorter curved sections instead of extra-long ones if you plan to move them by yourself; heavy cement pieces get awkward fast, and I’ve learned that the hard way with patio projects.
To reduce cracks: Keep the cement on the thick side, avoid curing in direct hot sun, and don’t rush demolding because early movement is one of the easiest ways to weaken the shape.
For placement: Nestle each border piece about 1 to 2 inches into the soil so it looks anchored and stays put through rain, mowing, and everyday yard traffic.