There’s something deeply satisfying about turning a handful of ordinary household odds and ends into something sturdy and useful. This little project uses dismantled plastic clothespins and a common liquid adhesive to make small garage grates that are handy under muddy boots, paint cans, plant pots, or anywhere you want airflow and less mess on a work surface. It reminds me of the old Midwestern habit of saving what you had and making it do one more job before throwing it out.
If you enjoy simple upcycling projects and don’t mind a bit of careful oven work, this is a practical make for a garage, potting bench, utility room, or shed. I like projects like this because they don’t ask for fancy supplies, just a little patience and a willingness to see everyday objects in a new way.
Materials
Instructions
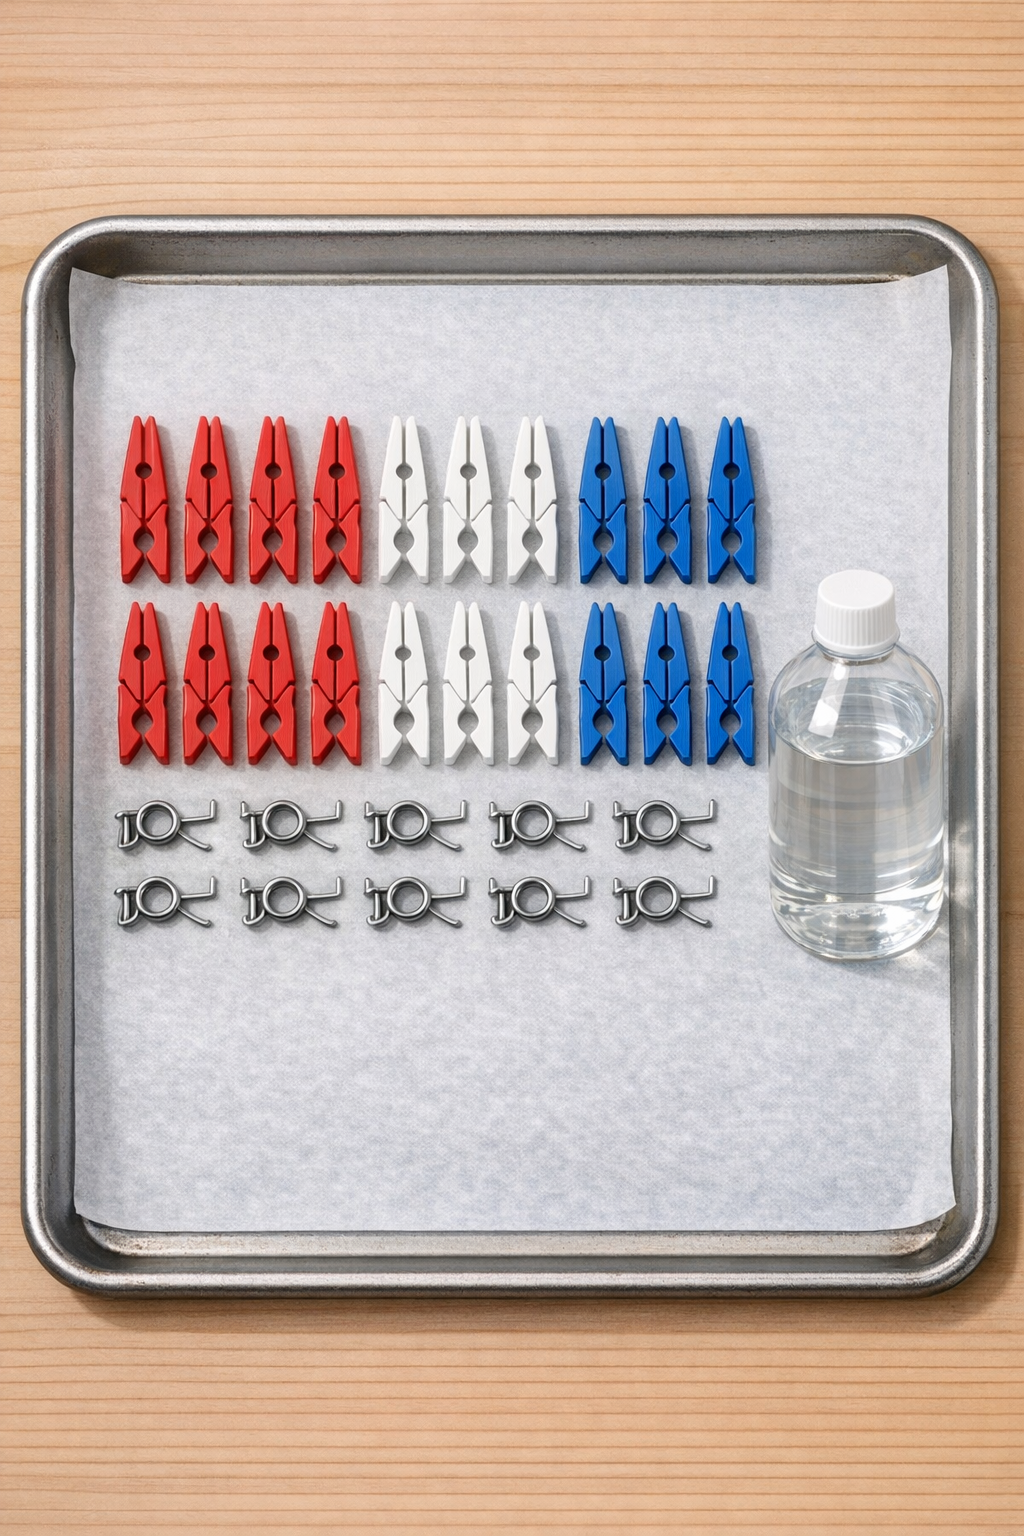
1. Pull apart all 48 plastic clothespins and remove the metal springs, setting the springs aside for another use or recycling. Sort the plastic halves by color so it’s easier to build an even pattern.
2. Wash the plastic pieces in warm soapy water, rinse them well, and dry them completely. Any dirt or oil on the surface can keep the pieces from bonding cleanly.
3. Line a baking tray with parchment paper and arrange the clothespin halves flat-side down in a tight grid, alternating red, white, and blue. Leave just a hair of space between pieces so the softened edges can meet without piling up.
4. Lightly brush or drizzle the acetone over the touching edges of the plastic pieces, using just enough to wet the seams. Work carefully and keep the liquid off anything you do not want softened.
5. Place the tray in an oven preheated to 250°F and bake for 8 to 12 minutes, watching closely until the edges soften and begin to fuse. Do not overbake; you want the pieces joined, not fully melted flat.
6. Remove the tray and press the softened grid gently with the flat bottom of another parchment-covered tray or a small flat pan. Press only enough to level the top and strengthen the contact points.
7. Let the piece cool completely for 20 to 30 minutes before lifting it off the parchment. If you’d like multiple small grates instead of one large one, snap or cut the cooled panel into sections.
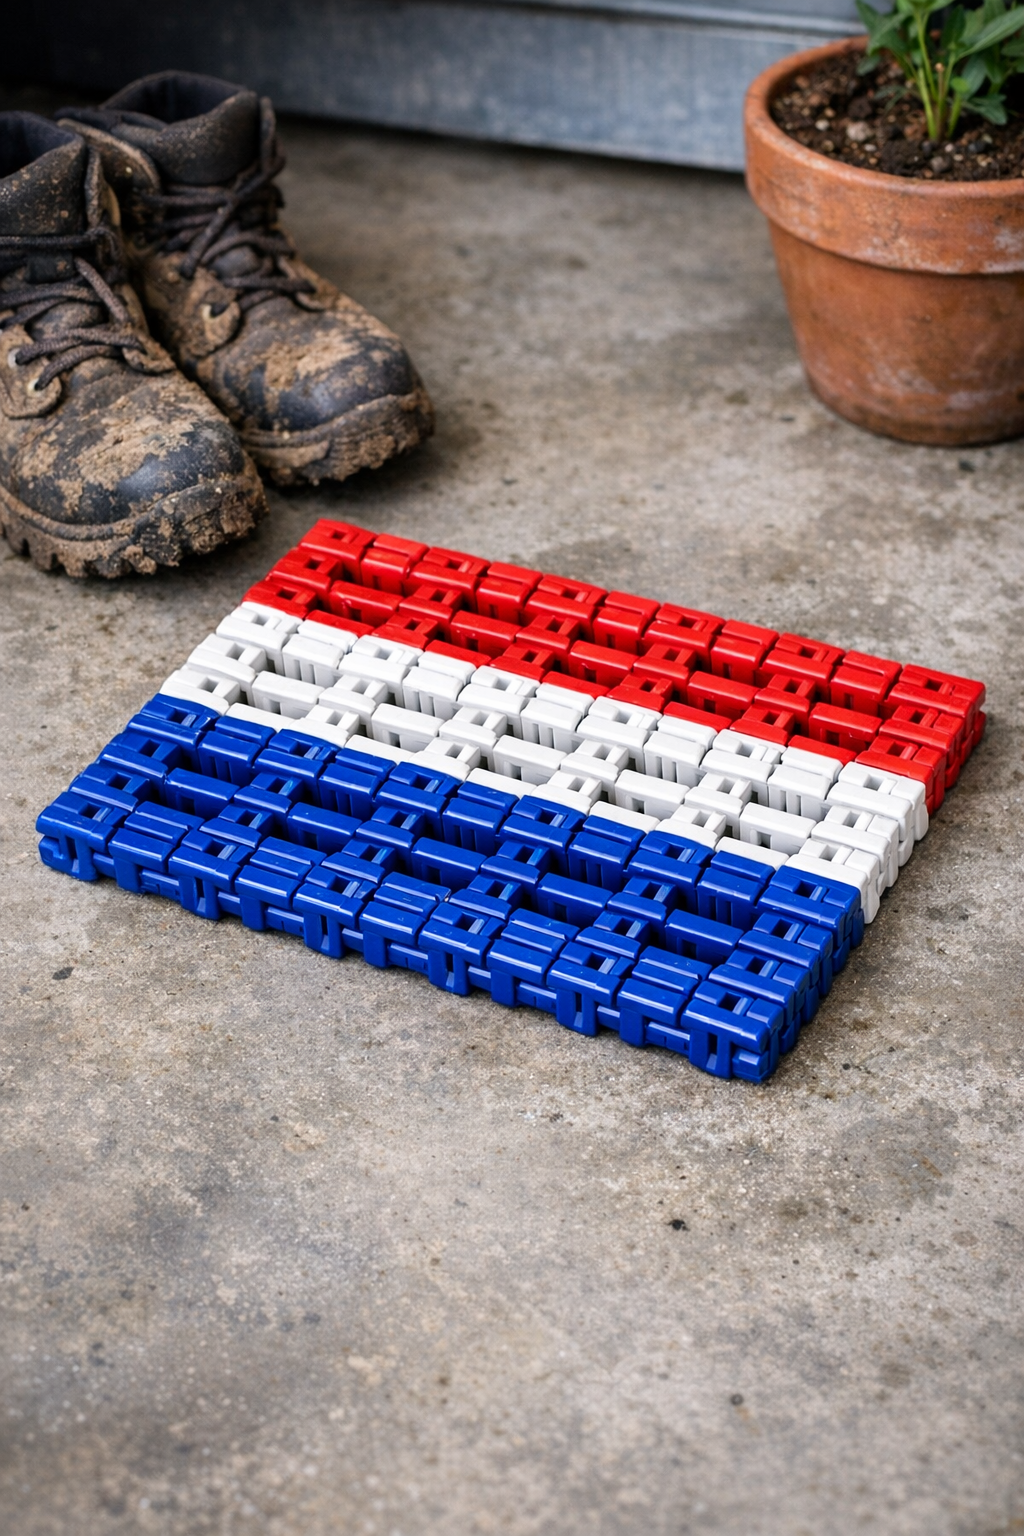
8. Set the finished grate in the garage, on a potting bench, or under messy supplies where drips and grit can fall through the openings. Test it with light to medium-weight items first to be sure the thickness suits your intended use.
Variations & Tips
Make smaller trays: If you only have a few clothespins on hand, make compact square grates for paint cans, seedling trays, or shoe drips instead of one larger panel.
Change the pattern: A striped arrangement looks especially nice with red, white, and blue, but a checkerboard or border pattern works just as well if you want a tidier finished look.
Use good ventilation: When heating plastic and working with acetone, always ventilate the area well and use an oven or toaster oven meant for workshop crafting rather than food use.
Keep the pressure light: Too much pressing after baking can collapse the open spaces, and those little gaps are what make the grate useful in the first place.
Best uses: These homemade grates are most practical for light-duty jobs like catching soil, drips, dust, and dampness. I would not use them for heavy loads, but for everyday garage fuss, they’re surprisingly handy.
Save the springs: Those clothespin springs are worth tucking into a jar, the way my generation always saved buttons and bits of wire. They come in handy for tiny repairs and other upcycling projects down the road.