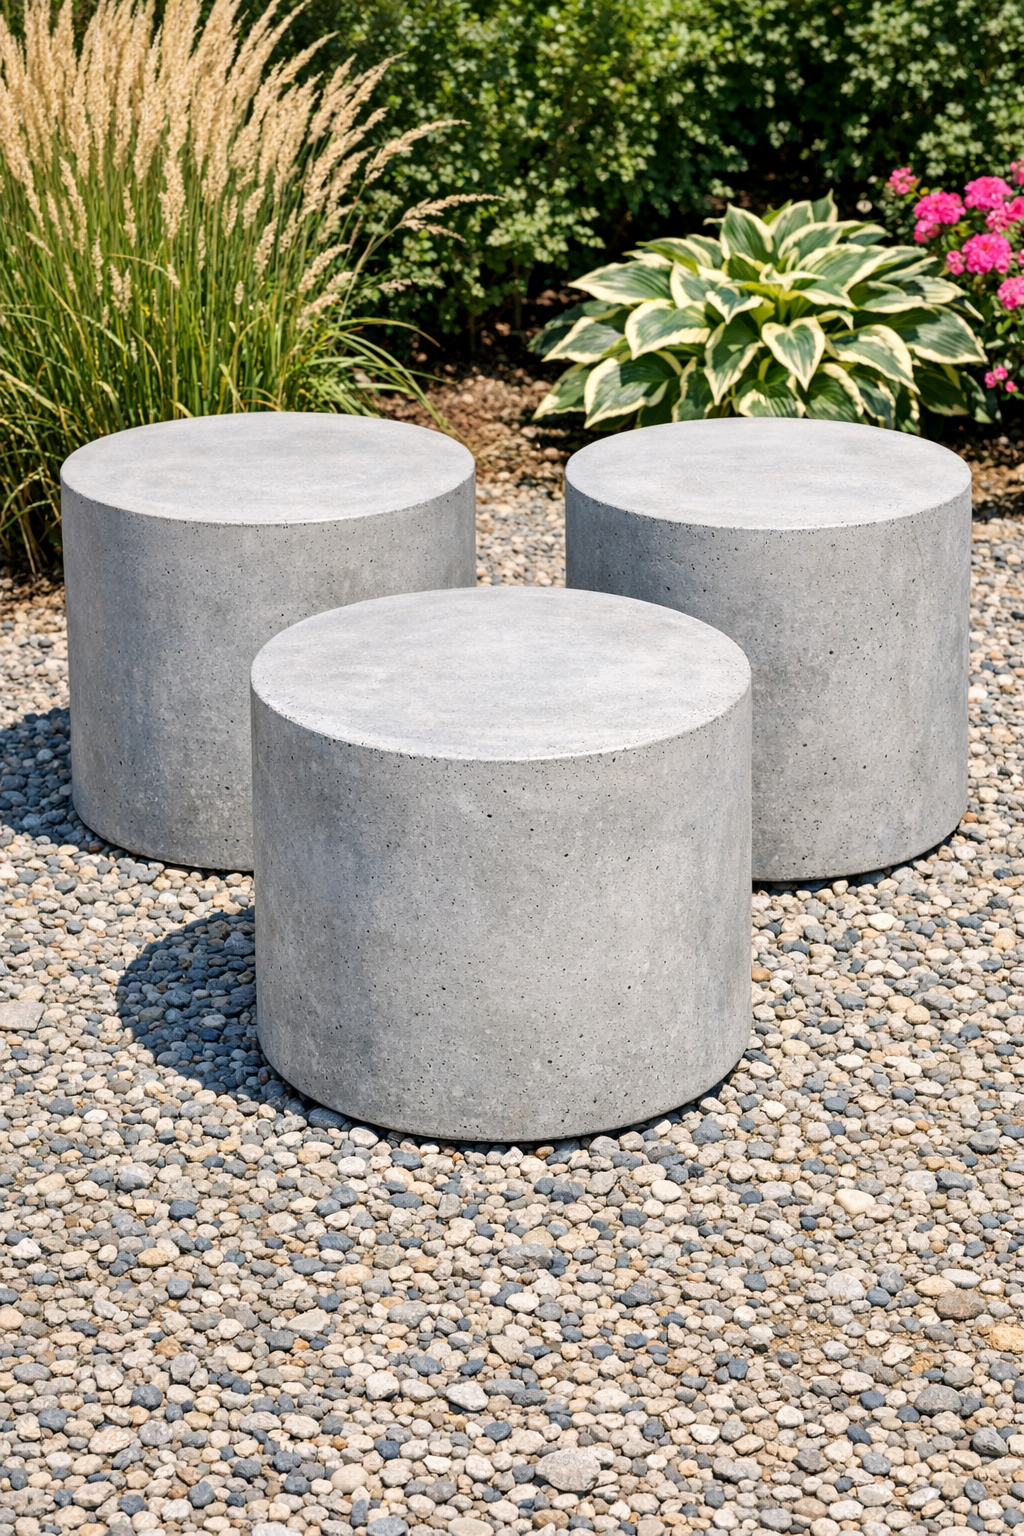
I love a project that turns a playful summer item into something unexpectedly useful, and these heavy cylindrical yard blocks do exactly that. By cutting foam water blasters into short molds and filling them with wet cement, you get sturdy modern-looking garden accents that can work as plant stands, pathway markers, bookends for an outdoor shelf, or simply sculptural pieces tucked into a flower bed.
The secret item in this version is a simple metal can set into the center, which reduces weight a bit, saves cement, and creates a cleaner, more balanced form. If you like concrete projects but do not want to fuss with building wooden forms, this is a very approachable weekend make. I’ve used similar quick molds for kitchen and patio projects for years, and the best ones are always the ones that rely on ordinary objects in a clever way.
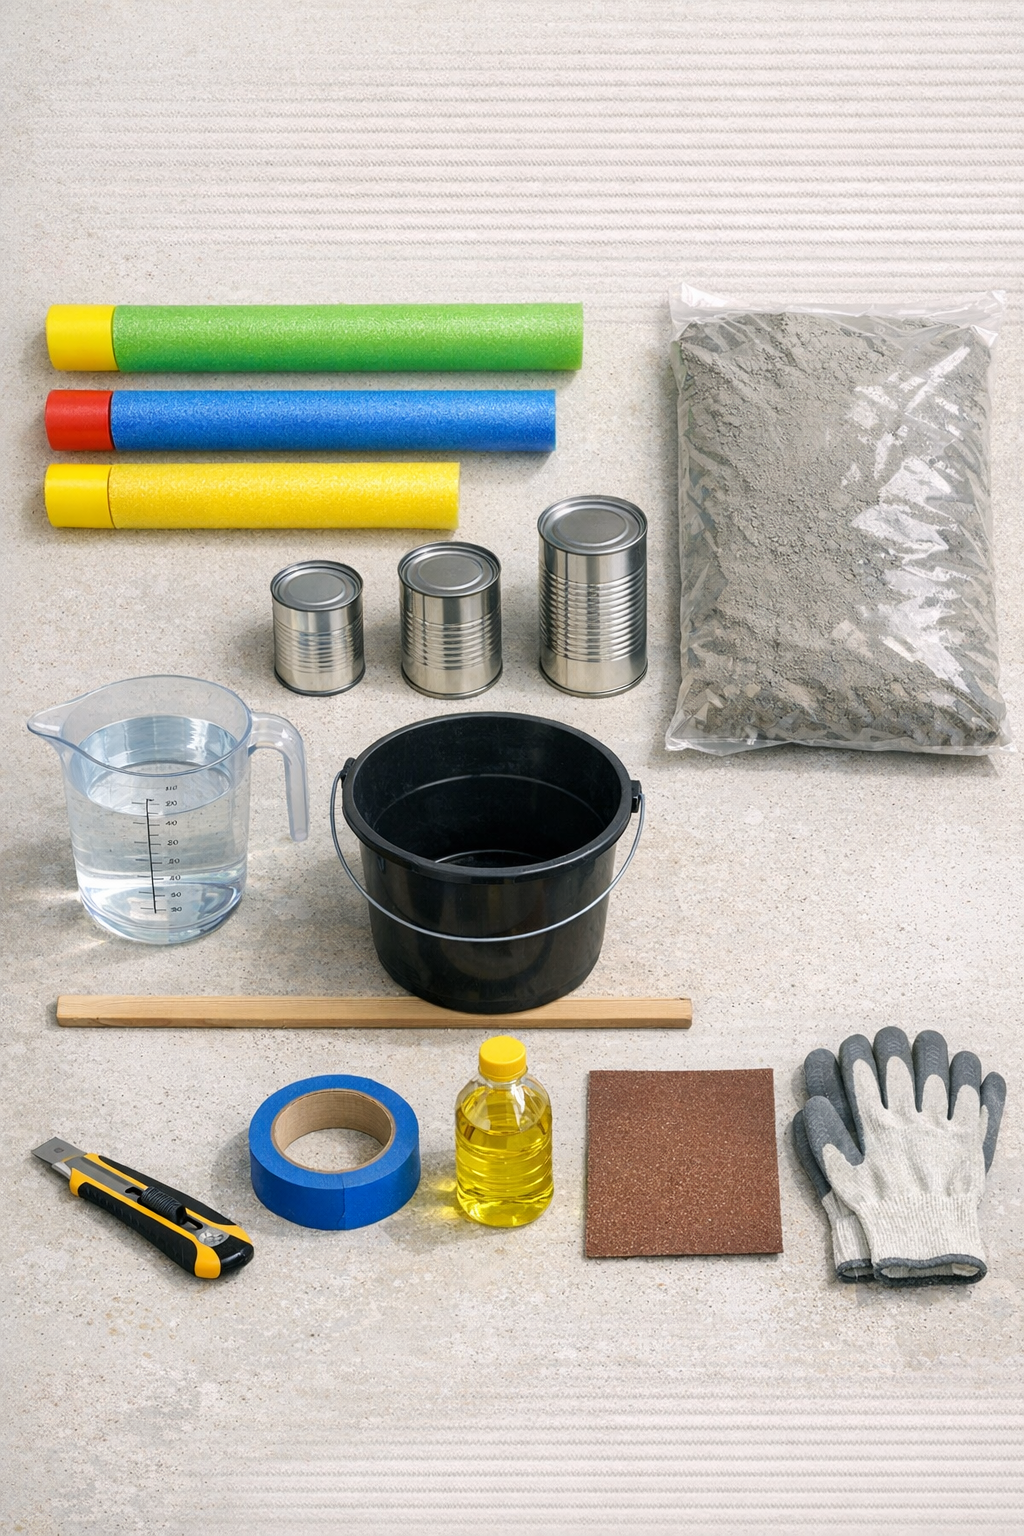
Materials
Instructions
1. Cover your work surface with a plastic drop cloth, then gather all materials so the concrete can be mixed and poured without interruption.
2. Use a utility knife to cut each foam water blaster into one 8-inch section, giving you three identical cylinder molds.
3. Tape one end of each foam cylinder securely so the wet cement cannot leak out, and stand the molds taped-side down.
4. Lightly coat the inside of each foam tube and the outside of each metal can with cooking oil so they release more easily after curing.
5. In a bucket, mix the concrete with water a little at a time until it reaches a thick oatmeal-like consistency that can still be poured.
6. Fill each foam mold about halfway with concrete, then tap the sides gently to release trapped air bubbles.
7. Press one metal can straight down into the center of each mold, leaving even space around the sides, then add more concrete around the can until the mold is filled to about 1/2 inch below the top.
8. Smooth the top surface with a stick or scrap of cardboard, then tap each mold again to settle the mix evenly.
9. Let the blocks cure undisturbed for 24 to 48 hours, or until fully firm and cool to the touch.
10. Peel away the foam mold, twist out the metal can, and sand any rough edges lightly for a cleaner finish.
Variations & Tips
Change the height: Cut the foam blasters into 4-inch, 6-inch, and 8-inch sections to make a staggered trio that looks especially nice near a walkway or porch.
Use a different center insert: If you do not have metal cans, a plastic cup wrapped in tape can work as a temporary core, but I prefer metal because it stays put better when the concrete is poured.
Add color: Mix in a small amount of concrete pigment or dry-brush the cured blocks with masonry paint for a warmer garden look.
Improve the finish: More tapping means fewer air pockets. Whenever I make concrete pieces, I spend an extra minute knocking bubbles loose because that small step makes the final surface look much more polished.
Protect the bottom: If the blocks will sit on a deck or patio, stick felt pads or rubber dots underneath once fully cured so the concrete does not scratch the surface.
Let them cure longer for strength: Even if they seem hard after a day, giving them a few extra days before heavy outdoor use helps them reach a stronger final set.