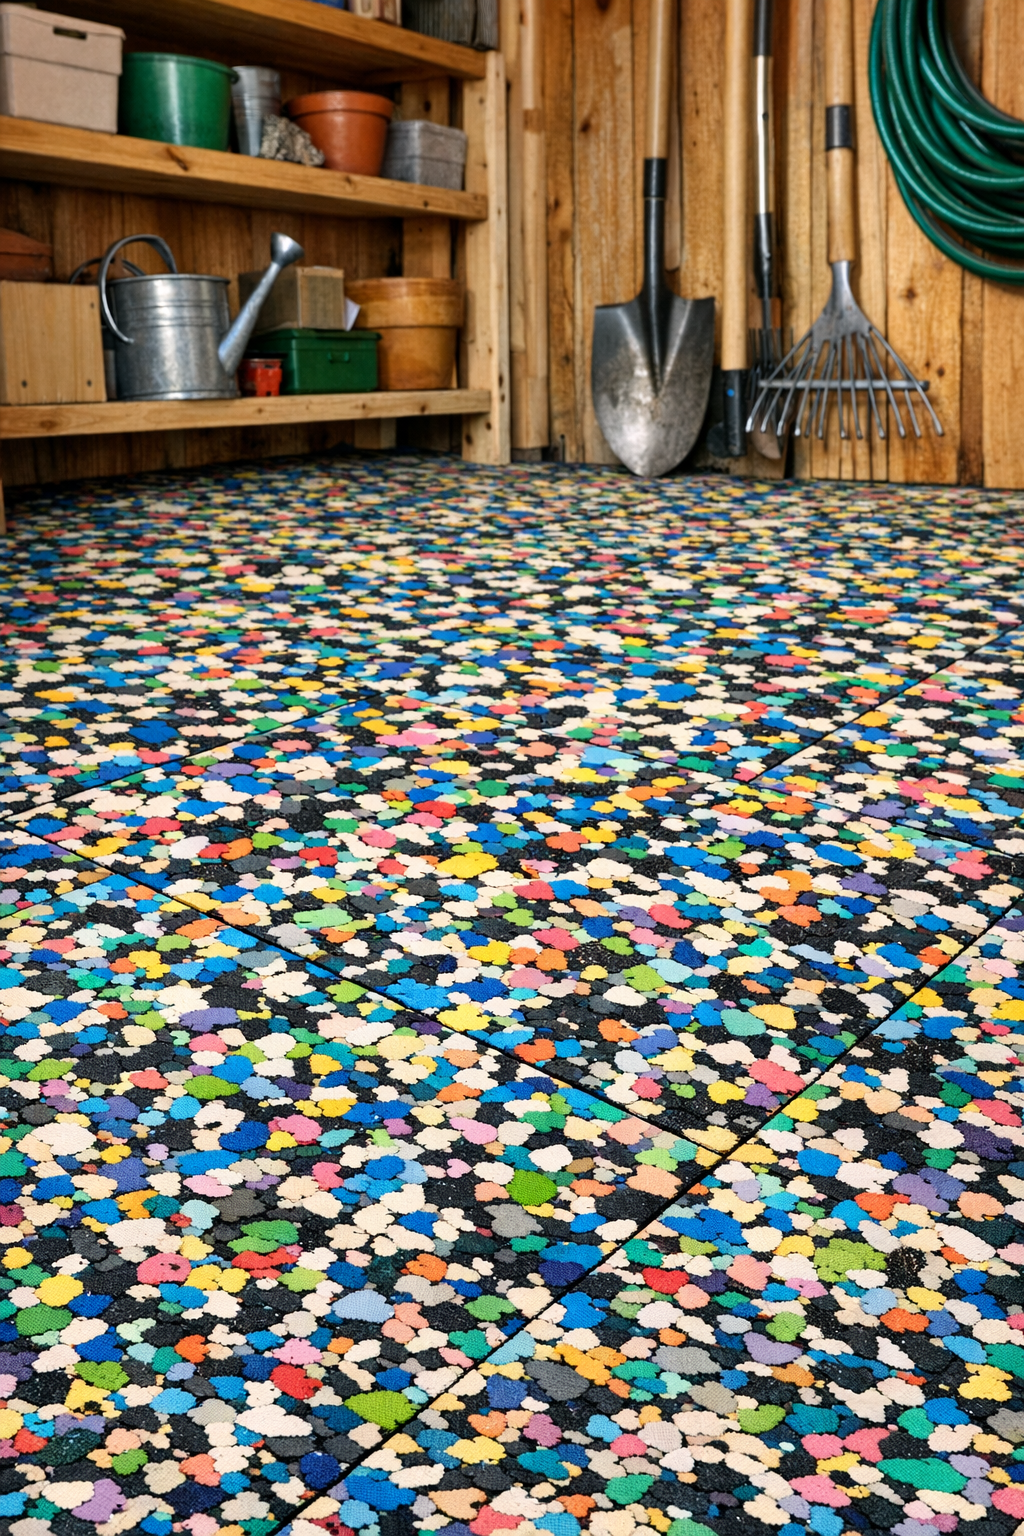
I’m always interested in practical upcycling projects, especially the kind that turn a pile of awkward leftovers into something genuinely useful. This flooring project does exactly that: chopped foam flip flops combined with a basic liquid binder, then baked into dense, impact-resistant panels that work beautifully for a shed floor, potting corner, workshop nook, or utility space.
What I like most here is that the method is straightforward and budget-friendly, but the result feels surprisingly polished. If you need a softer, more forgiving floor underfoot than bare concrete or plywood, this is a clever option for small outbuildings and work zones where durability matters more than formal looks.
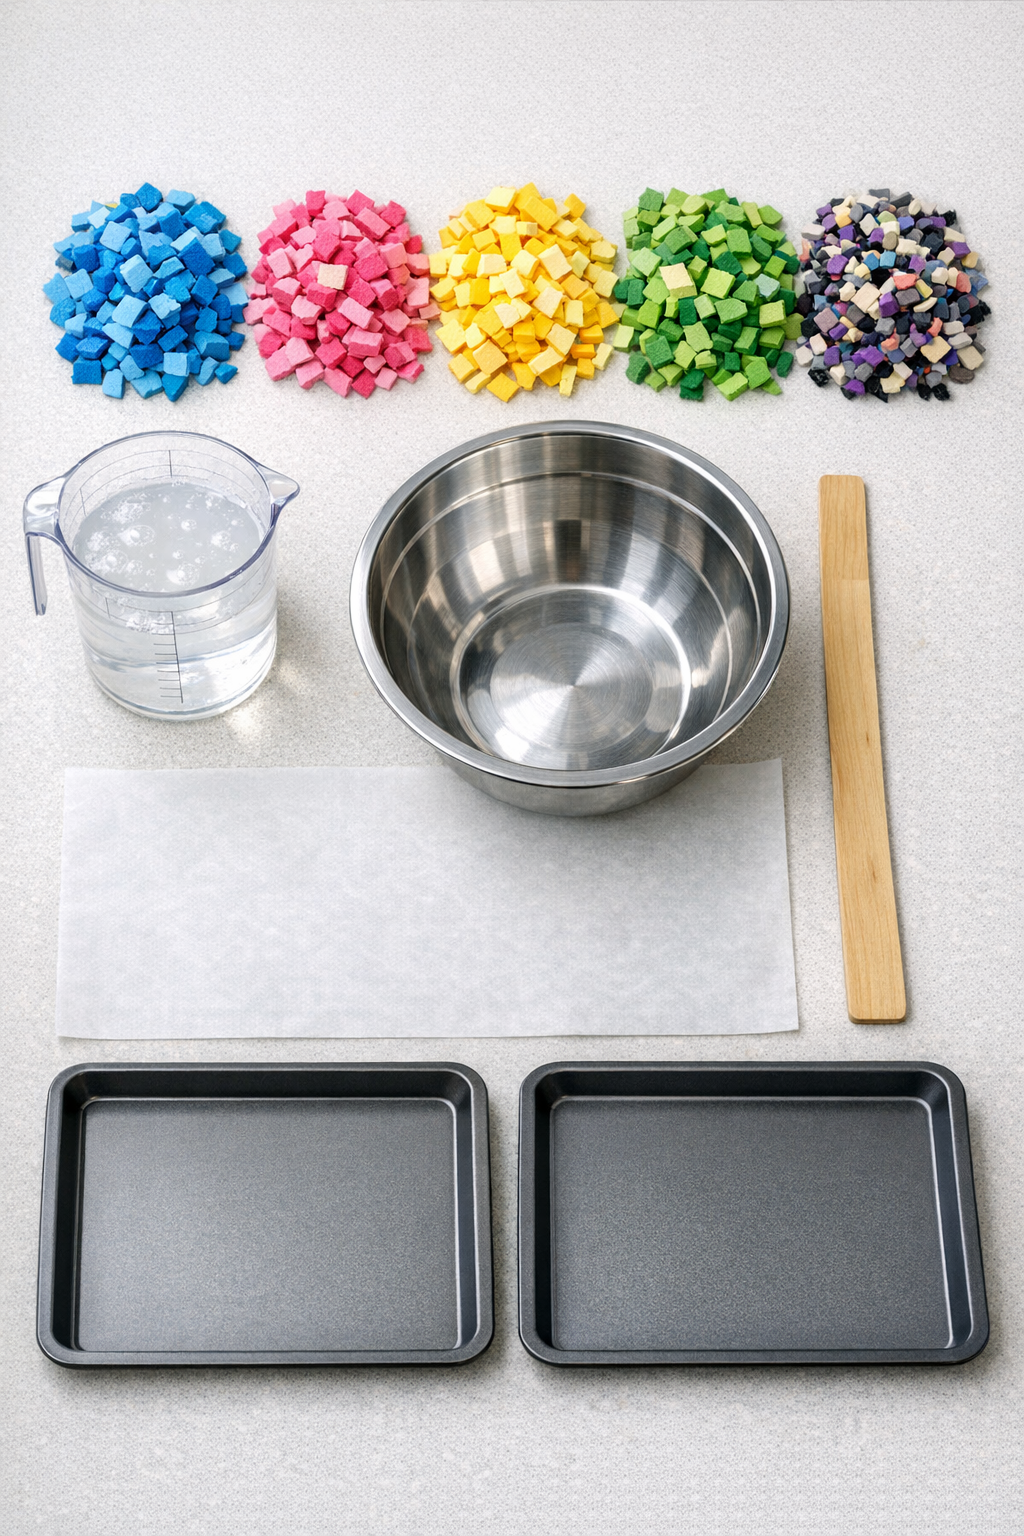
Materials
18 to 24 pairs foam flip flops, straps removed, chopped into 1/4-inch to 1/2-inch pieces
Instructions
1. Remove the straps from all flip flops and cut the foam soles into small, fairly even pieces about 1/4 inch to 1/2 inch wide so they pack together consistently.
2. Line the baking trays with parchment paper and preheat the oven to 250°F so the mixture warms and sets without scorching.
3. Pour the chopped foam into the large mixing tub, add the white glue a cup at a time, and stir until every piece is lightly coated but not swimming in excess liquid.
4. Spread the coated foam mixture evenly into the lined trays, aiming for a panel thickness between 3/4 inch and 1 inch.
5. Press the surface firmly with a flat board, roller, or rolling pin to compact the mixture and eliminate large air gaps.
6. Bake the trays for 35 to 45 minutes, just until the glue sets and the mass firms up; rotate the trays once halfway through for even heating.
7. Remove the trays from the oven and immediately place parchment over the top, then press the panels again with flat weights so they cool dense and level.
8. Let the panels cool completely for at least 2 hours, then peel away the parchment and check that each sheet feels firm, slightly flexible, and well bonded.
9. Measure the shed floor area and trim the panels with a utility knife so they fit tightly, leaving a small 1/8-inch gap at the perimeter if the shed tends to get humid.
10. Dry-fit the panels first, then use construction adhesive on the subfloor if you want a permanent installation, or lay them loose for a removable cushioned floor.
11. Press each panel into place and weight it down for several hours so it sits flat and bonds well if glued.
12. Sweep the finished floor and test it by walking across it and setting down tools or storage bins to confirm the surface feels stable and impact-resistant.
Variations & Tips
For a more uniform look: Sort the flip flop pieces by color before mixing so the finished panels read as striped, terrazzo-like, or tone-on-tone rather than random.
For better compression: Smaller foam pieces make a denser panel; when I want a tougher surface, I keep most pieces closer to 1/4 inch instead of 1/2 inch.
For removable floor tiles: Use smaller tray molds and make individual tiles rather than full panels, which is especially handy in narrow sheds or awkward corners.
For moisture-prone sheds: Install over a dry wood or concrete base and leave a slight perimeter gap so seasonal expansion and trapped dampness are less of an issue.
For easier cutting: Score panels in several light passes with the utility knife instead of trying to slice through in one go; that gives cleaner edges and less tearing.
For maintenance: Sweep regularly and wipe with a barely damp cloth; soaking the surface can weaken the bond over time, so I treat it more like a composite board than a washable rubber mat.