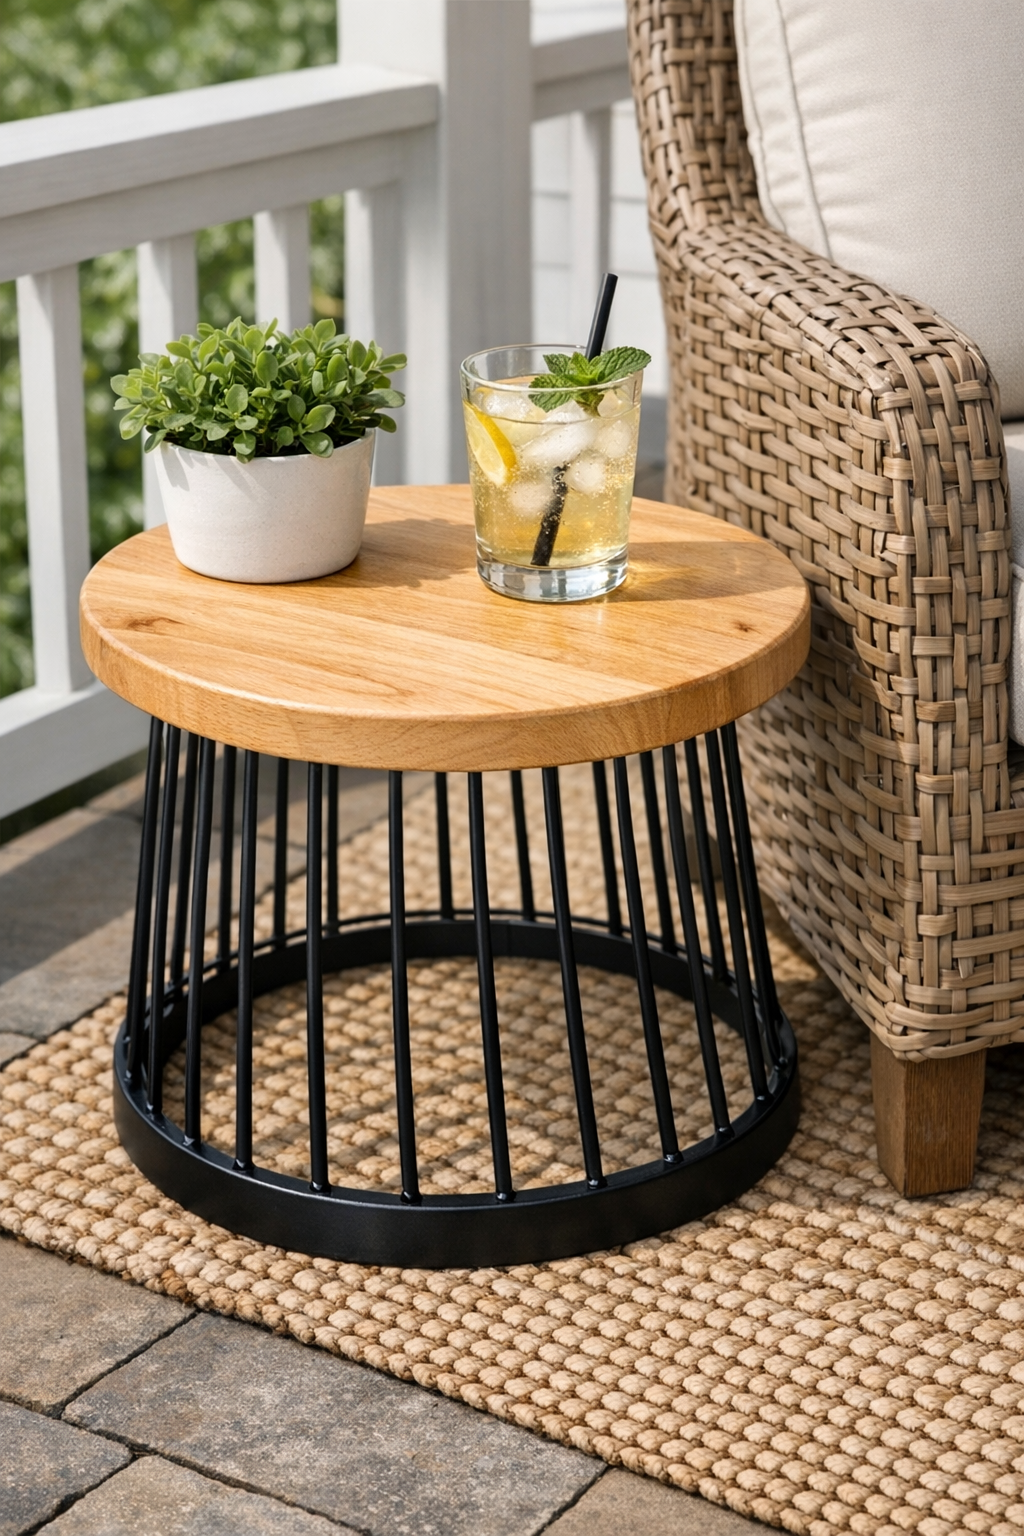
This patio side table is one of those wonderfully simple projects that looks far more polished than the effort it takes to make it. By turning a wire laundry basket upside down and topping it with a round wooden cutting board, you get a lightweight, modern little table that works beautifully on a porch, balcony, or tucked beside an outdoor chair. I love projects like this because they borrow everyday objects and give them a second life without requiring a full workshop.
As someone who spends plenty of time thinking about function, finish, and how things hold up in real life, I appreciate a DIY that is both practical and attractive. This one is especially good for beginners, renters, or anyone who wants a stylish outdoor accent table in an afternoon with just a few supplies and minimal tools.
Materials
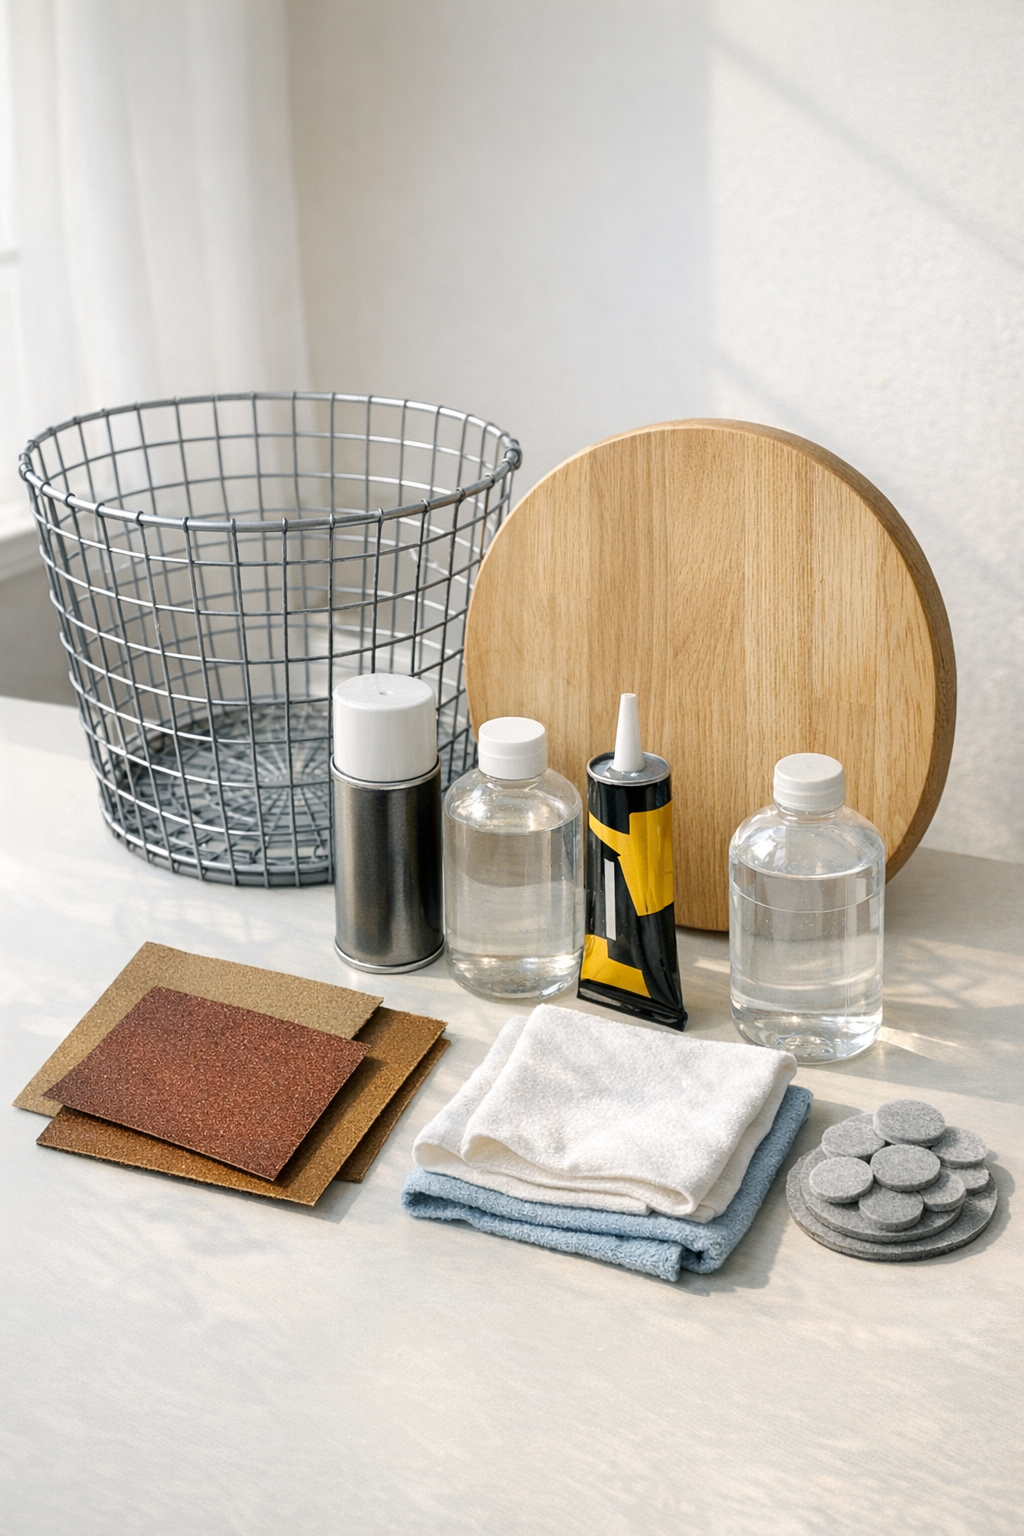
1 wire laundry basket, approximately 15 to 17 inches in diameter and 18 to 22 inches tall
Instructions
1. Set your wire basket upside down on a flat surface and place the cutting board on top to check the fit. The board should overhang evenly by about 1/2 to 1 inch all the way around for the best balance and look.
2. Clean the basket thoroughly with rubbing alcohol or degreaser to remove dust and oils, then let it dry completely. Wipe down the cutting board as well so the adhesive and finish will bond properly.
3. Lightly sand the top side of the cutting board with 120-grit sandpaper, then smooth it with 220-grit. This gives the wood a more finished feel and helps the sealer go on evenly.
4. Spray-paint the upside-down basket in light, even coats if you want to change or refresh the color. Let each coat dry as directed, and add a second coat for solid coverage.
5. Apply exterior clear sealer to the cutting board in thin, even coats, covering the top, sides, and underside edge. Let it dry fully and add a second coat if the board will live on a covered porch or patio.
6. Once the paint and sealer are completely dry, center the cutting board on the flat bottom of the upside-down basket. I like to measure the overhang in a few spots here, because a centered top makes the finished piece look intentional and custom.
7. Apply construction adhesive or epoxy to the basket rim or contact points where the wood will rest, then press the cutting board firmly into place. Hold it steady for a minute, and let the adhesive cure fully according to the package directions before moving the table.
8. Add felt or rubber pads to the bottom edge of the basket so the table sits evenly and does not scratch your porch floor. Check for wobble and adjust pad placement if needed.
9. Let the finished table sit undisturbed until everything is fully cured, then style it with a small plant, candle, or cold drink. It is ready to use as a casual side table once the top feels secure and stable.
Variations & Tips
Color change: Black gives this table a crisp modern look, while white feels airy and coastal. I also like deep green or bronze for porches with lots of plants.
Top options: If you cannot find a cutting board in the right size, use a pre-cut wood round of similar diameter and thickness. Just be sure to sand and seal it well before attaching it.
Outdoor placement: This project does best on a covered porch or screened patio rather than fully exposed to rain and snow. Even sealed wood lasts longer when it is not constantly weathered.
Stability tip: Choose a basket with a wide, level base and sturdy wire spacing so the top has enough contact points. If the basket flexes too much, it will not make a dependable table.
Easy styling idea: Because the basket base is open, the piece stays visually light in a small outdoor space. I find it especially useful next to a lounge chair where a bulky table would feel crowded.
Adhesive reminder: Always check that your adhesive is suitable for both metal and wood. A strong bond is what turns this from a clever idea into a table you can actually use every day.