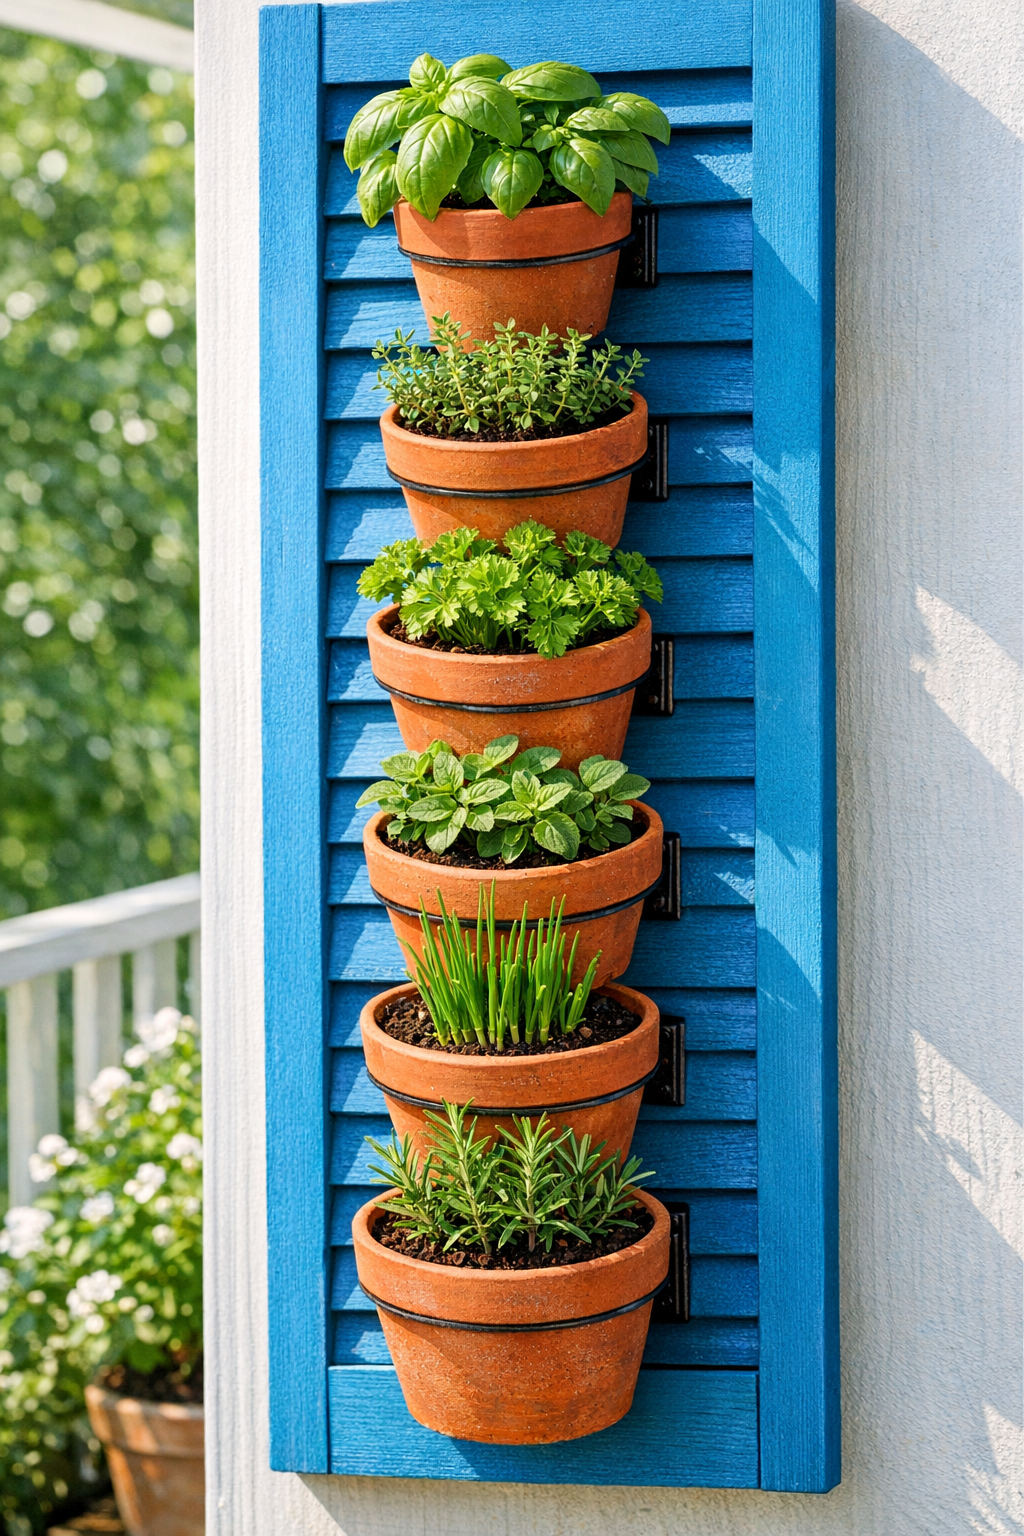
There’s something especially satisfying about turning a humble old shutter into a working little garden. This outdoor spice planter uses painted wooden shutter slats as a vertical base, with miniature terracotta pots screwed right into place so you can grow the kitchen favorites you reach for most. I love projects like this because they make a backyard or porch feel both useful and welcoming, the sort of thing that looks charming near the back door and earns its keep all season long.
Out here in the Midwest, we’ve always made the most of what we had on hand, and this project has that same practical spirit. It’s a good weekend DIY for anyone who wants a small-space herb or spice garden, whether you’re dressing up a patio, adding life to a fence line, or making it easier to snip fresh basil, thyme, and oregano before supper.
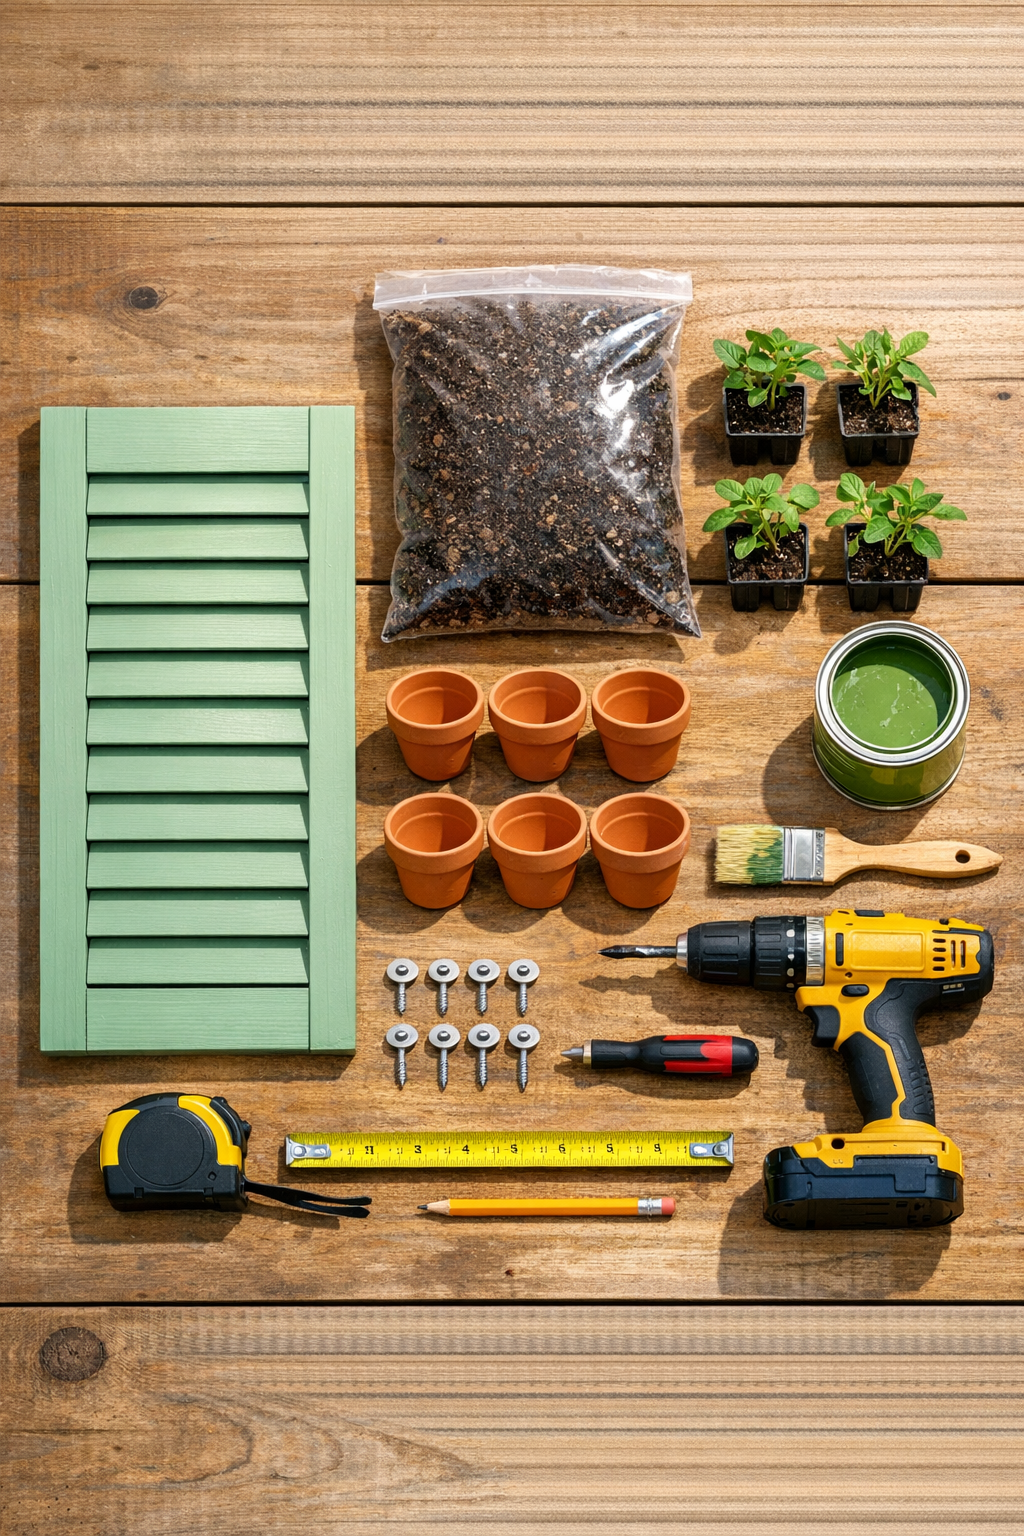
Materials
1 painted wooden shutter, approximately 11 to 14 inches wide x 36 to 48 inches tall
Instructions
1. Clean the shutter well and let it dry completely, then lightly sand any rough spots so the paint will adhere and the finish feels smooth to the touch.
2. Apply primer if needed, then paint the shutter with 1 to 2 coats of exterior paint, letting each coat dry fully before moving on.
3. Arrange the terracotta pots on the shutter before drilling, spacing them evenly down the center or slightly staggered so each plant has room to grow without crowding.
4. Mark one screw point for each pot, placing it high enough on the pot’s back side that the washer and screw will hold the rim area snugly against a slat.
5. Drill a pilot hole through each marked shutter slat location to make attaching the pots easier and to help prevent the wood from splitting.
6. Hold each pot in place and drive a galvanized screw with a washer through the drainage hole or upper back area of the pot into the shutter until the pot feels secure but not overly tight.
7. Add your hanging hardware to the back of the shutter, or fasten the shutter directly to a fence, post, or exterior wall where it will get 6 to 8 hours of sun.
8. If you like, place a coffee filter or small square of landscape fabric inside each pot, then fill each one about two-thirds full with potting mix.
9. Gently remove the herb seedlings from their nursery pots, loosen the roots lightly, and plant one herb in each terracotta pot.
10. Add more potting mix around each plant, press gently to settle the soil, and water thoroughly until excess drains out the bottom.
11. Check the planter after watering to make sure every pot is still snug, then place it in its final outdoor spot and rotate or trim herbs as they grow.
Variations & Tips
Color choice: I think soft white, sage green, barn red, or faded blue all suit this project beautifully, especially if you want that old-fashioned garden look.
Best herbs to grow: Choose compact herbs that don’t mind smaller quarters, such as thyme, oregano, chives, or parsley; basil works too, but it may need more frequent pinching and watering.
Weather protection: If your planter will sit in driving rain, add a clear outdoor sealer to the painted shutter after the paint has cured to help it last longer.
Mounting tip: Once the pots are filled with soil and watered, this piece gets heavier than it looks, so I always recommend anchoring it into something sturdy rather than relying on a flimsy nail.
Pot safety: Terracotta can crack if you over-tighten the screw, so tighten just until the pot is held firmly and no more.
Watering habit: Small terracotta pots dry out quickly in summer heat, and on those hot July afternoons around here, I often check them morning and evening.
Make it your own: If you have room, you can add a small metal hook at the bottom of the shutter for garden snips, or tuck in plant markers if you like a tidier look.