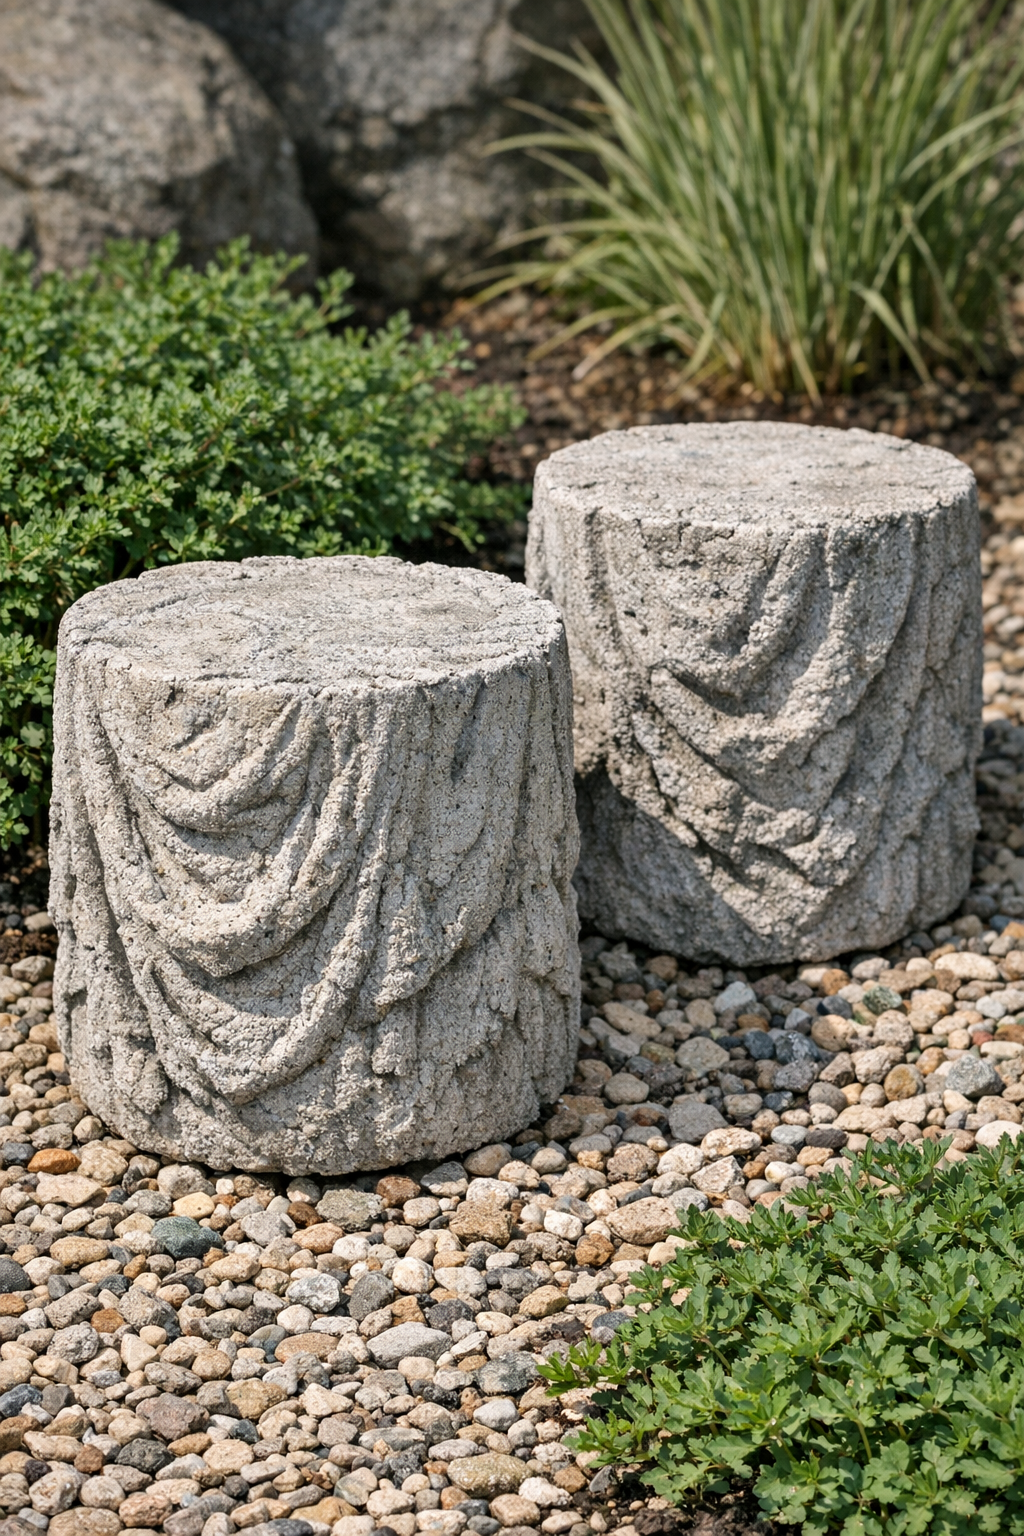
I love a project that looks like it came from a garden boutique but starts with the kind of humble materials most of us would never think twice about. These heavy textured yard blocks are exactly that sort of make: simple, inexpensive, and surprisingly sculptural once they cure. By pouring cement into styrofoam bait buckets and using one clever texture-maker, you can create chunky decorative blocks that look aged, substantial, and custom-made for a flower bed, porch corner, or tucked beside a walkway.
What makes this project especially satisfying is that it does not require fancy molds or advanced concrete experience. If you can mix cement to a thick batter-like consistency and press in texture, you can make these. I’m always drawn to outdoor pieces with a little visual weight and history to them, and this is one of those easy weekend projects that delivers both.
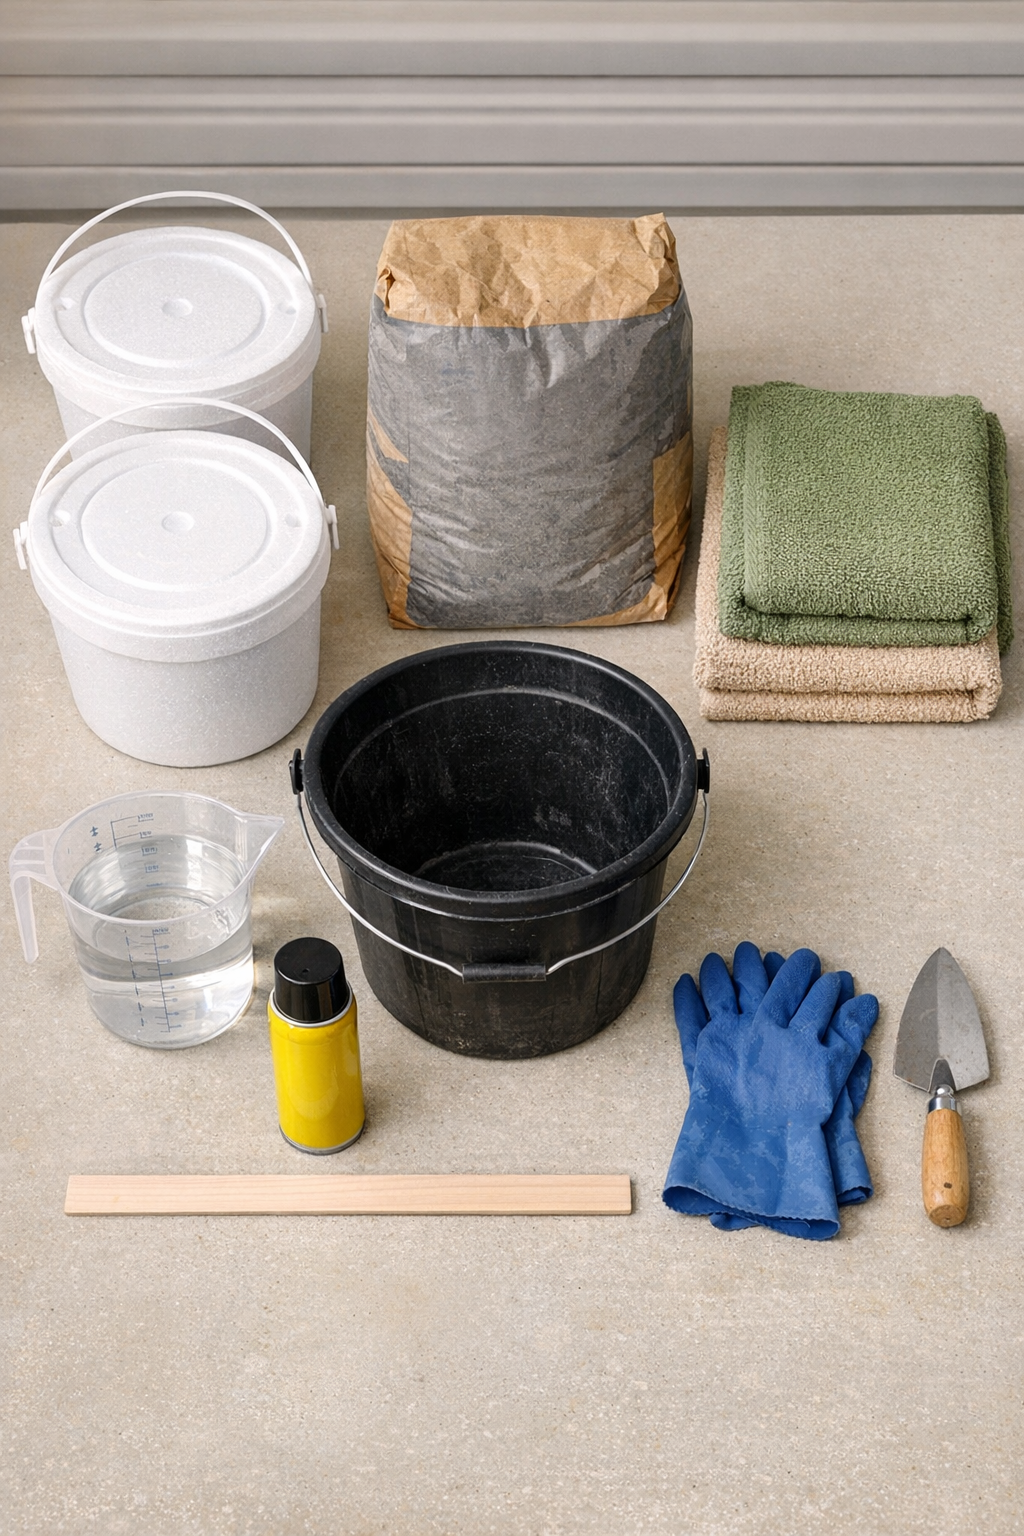
Materials
2 styrofoam bait buckets, 1 to 1.5 gallon size each
Instructions
1. Set your drop cloth on a flat surface outdoors or in a well-ventilated work area, and place the two styrofoam bait buckets on top. Lightly coat the inside of each bucket with cooking spray or a thin film of oil so the cured blocks release more easily.
2. Cut or fold the towels so each one fits down into a bait bucket with some bunching and raised ridges. This towel is the secret item that creates the deep, irregular texture on the finished cement blocks.
3. In the mixing bucket, combine the cement mix with water a little at a time until it reaches a thick, scoopable consistency, like stiff oatmeal or brownie batter. Mix thoroughly so there are no dry pockets.
4. Scoop cement into the first lined bucket, pressing it firmly into the towel folds and around the sides to capture the texture. Fill the bucket to your desired height, leaving about 1 inch at the top if you want a cleaner edge.
5. Repeat with the second bucket, packing the cement tightly and tapping the bucket sides gently to settle the mix. Smooth only the exposed top surface with a trowel; the sides should stay rough and natural.
6. Let the buckets sit undisturbed for 24 to 48 hours, depending on temperature and humidity, until the cement is hard to the touch. If the weather is hot and dry, lightly mist the tops once or twice during the first day to slow cracking.
7. Peel away the styrofoam bucket carefully, then pull off the towel to reveal the heavy texture underneath. If small bits of foam or fabric cling to the surface, brush them away once the block has cured a bit more.
8. Cure the blocks for another 3 to 5 days before placing them in the yard, especially if they are thick. Once fully set, use them as sculptural garden accents, risers for planters, or stacked decorative blocks near a path.
Variations & Tips
Different towel textures: Terry cloth gives a bold, rugged surface, while thinner woven towels create a subtler stone-like pattern. I like mixing the two when I want the blocks to look less uniform.
More height or weight: For taller pieces, use deeper buckets and mix extra cement, but be prepared for significantly more weight. I always make sure I know where a block will live before I move it into place.
Aged finish: If you want an older garden look, let the blocks weather naturally outdoors rather than painting them right away. Concrete often develops more character after a few weeks in the elements.
Cleaner tops: For a more polished result, tap the filled molds a few extra times and smooth the top with a damp trowel. That gives you contrast between the rough sides and the flatter top surface.
Placement tip: Set these on compacted gravel, pavers, or firm soil so they stay level. Heavy concrete pieces can tilt over time if placed directly on soft mulch.
Safety note: Wear gloves when handling wet cement because it can irritate skin. I also recommend mixing slowly to keep cement dust down, especially on breezy days.