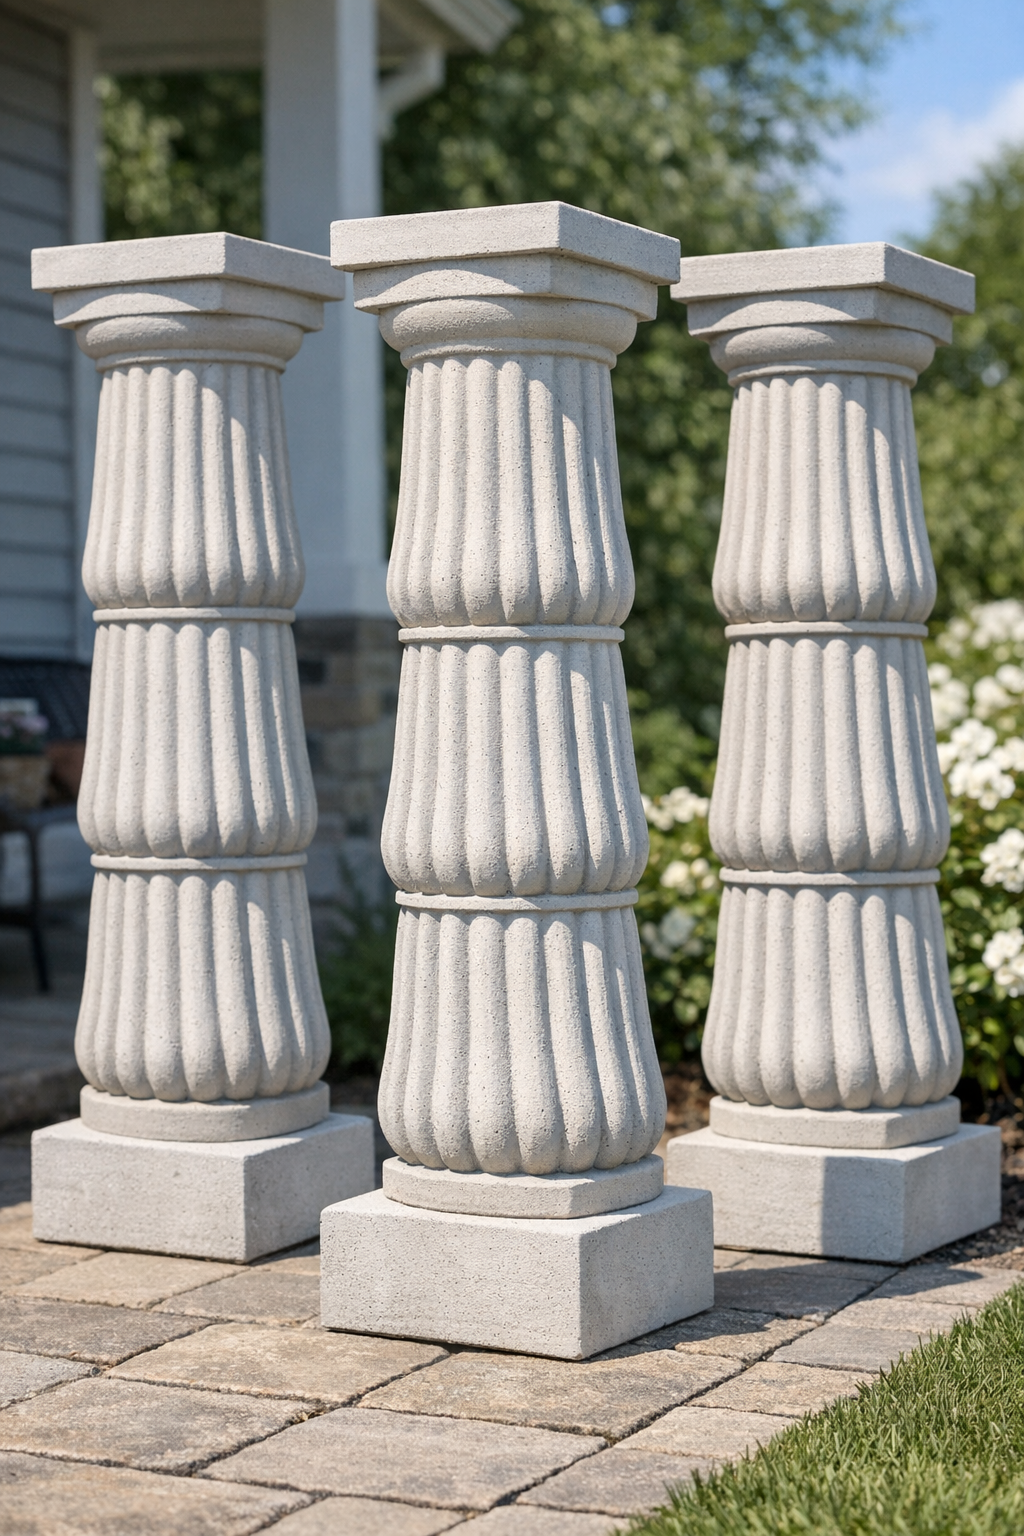
I love a project that turns everyday recycling into something that looks far more expensive than it is, and these heavy fluted yard columns absolutely do that. By stacking cement-filled cut plastic milk jugs with two simple extras, you can make substantial outdoor columns that look classic and architectural without needing fancy molds or complicated woodworking.
This is a great weekend build if you want to dress up a porch, frame a walkway, or create a sturdy base for lanterns, planters, or seasonal décor. As someone who is usually squeezing projects in between workdays and dinner prep, I really appreciate that this one is repetitive in the best way: once you make the first section, the rest goes quickly.
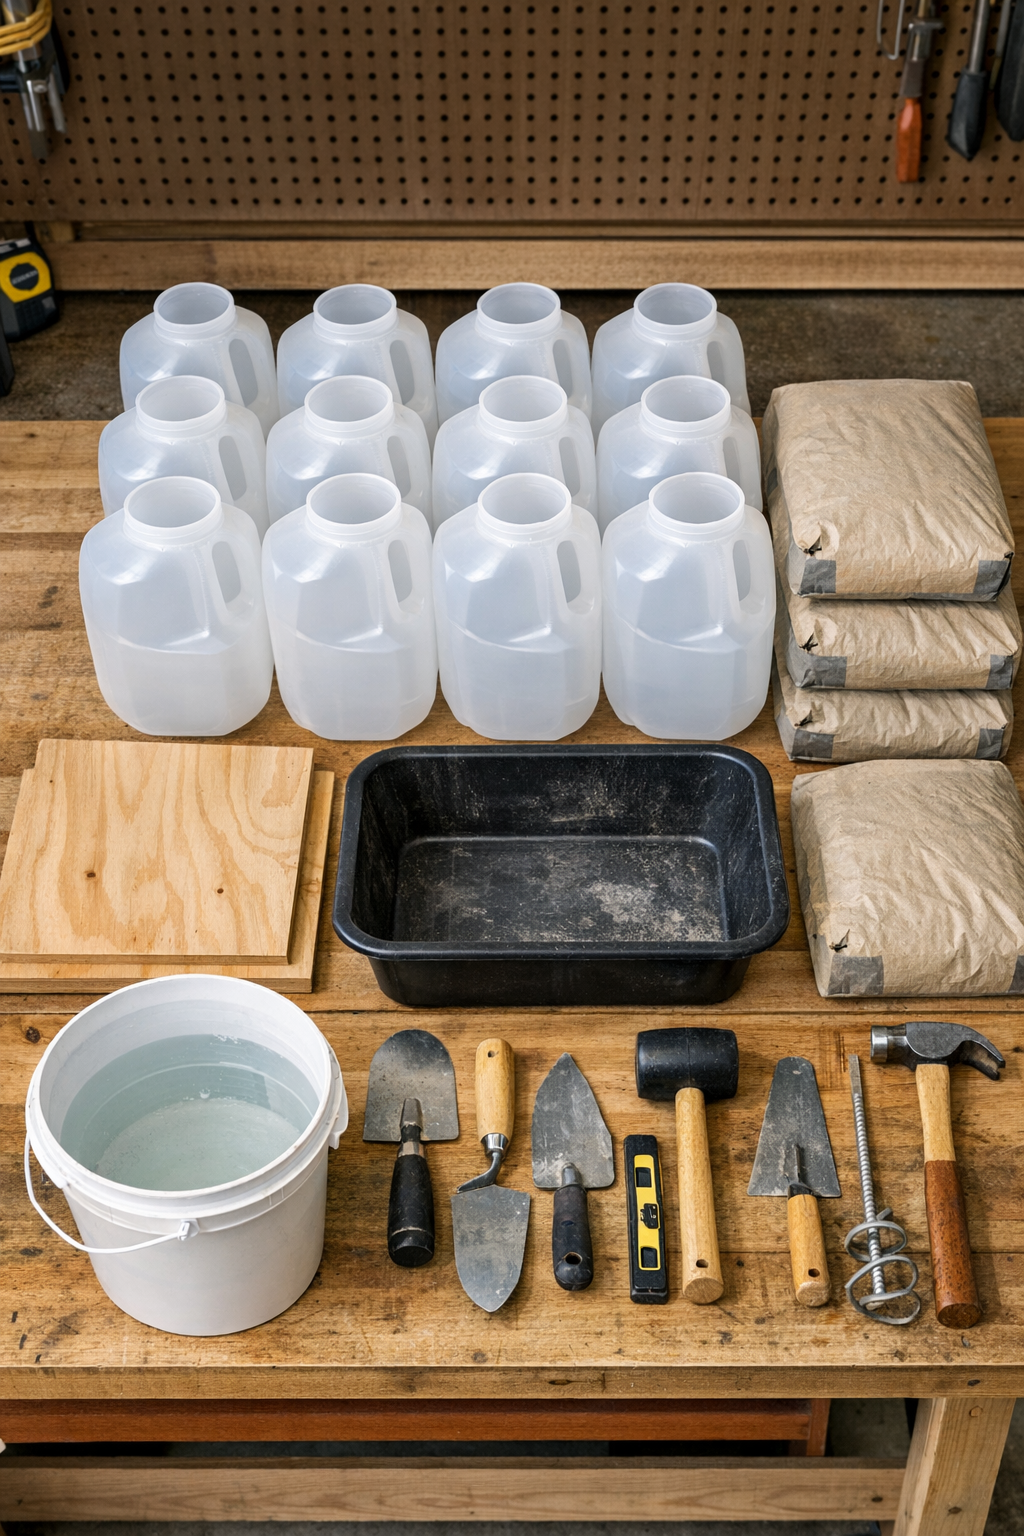
Materials
12 clean plastic gallon milk jugs, labels removed
Instructions
1. Rinse the milk jugs thoroughly, remove labels, and cut the tops off each jug at the shoulder so every piece is the same height. Try to keep the cut as level as possible, because uniform sections stack much more neatly.
2. Set your tarp on a flat work surface and place the cut jugs upright so they are ready to fill. If you are working alone like I usually do, prep all the molds first so the mixing stage feels less rushed.
3. Mix the concrete in a tub according to the package directions until it reaches a thick, scoopable consistency similar to firm oatmeal. Work in small batches so it does not begin setting before the jugs are filled.
4. Fill each cut jug with concrete, tapping the sides several times to release trapped air and settle the mix into the fluted grooves. Smooth the top of each filled section as evenly as you can.
5. Let the concrete cure fully, following the bag directions, until the pieces are hard enough to handle without chipping. Overnight is usually the easiest schedule for me, especially if I am fitting this around a busy week.
6. Peel or cut away the plastic jugs to release the concrete forms, then sand any rough edges or thin flashing on the tops and bottoms. Keep the sanding light so you preserve the fluted shape made by the jug sides.
7. Arrange the concrete sections in a straight vertical stack to decide on the final column height and to choose the best-looking pieces for the top and front. Four sections make a nice medium-height yard column, and three identical columns from twelve forms create a balanced set.
8. Run exterior construction adhesive between each concrete section and stack them carefully, checking from all sides that the column stays centered. Press each piece down firmly and wipe away any excess adhesive right away.
9. Glue one wood board to the bottom as the base and the second board to the top as a cap, centering both boards so the overhang matches on all sides. This simple step makes the whole project look intentional and gives it that finished column shape.
10. Fill any visible seams between the stacked sections and where the concrete meets the boards with paintable exterior caulk. Smooth the bead with a damp finger so the transitions look clean once painted.
11. Prime the entire column, including the wood top and base, and let it dry completely. Apply exterior paint in two thin coats for an even finish that helps the mixed materials read as one solid piece.
12. Let the paint cure, then move the column into place and add optional felt or rubber pads under the base if it will sit on a porch or patio. If you are making a matching set, space them evenly for the strongest visual impact.
Variations & Tips
Taller columns: Use five filled jug sections per column instead of four if you want more height, but make sure the base board is wide enough to keep the piece stable.
Different finishes: A stone gray, creamy white, or charcoal exterior paint all look great here. I especially like a matte finish because it helps the columns resemble cast stone.
For planters or lanterns: Make the top board slightly larger, around 18 x 18 inches, if you want more surface area for displaying a planter, statue, or seasonal lantern.
Safer moving: These get heavy fast, which is great once they are in the yard, but not so fun during setup. Build them near their final location when possible, or move each section separately and assemble on site.
Smoother seams: If the stacked joints are still obvious after caulking, add a second thin pass and sand lightly once dry before priming.
Weather resistance: For the longest life outdoors, use exterior-rated adhesive, primer, caulk, and paint on every exposed surface, especially the wood cap and base.