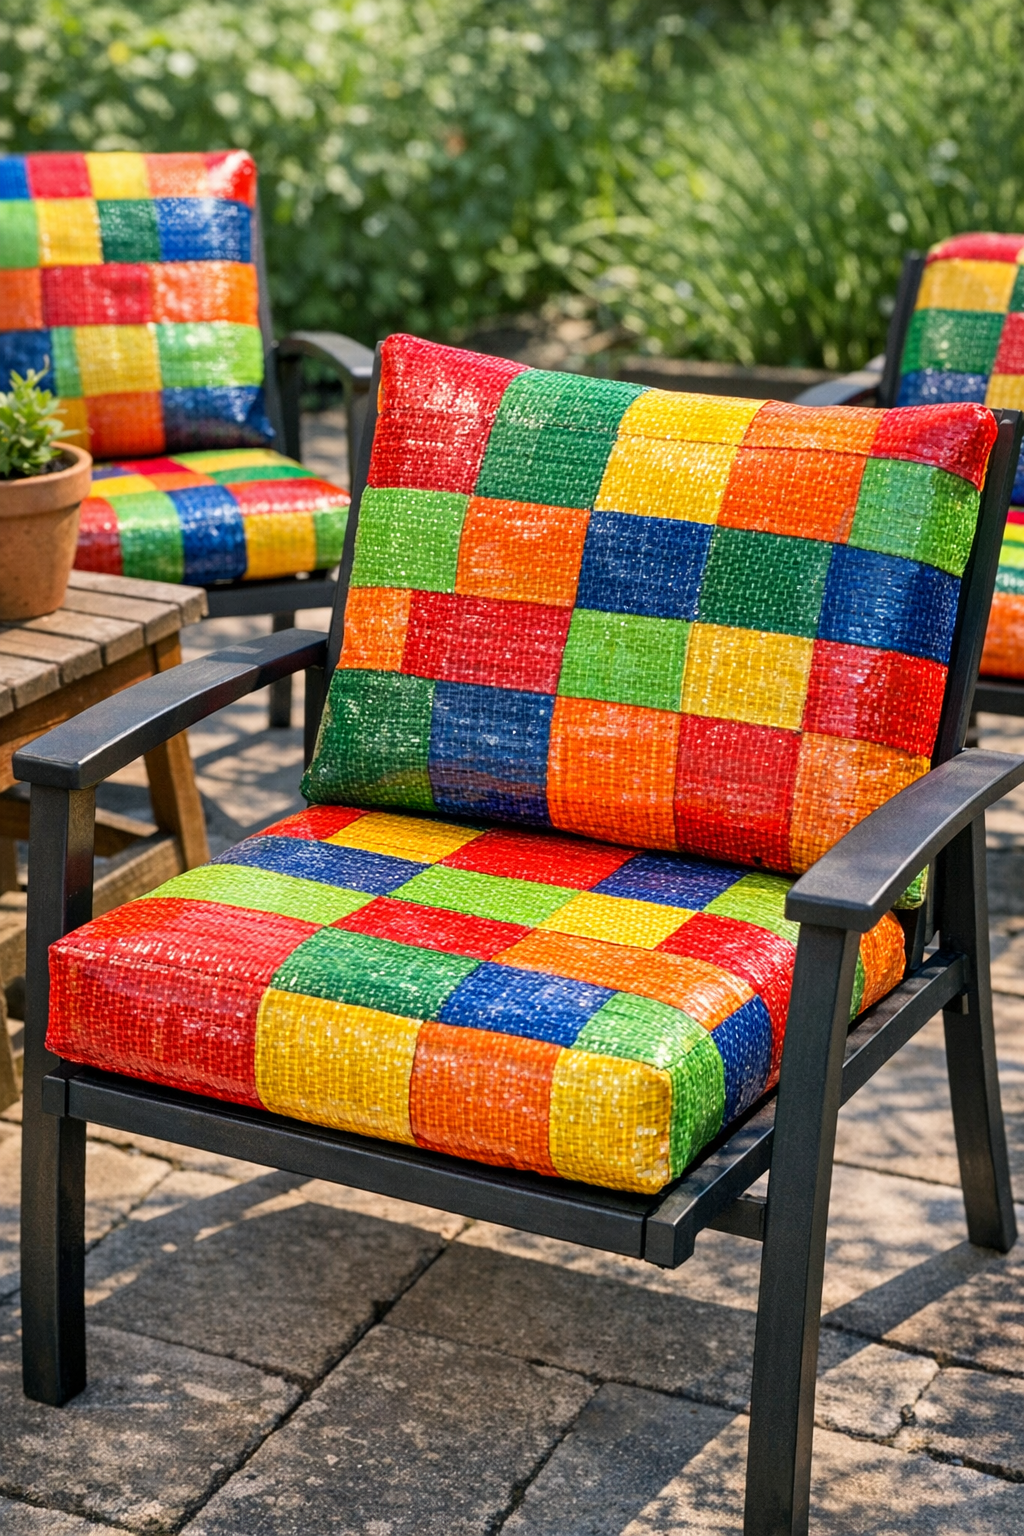
I’m always a little too excited when a piece of packaging turns out to be useful instead of heading straight to the trash, and plastic mesh fruit bags are one of my favorite examples. When you layer and gently iron them between fabric sheets, they fuse into a surprisingly sturdy, springy cushion insert that works beautifully for casual outdoor patio seating.
This project is great if you want a budget-friendly cushion for a bench, porch chair, or patio dining seat without buying foam inserts. I like it for busy households because the supplies are simple, the build is fast, and the finished cushions hold up better than you’d expect for something made from produce bags.
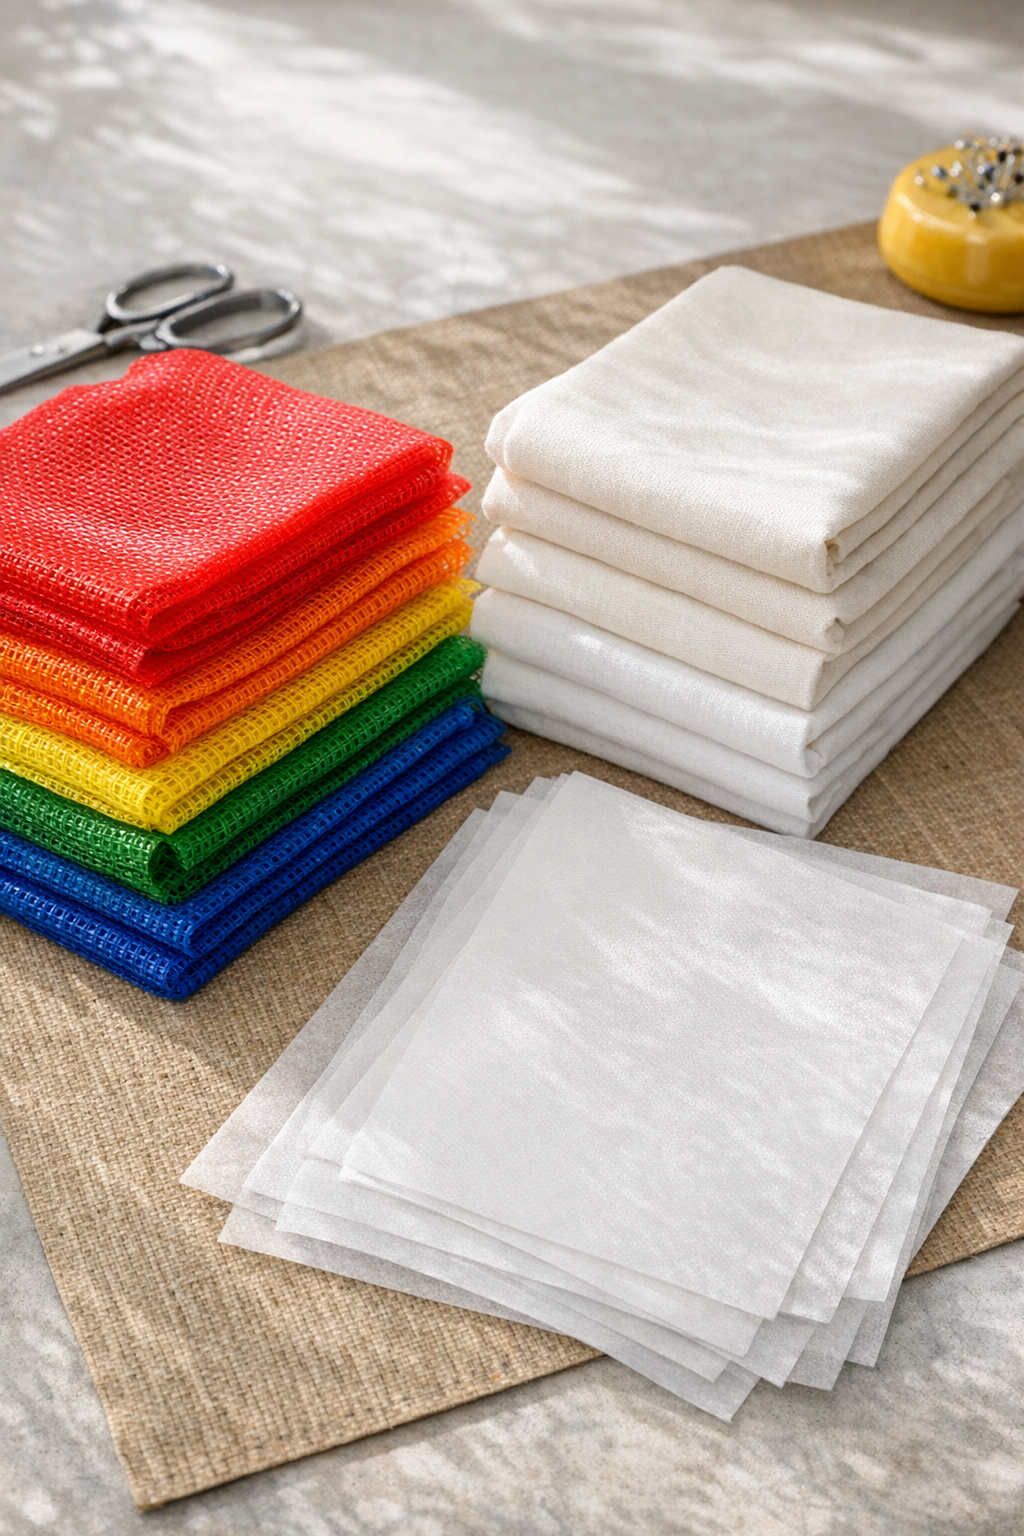
Materials
Instructions
1. Wash and fully dry the plastic mesh fruit bags, then cut away any hard seams, tags, drawstrings, or closures so you are left with flexible mesh only.
2. Open each bag into the flattest shape possible and stack the mesh layers into a rectangle slightly larger than your finished cushion size, using about 10 to 12 bags per cushion pad thickness.
3. Place one cotton pressing sheet on your ironing surface, lay 2 fusible bonding sheets on top, then center the stacked mesh over them and cover with the remaining 2 bonding sheets.
4. Top everything with the second cotton pressing sheet so the plastic is completely covered before any heat touches it.
5. Set your iron to medium heat with steam off, then press in short 5 to 8 second sections across the entire surface without sliding the iron, lifting and lowering as you go.
6. Let the panel cool for 1 minute, then peel back one corner of the cotton sheet and check whether the mesh has bonded into one flexible pad; if needed, cover it again and press a few more seconds per section.
7. Trim the fused panel to your desired cushion size, such as 15 x 15 inches for a standard patio dining chair, rounding the corners slightly if you want a softer look.
8. For a thicker patio cushion, make a second fused panel the same size and place it directly on top of the first, then cover and lightly press again to tack the layers together.
9. Allow the finished cushion insert to cool completely and flatten under a few books or a cutting board for 15 to 20 minutes so it sets evenly.
10. Use the finished pad as-is on covered patio furniture, or slide it inside a removable outdoor cushion cover if you want extra comfort and a more polished look.
Variations & Tips
For thicker cushions: Add more mesh bags per layer or fuse two finished pads together. I’ve found this works especially well for metal patio chairs that need a little more softness.
For a cleaner shape: Put a heavy book on the warm fused pad while it cools. That little extra step helps keep the edges flatter and more even.
For heat safety: Always keep the plastic fully covered with cotton while ironing, and use medium heat instead of high. The goal is to fuse the mesh, not melt it into a sticky mess.
For outdoor use: These inserts do best in covered patio spaces or on furniture that gets brought in during heavy rain. They’re durable, but I still treat handmade pieces a little nicer so they last longer.
For custom sizing: Measure your chair seat first and make the fused panel about 1 inch smaller in both directions if you plan to add a fabric cover. That makes assembly easier and keeps the cover from looking overstuffed.
For color mixing: If your fruit bags are different colors, alternate the layers for a speckled look. It’s a fun way to use what you have, and honestly, it reminds me of the kind of practical kitchen-and-patio project I can squeeze in on a busy weeknight.