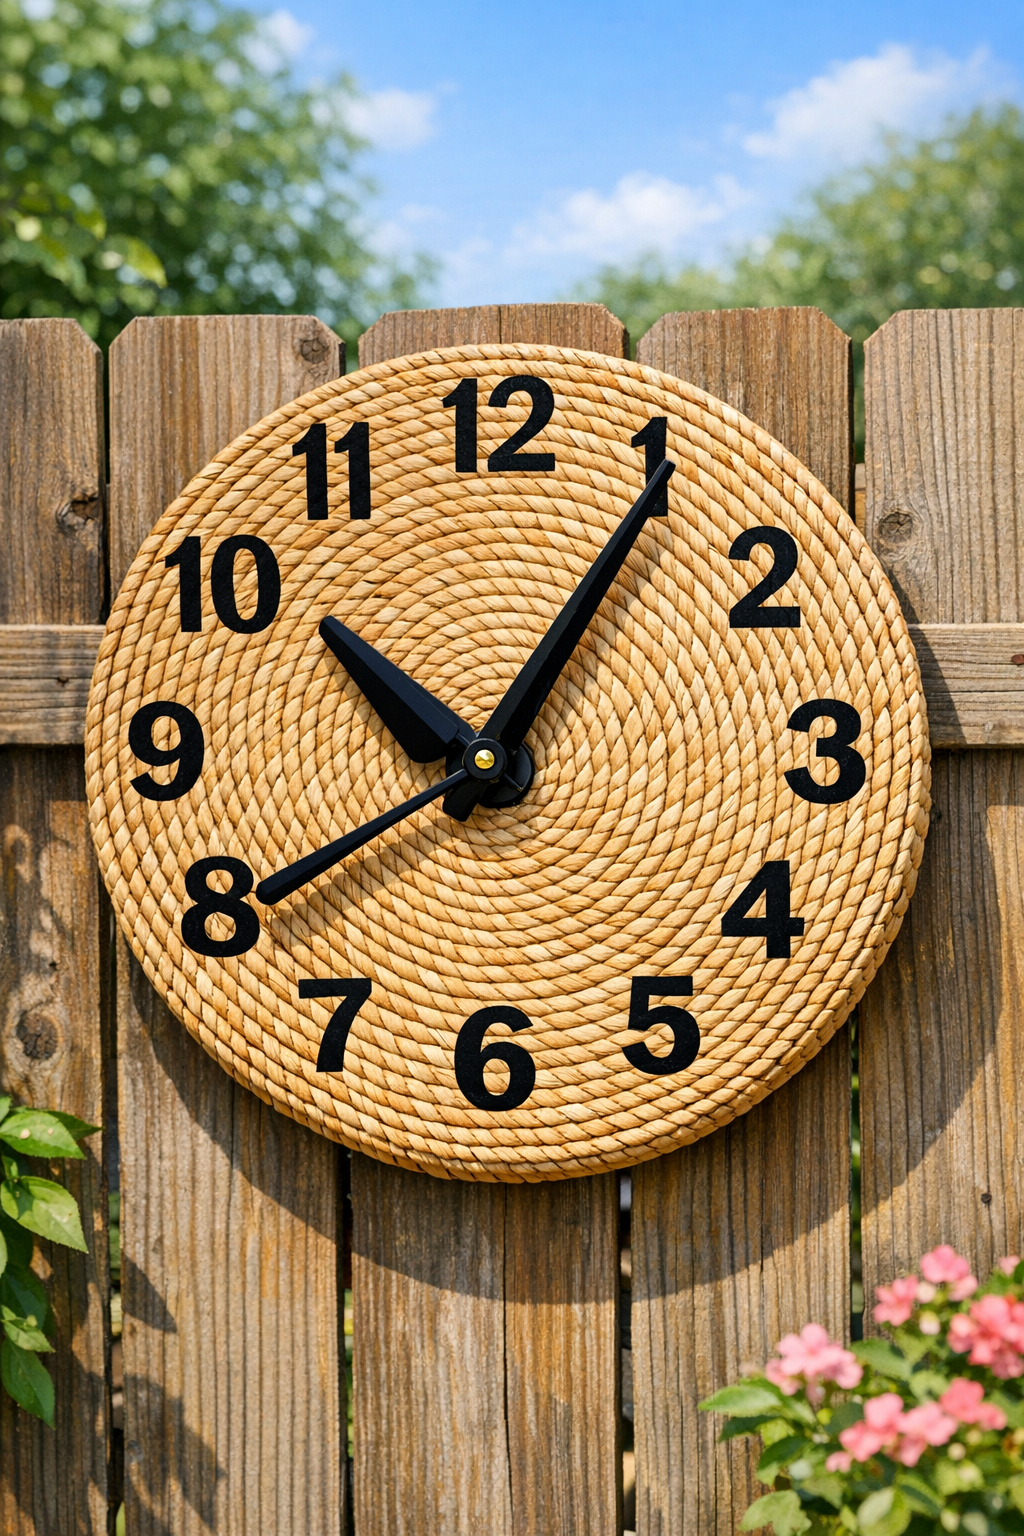
This backyard project turns an ordinary woven basket lid into a charming outdoor clock you can hang right on a fence. I love DIYs like this because they add personality to a space without feeling fussy, and the natural texture of the basket gives the whole piece a warm, relaxed look that fits beautifully in a garden or patio corner.
As a parent, I’m always drawn to projects that make outdoor spaces feel a little more inviting for family dinners, weekend cookouts, and those evenings when everyone lingers outside a bit longer. This one is especially nice for beginners because the build is simple, the supplies are manageable, and the finished clock looks far more expensive than it is.
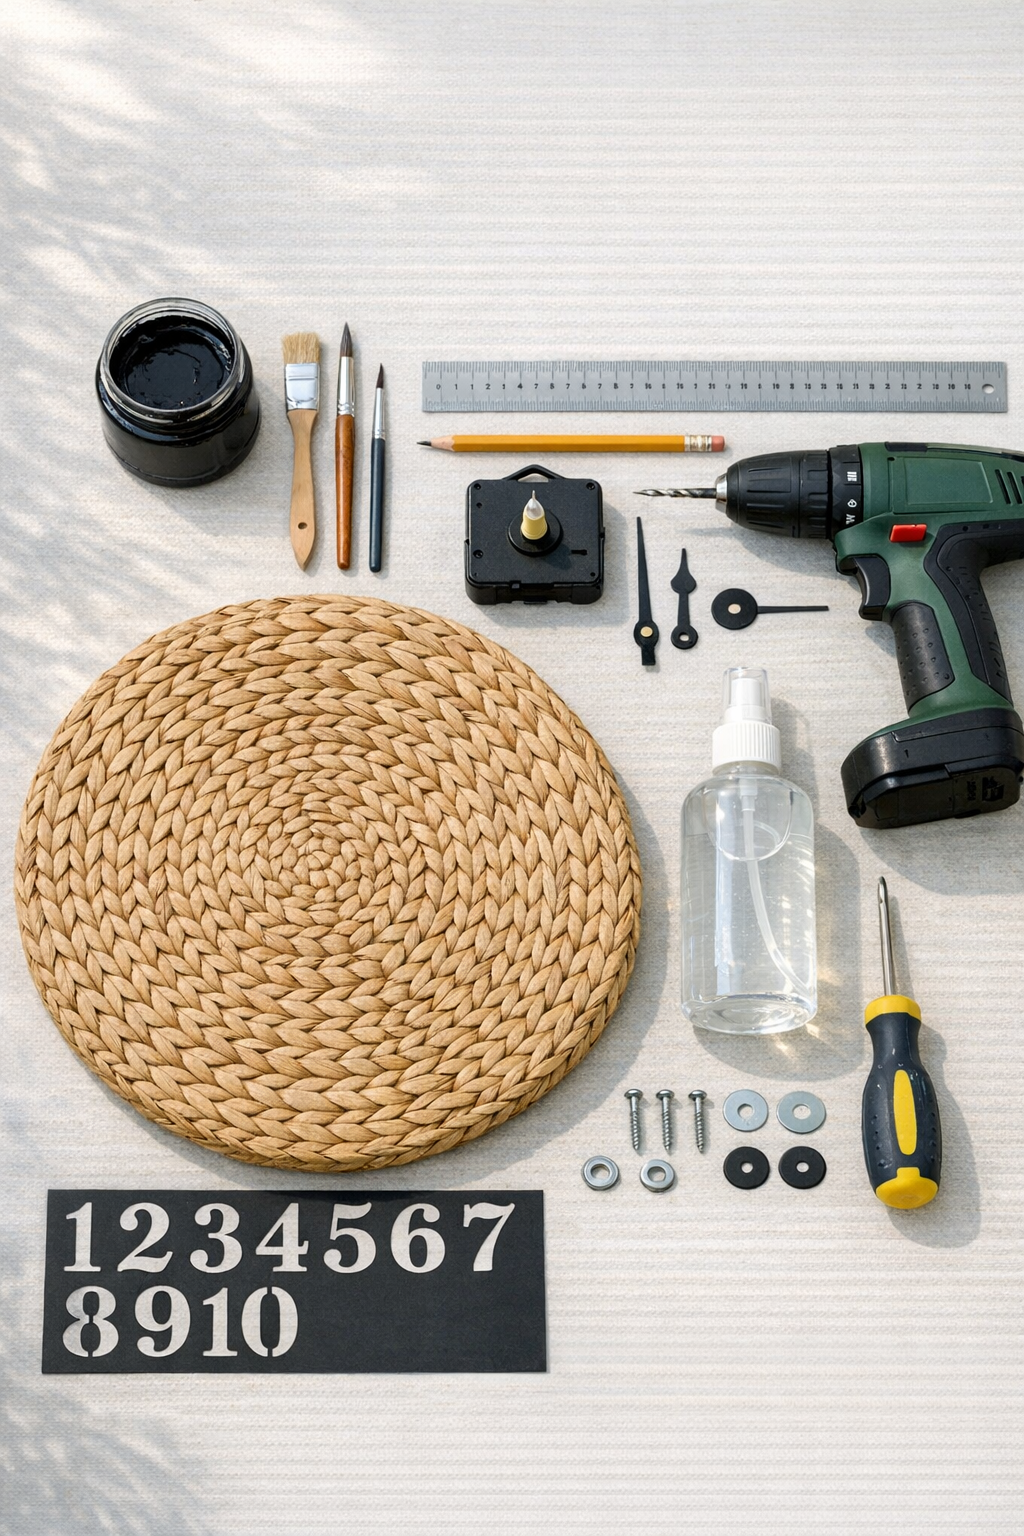
Materials
Instructions
1. Wipe the basket lid with a soft dry cloth to remove dust, loose fibers, and any dirt so the paint and sealer will adhere well.
2. Find the center of the lid by measuring across it in two directions and marking the middle point lightly with pencil.
3. Use the ruler and pencil to lightly mark the 12, 3, 6, and 9 positions first, keeping each mark the same distance from the center so the clock face looks balanced.
4. Fill in the remaining number positions between those marks, checking spacing as you go; I like to step back for a quick look before painting because it is much easier to adjust pencil lines than wet paint.
5. Place the number stencils over each mark and paint the numbers 1 through 12 with black outdoor paint, using a small amount of paint to keep the edges crisp on the woven surface.
6. Let the numbers dry completely, then touch up any thin spots or uneven edges with the small round brush.
7. Set the lid on the scrap wood and drill a hole through the center mark, using steady pressure so the weave stays as neat as possible.
8. Insert the clock mechanism shaft through the back of the lid, then secure it on the front with the washer and nut that came with the kit.
9. Press the clock hands on in the correct order according to the kit directions, making sure they do not rub against each other or the woven surface.
10. Brush on a thin, even coat of clear outdoor sealer over the front and edges, avoiding heavy buildup around the mechanism and hands.
11. Let the sealer dry fully, then add a second light coat if your basket will hang in a very exposed area.
12. Attach a hanger to the back or plan direct mounting points through sturdy parts of the woven frame, then insert the battery and set the correct time.
13. Mount the clock securely to the fence with exterior screws and washers, checking that it hangs level and sits firmly without wobbling.
Variations & Tips
For a bolder look: Use white or navy paint instead of black if your fence is dark and you want the numbers to stand out from a distance.
For picky decorators: If everyone in the family has different style opinions like they do at my house, keep the basket natural and only change the number style; block numbers feel modern, while slightly curved stencil numbers feel more cottage-like.
If the weave is uneven: Dab the paint on lightly instead of brushing heavily, because too much paint can bleed into the texture and blur the number edges.
For better weather resistance: Hang the clock in a covered patio or under an overhang if possible, since woven natural fibers last longer with some protection from constant rain and harsh sun.
If you cannot find a basket lid: A shallow round woven tray works beautifully too, as long as the center area is stable enough to hold the clock mechanism.
To make it easier to read: Paint small dot markers for the minute positions at 12, 3, 6, and 9, or all the way around if you want a more traditional clock face.
Before mounting outdoors: Test the clock indoors for a full day to make sure the hands move freely and keep time correctly before you put it up on the fence.