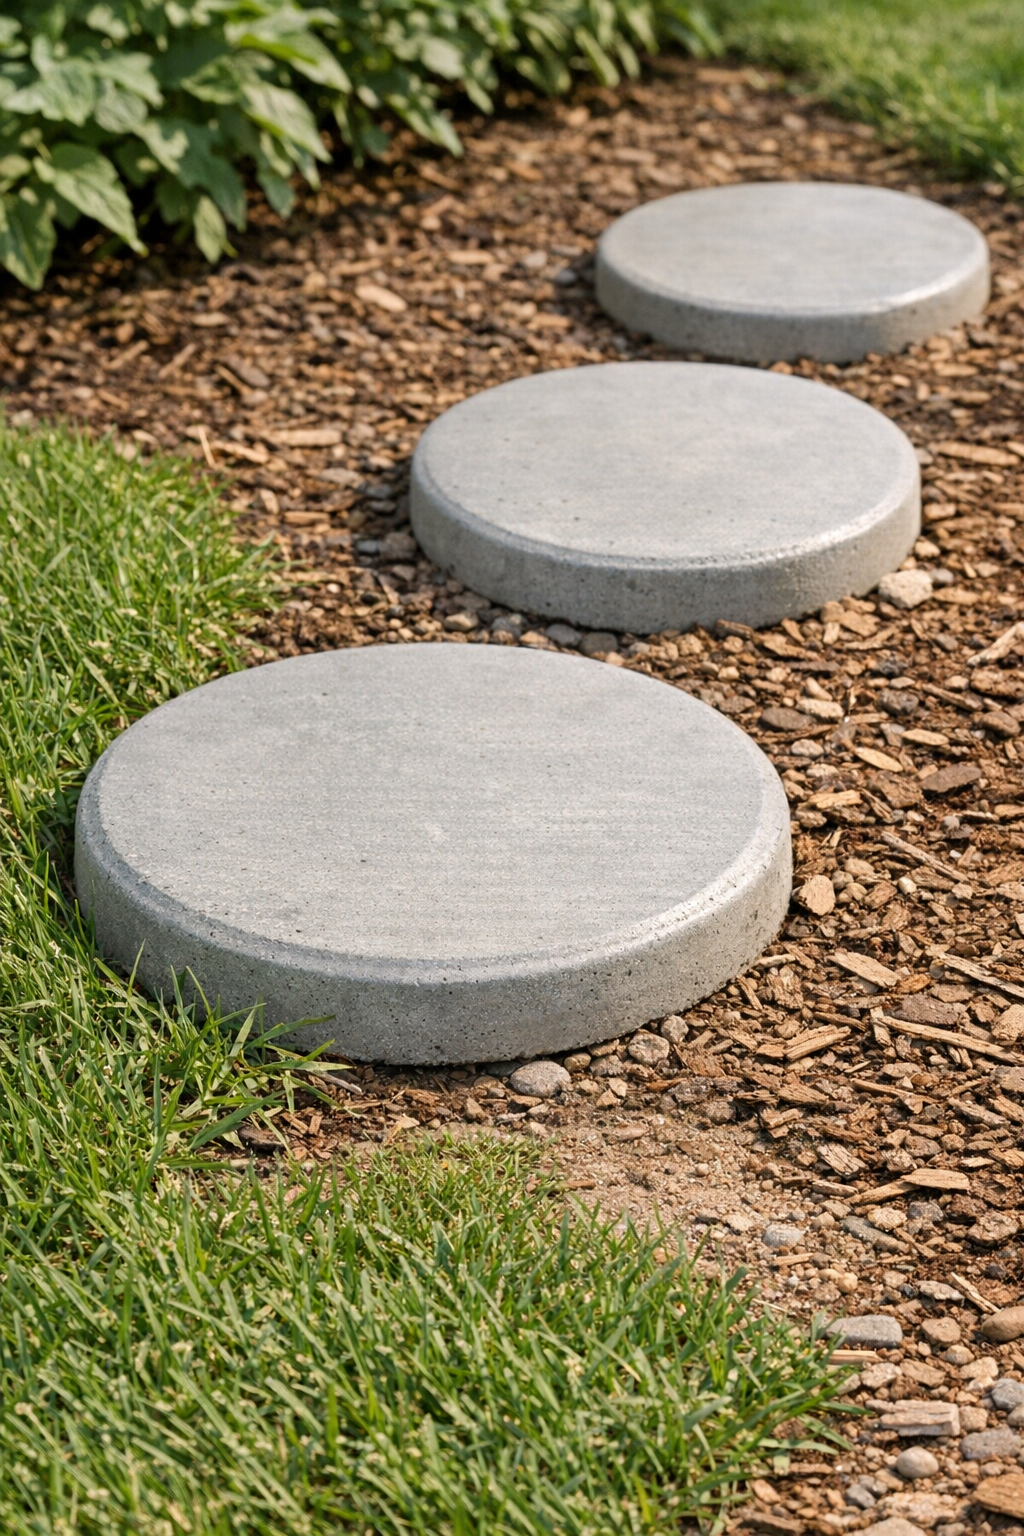
If you’ve ever looked at a patch of lawn or mulch and thought, “This spot really needs a simple walkway,” this is one of those projects that feels almost too easy for how useful it turns out. In this DIY, I’m using inexpensive plastic frisbees as molds to make heavy round cement patio blocks that can be used as stepping stones, a small path, or even a tidy base around a garden bed.
I love projects like this because they fit real life. You don’t need fancy forms or a workshop full of tools, and you can batch these out over a weekend between errands and laundry. If you’re a beginner, this is a very approachable concrete project, and if you’ve done DIY for a while, it’s a satisfying low-cost way to make something practical that actually holds up outdoors.
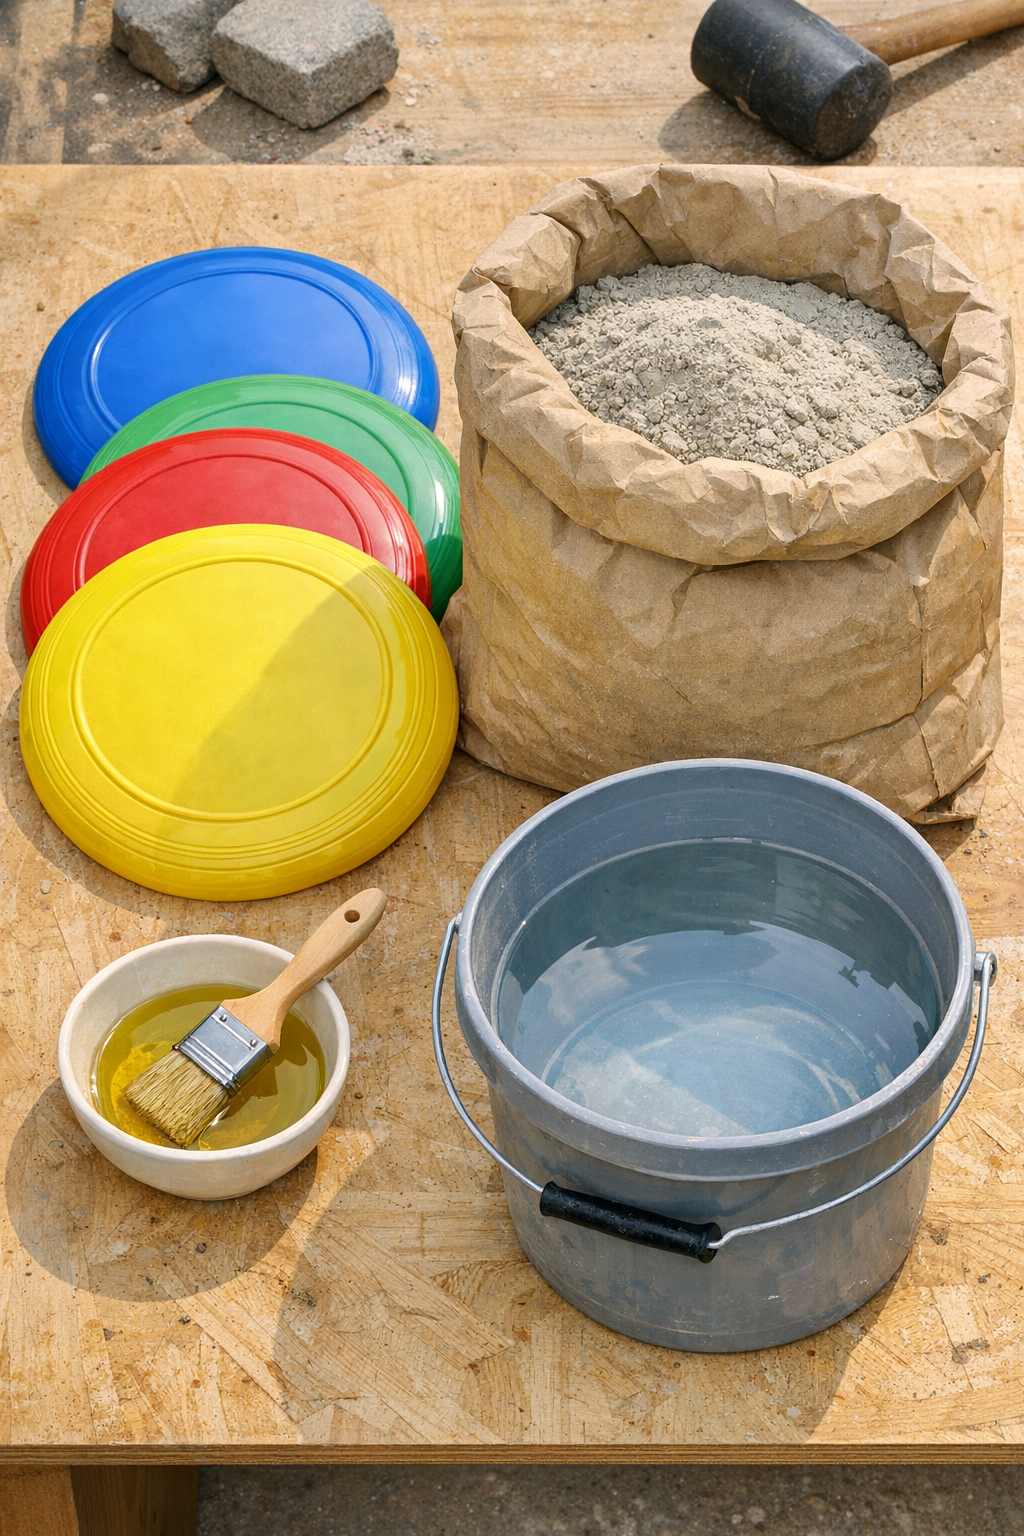
Materials
Instructions
1. Pick a flat work area outdoors or in a garage, and spread out the plastic drop cloth to protect the surface. Set the frisbees upside down so the domed side faces up, because that shape creates a gently rounded patio block.
2. Lightly coat the outside of each inverted frisbee with a thin film of cooking oil using the brush or paper towel. This helps the cured cement release more easily once the blocks have hardened.
3. Pour the concrete mix into the bucket and add water a little at a time, stirring until it reaches a thick scoopable consistency like stiff oatmeal. Avoid making it runny, or the finished blocks will be weaker and slower to set.
4. Scoop the wet concrete onto the center of each upside-down frisbee, then spread it evenly to cover the top and form a round disk about 1 1/2 to 2 inches thick. Press gently with the scoop or gloved hands so there are no big air pockets.
5. Tap the sides of each frisbee lightly a few times to help trapped air rise out of the mix. Smooth the tops with the stir stick or your gloved hand if you want a cleaner finished surface.
6. Let the blocks sit undisturbed until the concrete firms up, following the set time on your mix, usually a few hours for initial hardening. If the weather is hot or windy, cover them loosely with plastic so they do not dry too fast.
7. Once the blocks are firm enough to hold their shape, carefully flip each one over and peel or flex the frisbee away from the concrete. If one sticks a little, give it a gentle twist instead of forcing it.
8. Let the blocks cure for 24 to 48 hours before moving them, then place them in your yard, garden path, or patio area on level ground. For the most stable result, nestle each block slightly into soil or sand so it does not rock.
Variations & Tips
For a smoother finish: After filling the molds, lightly mist or dampen your glove before smoothing the surface. I do this when I want the blocks to look a little more polished without extra tools.
For a more rustic look: Leave the top texture slightly rough instead of over-smoothing it. Once these are set into a garden path, that natural finish blends in really nicely.
Add decorative detail: Press small stones, bits of broken tile, or sea glass into the surface while the concrete is still wet. Keep embellishments shallow so the walking surface stays comfortable and stable.
Use consistent portions: If you want all the blocks to match, scoop the same amount of concrete into each frisbee. I usually eyeball it, but even a small measuring bucket helps if you’re making a larger set.
Place them on a firm base: These hold up best when set on compacted soil or a thin layer of sand. That extra two-minute prep makes a big difference, especially after a good Midwestern rain.
Make more in batches: If you’re building a full walkway, reuse the frisbees after the first set cures enough to unmold. This is the kind of project I like to do assembly-line style while meal prep is happening inside.