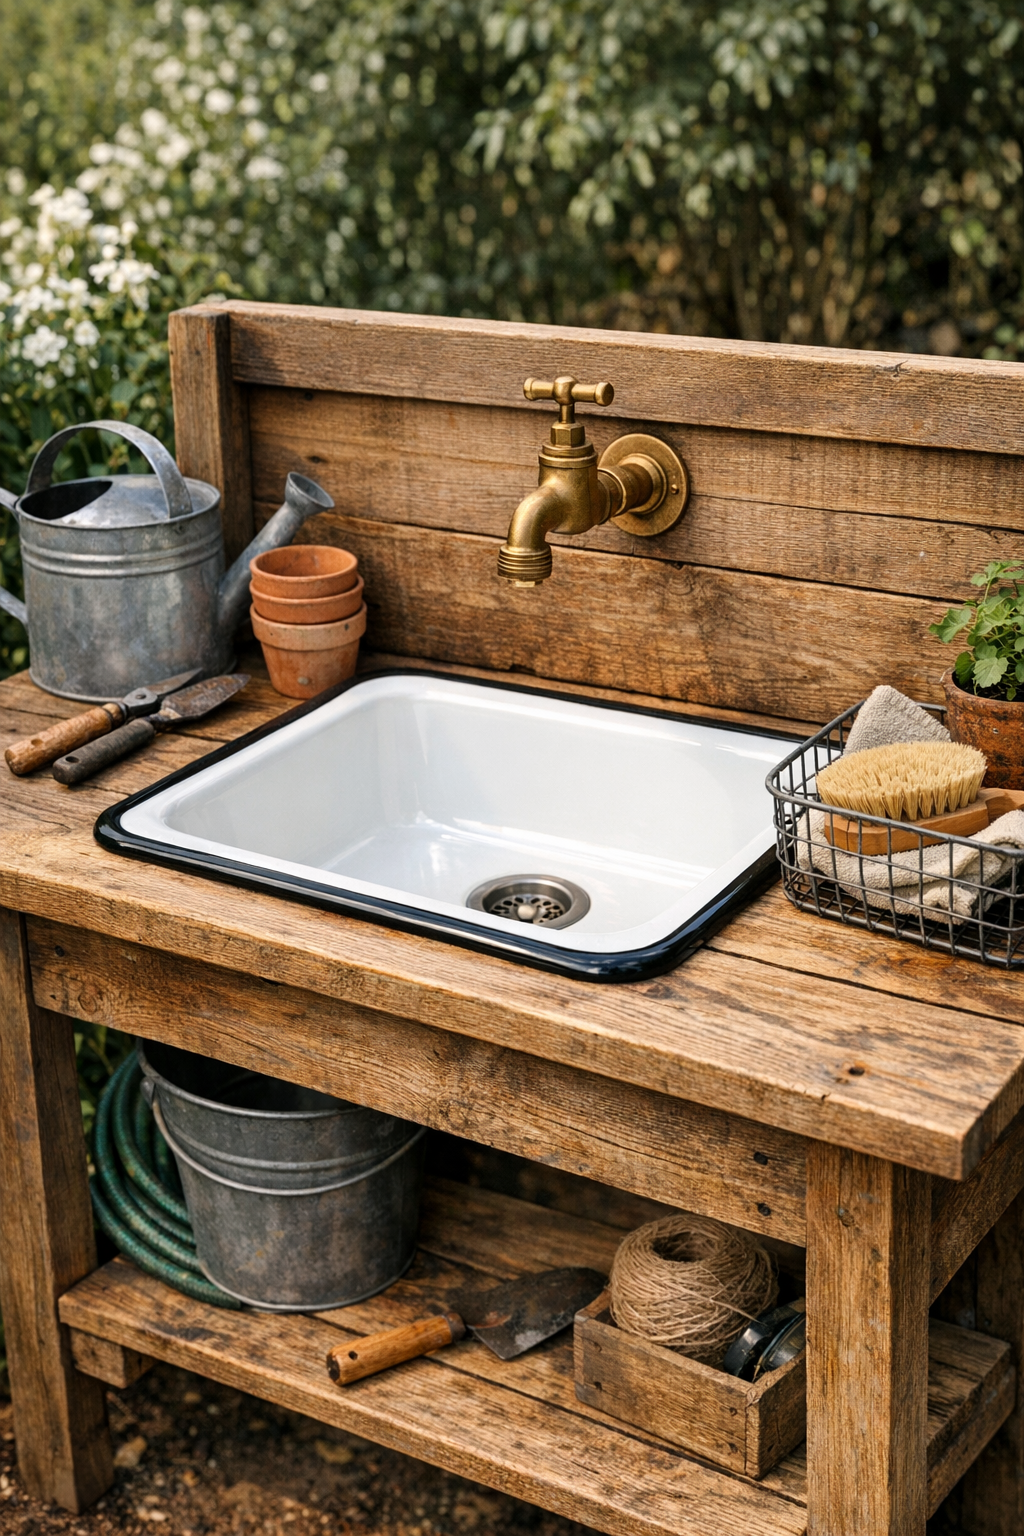
There is something mighty satisfying about making a garden station that works as hard as you do. This outdoor sink starts with a wooden potting bench, an old-fashioned enamel wash basin, and a simple hose spigot setup, and the end result is a practical little washing spot for muddy hands, harvested vegetables, and well-used garden tools.
I have always loved projects that feel a bit like the old farmyards I grew up around in the Midwest, where every work area had a purpose and nothing fancy was wasted. If you have a sturdy bench and a bit of patience with measuring and cutting, this is a very manageable build for anyone who wants a charming, useful sink right out in the garden.
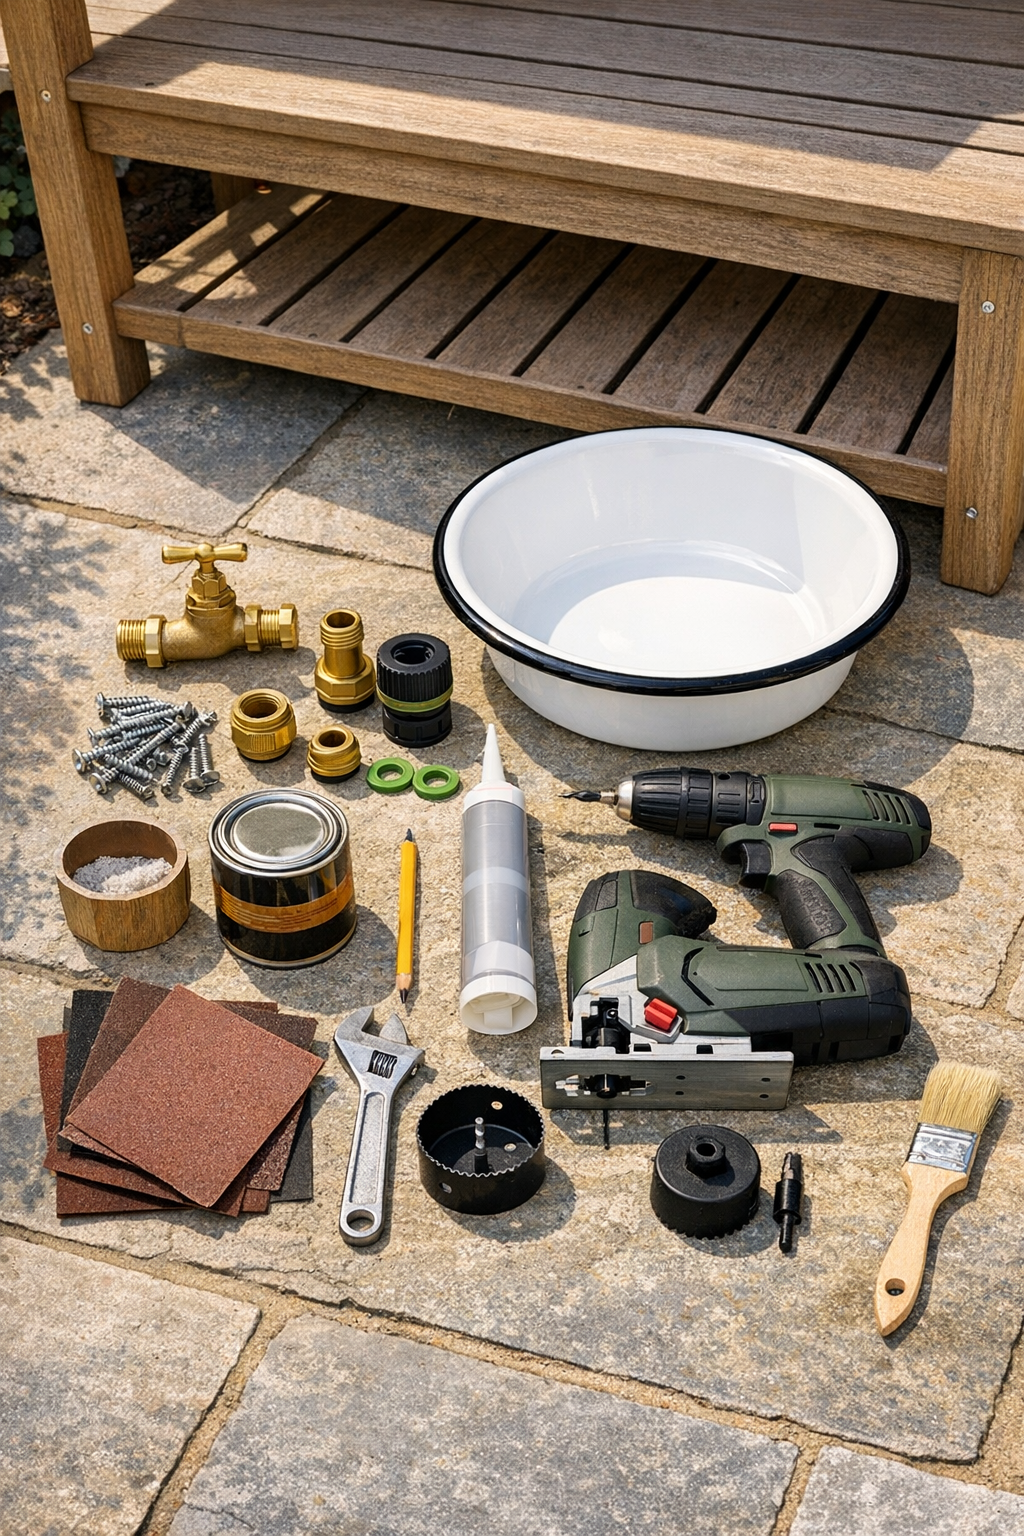
Materials
Instructions
1. Set the potting bench on a level surface and decide where the basin should sit, leaving enough counter space on one side for pots, tools, or a basket of vegetables.
2. Turn the enamel basin upside down on the benchtop, trace around the rim, then draw a second cut line about 1/2 inch inside that tracing so the basin lip will rest on the wood instead of falling through.
3. Drill a starter hole just inside the inner cut line, then use a jigsaw to cut out the opening slowly and evenly.
4. Sand the cut edge smooth and test-fit the basin, trimming a little more if needed until the rim sits flat and secure on the benchtop.
5. Brush exterior sealer or paint onto the raw cut wood and let it dry completely, because that fresh edge is the first place weather and water will try to work their mischief.
6. Mark the spigot location on the back rail or upright support of the bench, positioning it high enough to clear the basin and low enough to reach comfortably.
7. Drill the hole for the bulkhead fitting or threaded connector, then insert the fitting and tighten it firmly with washers and nuts according to the hardware style.
8. Wrap plumber's tape around the threaded connections and attach the brass spigot to the fitting, then connect the utility hose on the back side so it can feed from a garden hose source.
9. Install the drain assembly in the enamel basin with a bead of exterior-grade silicone under the flange, then tighten it from underneath.
10. Attach the drain hose or PVC pipe to the basin drain and direct it down into a bucket, gravel drain container, or an appropriate outdoor drainage spot allowed in your area.
11. Run a thin bead of silicone under the basin rim, set the basin into the opening, and press gently so it seals against the wood.
12. Connect your garden hose to the back feed line, turn on the water, and test the spigot and drain for leaks, tightening any fittings as needed.
13. Let the sealant cure according to the package directions before regular use, then stock the bench with a soap dish, scrub brush, and a towel so it is ready for garden season.
Variations & Tips
Vintage look: If you want more old-fashioned charm, use milk paint or a soft sage green exterior paint on the bench and pair it with an enamel basin that has a dark rim.
Drain option: For a simple setup, let the drain hose empty into a removable bucket and use that gray water on non-edible flower beds if that is permitted where you live.
Counter space: If your bench is narrow, offset the basin to one side so you still have a dry work area for seed trays, potted herbs, or a basket of tomatoes.
Weather protection: Reapply exterior sealer once a year, especially around the sink cutout and the spigot hole, because those are the spots that get the most moisture.
Basin fit: I always recommend cutting the opening slightly smaller at first. You can remove more wood, but you surely cannot put it back once it is gone.
Cold-season care: Before freezing weather, disconnect the hose and drain all the lines so you do not end up with split fittings come winter.
Daily usefulness: This sort of sink is wonderful for rinsing radishes, washing muddy gloves, or cleaning up after potting plants, and that is exactly why I think a good garden station earns its keep in a hurry.