There’s something so satisfying about a backyard project that feels both practical and a little bit resort-inspired, and this outdoor shower curtain setup definitely checks both boxes. For this build, I’m turning a basic natural canvas drop cloth into a sturdy curtain by adding grommets, then hanging it from a galvanized steel pipe frame for an outdoor shower area that feels finished and private without getting overly complicated.
I love projects like this in the middle of summer because they make the yard more usable right away. If you’ve got an outdoor shower by a pool, garden, lake cottage, or even just a hose-off spot for muddy kids and dogs, this is a straightforward DIY that looks clean, holds up well outdoors, and can absolutely be tackled over a weekend.

Materials
Instructions
1. Measure the width and height of your outdoor shower opening, then decide how much fullness you want in the curtain. I like to allow a few extra inches in width so the curtain doesn’t pull tight and look skimpy once it’s hanging.
2. Cut the canvas drop cloth to size, leaving 2 inches extra on each side and 3 inches extra at the bottom for hems. If your drop cloth already has finished edges on one or two sides, use those as your outer edges to save time.
3. Fold over the raw side edges by 1 inch, then fold again by 1 inch to create a double hem. Press the folds flat and stitch them, or secure them with canvas hemming tape if you want a faster no-sew option.
4. Fold the bottom edge up by 1 1/2 inches, then fold it again by 1 1/2 inches and stitch across. This heavier hem helps the curtain hang straighter, which is one of those little details that makes the whole thing look more polished.
5. Reinforce the top edge by folding it down 1 1/2 inches and securing it with stitching or hemming tape. Add a second strip of canvas tape behind the top band if your drop cloth feels lightweight, since this is where all the grommet stress will sit.
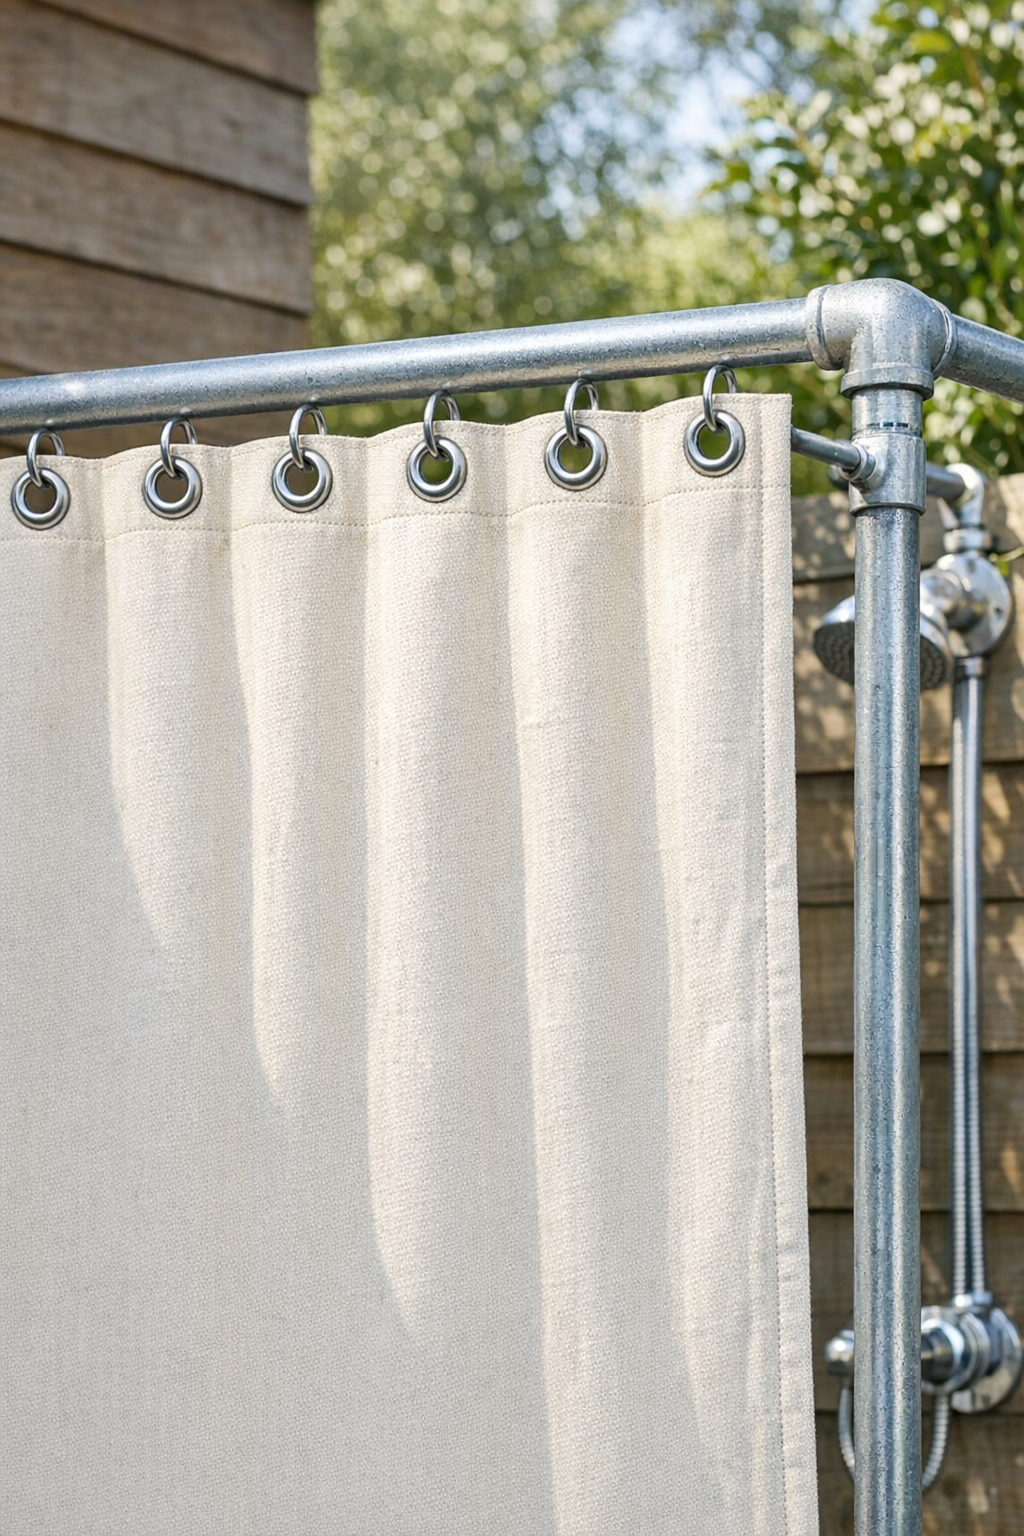
6. Mark 12 evenly spaced grommet positions across the top edge, keeping each one about 1 1/2 inches down from the top and 4 to 6 inches apart depending on your curtain width. Leave the first and last grommets about 1 1/2 inches in from the sides so the corners stay strong.
7. Cut each grommet hole using the template from your kit or trace the inner opening carefully, then install the grommets one at a time with the included setting tool and mallet. Work on a solid surface so the metal sets cleanly and doesn’t wobble loose later.
8. Assemble the galvanized pipe frame on the ground first by threading the 72-inch top pipe into the two elbow fittings, then threading the 24-inch side support pipes into the elbows and floor flanges. Hand-tighten everything, then square it up so the frame sits evenly.
9. Hold the assembled frame in place at the shower area and mark the flange screw holes. Drill pilot holes, add anchors if needed, and fasten both flanges securely with exterior screws so the top bar is level and stable.
10. Spray the canvas curtain lightly with fabric protector and let it dry fully before hanging. This extra step is worth it outdoors, especially if your shower area gets afternoon storms like mine does every July.
11. Clip the shower curtain rings through each grommet and slide them onto the top pipe. Check that the curtain opens and closes smoothly, then trim any loose threads and make small spacing adjustments if one area hangs unevenly.
12. Test the setup with water and make sure the bottom hem clears the ground by about 1 inch so it can dry properly. If needed, remove the curtain and shorten the hem slightly rather than letting the fabric sit in puddles.
Variations & Tips
Add a tie-back: Sew a simple 2-inch-wide canvas strip or use outdoor rope to create a tie-back for when the shower is not in use. It keeps the area feeling tidy and lets the curtain dry faster.
Use clip rings for flexibility: If you’re not fully confident about grommet spacing yet, clip rings can be a nice backup because they let you fudge spacing a little. I still prefer grommets for the finished look, but clip rings make installation easier.
Choose the right drop cloth weight: A heavier canvas drop cloth gives you better privacy and hangs more neatly in the breeze. If your yard gets a lot of wind, go with a thicker cloth instead of the cheapest thin option.
Prevent mildew: Let the curtain stay partially open between uses so air can move through it. You can also respray with fabric protector every season to help the canvas shed water better.
Try a wraparound version: If you want more coverage, build a longer pipe run or an L-shaped frame and make two curtain panels instead of one. That setup works especially well around stock tank pools or more open shower corners.
Make it easier to clean: Hem the bottom a little higher if your shower sits near mulch, grass, or gravel. I’ve learned the hard way that anything dragging outside picks up dirt fast, and a shorter curtain still looks just as nice.