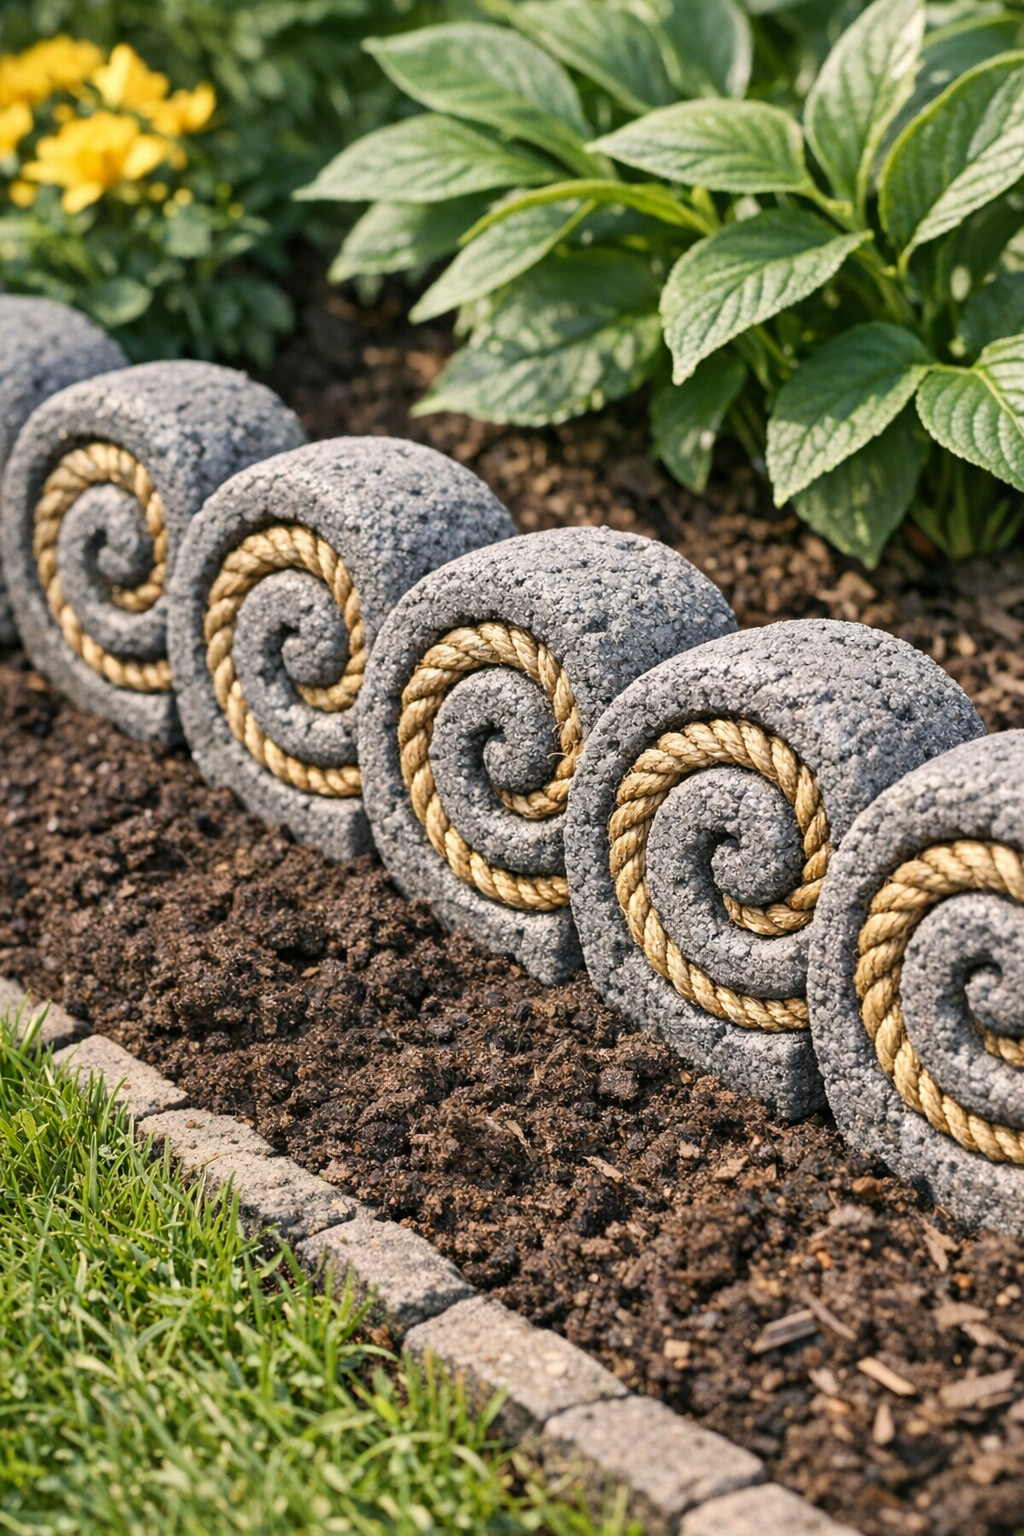
I love a project that feels a little bit like kitchen alchemy, and this one absolutely does. By soaking coiled sisal rope in a cement mixture, you can turn two humble materials into sturdy, sculptural spiral garden borders that look far more expensive than they are. The finished pieces have a wonderful handmade texture, a satisfying weight, and a natural shape that works beautifully around flower beds, potted plants, or a small herb patch.
If you enjoy practical garden DIYs and do not mind getting your hands a little messy, this is an especially rewarding make. As someone who spends plenty of time thinking about texture in food and presentation in the kitchen, I find that same attention to form carries right over into garden projects like this one—simple ingredients, careful handling, and a surprisingly elegant result.
Materials
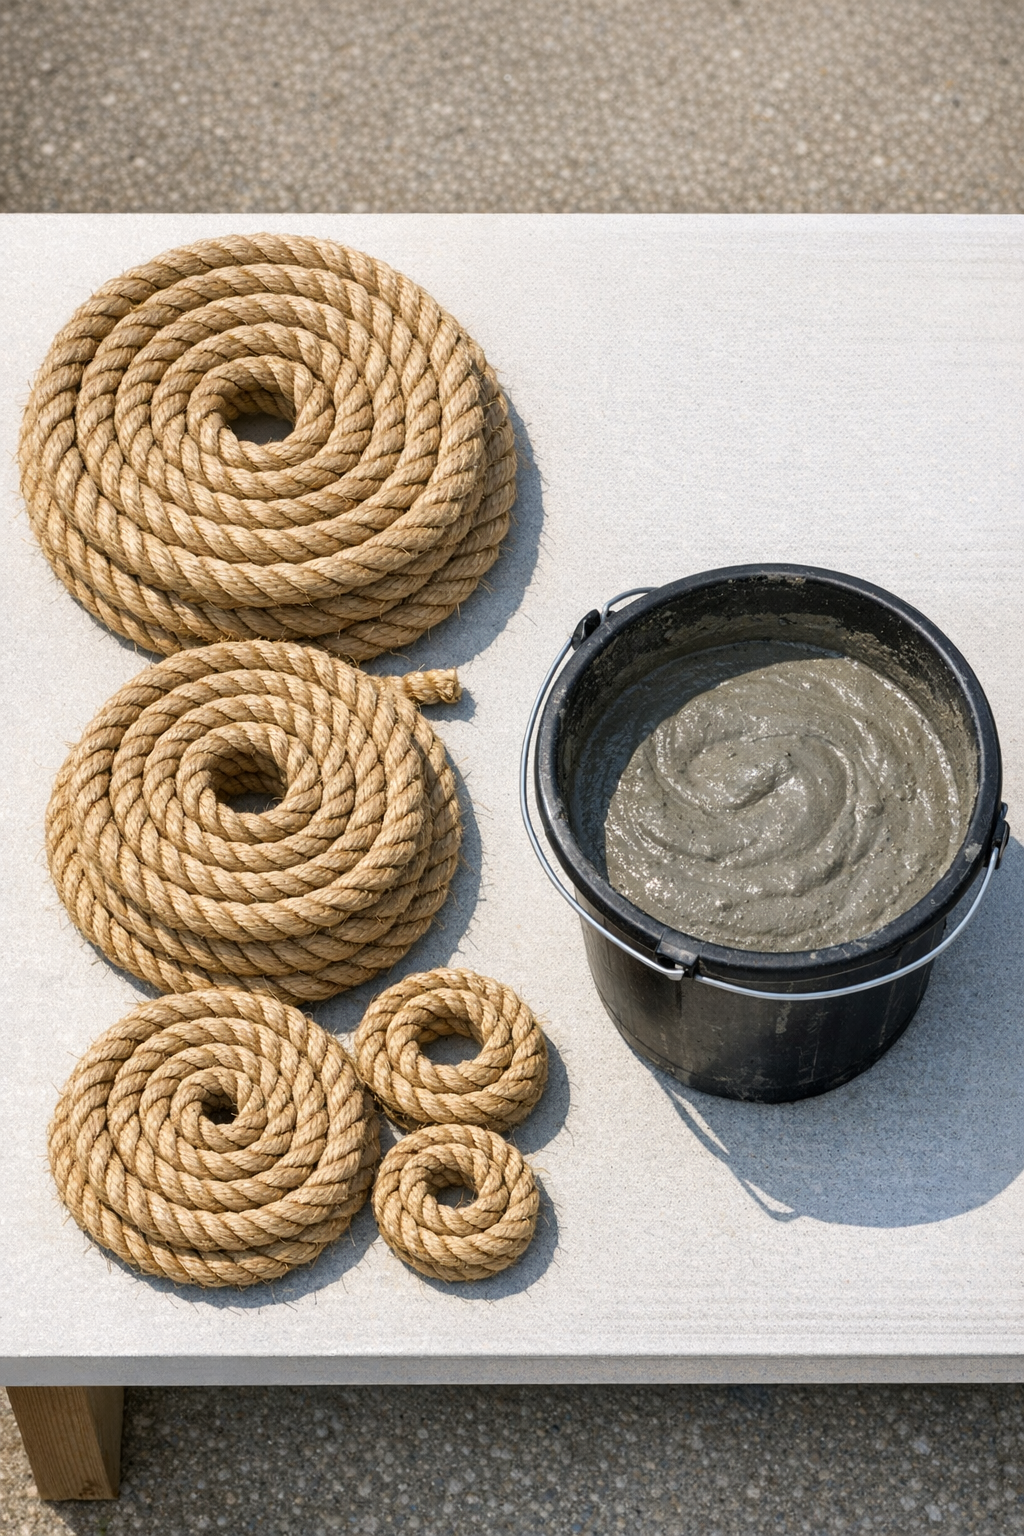
100 feet of 1/2-inch sisal rope
Instructions
1. Choose a flat work area outdoors or in a well-ventilated garage, and cover the surface with a scrap board or plastic sheet so the cement does not bond where you do not want it.
2. Pour the liquid cement slurry into a wide bucket or tub deep enough to fully coat sections of rope, then stir until the mixture is smooth and evenly wet.
3. Cut or separate the rope into lengths that are easy to handle, about 8 to 12 feet each, so you can soak and coil them before the cement starts to set.
4. Submerge one rope length in the cement mixture and press it down with your hands until every strand is thoroughly saturated from end to end.
5. Lift the coated rope slowly and let the excess drip back into the bucket for a few seconds; the rope should be fully covered but not pouring off heavy globs.
6. Starting at one end, coil the rope tightly into a flat spiral on your protected surface, pressing each round snugly against the last so the border piece cures as one solid shape.
7. Shape the spiral to your preferred diameter, keeping the outer edge as even as possible; for border pieces, spirals around 10 to 14 inches wide are easy to place in the garden.
8. Repeat the soaking and coiling process with the remaining rope until you have enough spirals to outline your bed, path edge, or planter area.
9. Let the spirals cure undisturbed until they are firm enough to move, usually 24 hours, then allow another 24 to 48 hours for a full hard set before outdoor use.
10. Once fully cured, place the rigid spiral pieces upright or slightly overlapped along the garden edge, pressing them lightly into the soil for stability and adjusting the spacing until the border looks balanced.
Variations & Tips
Make larger statement pieces: Use longer rope lengths and form wider spirals if you want fewer, bolder border sections around a larger bed.
Adjust the cement thickness: If the slurry is too thin, it will not cling well to the sisal; if it is too thick, it becomes difficult to saturate the rope evenly. I aim for a texture similar to a thick crepe batter.
Keep the coils tight: The tighter you press the rope rounds together while shaping, the stronger and cleaner the final spiral will be once cured.
Work in small batches: Cement begins setting faster than many people expect, so soaking one manageable rope length at a time gives you better control and a neater finish.
Use the same technique for planters or trivets: Flat cement-coated rope spirals can also be made as decorative stepping accents, rustic outdoor trivets, or bases for garden containers.
Let them cure fully before placing outdoors: This is the hardest part for impatient makers, but full curing gives the borders their strength and helps them hold up much better through watering and weather.