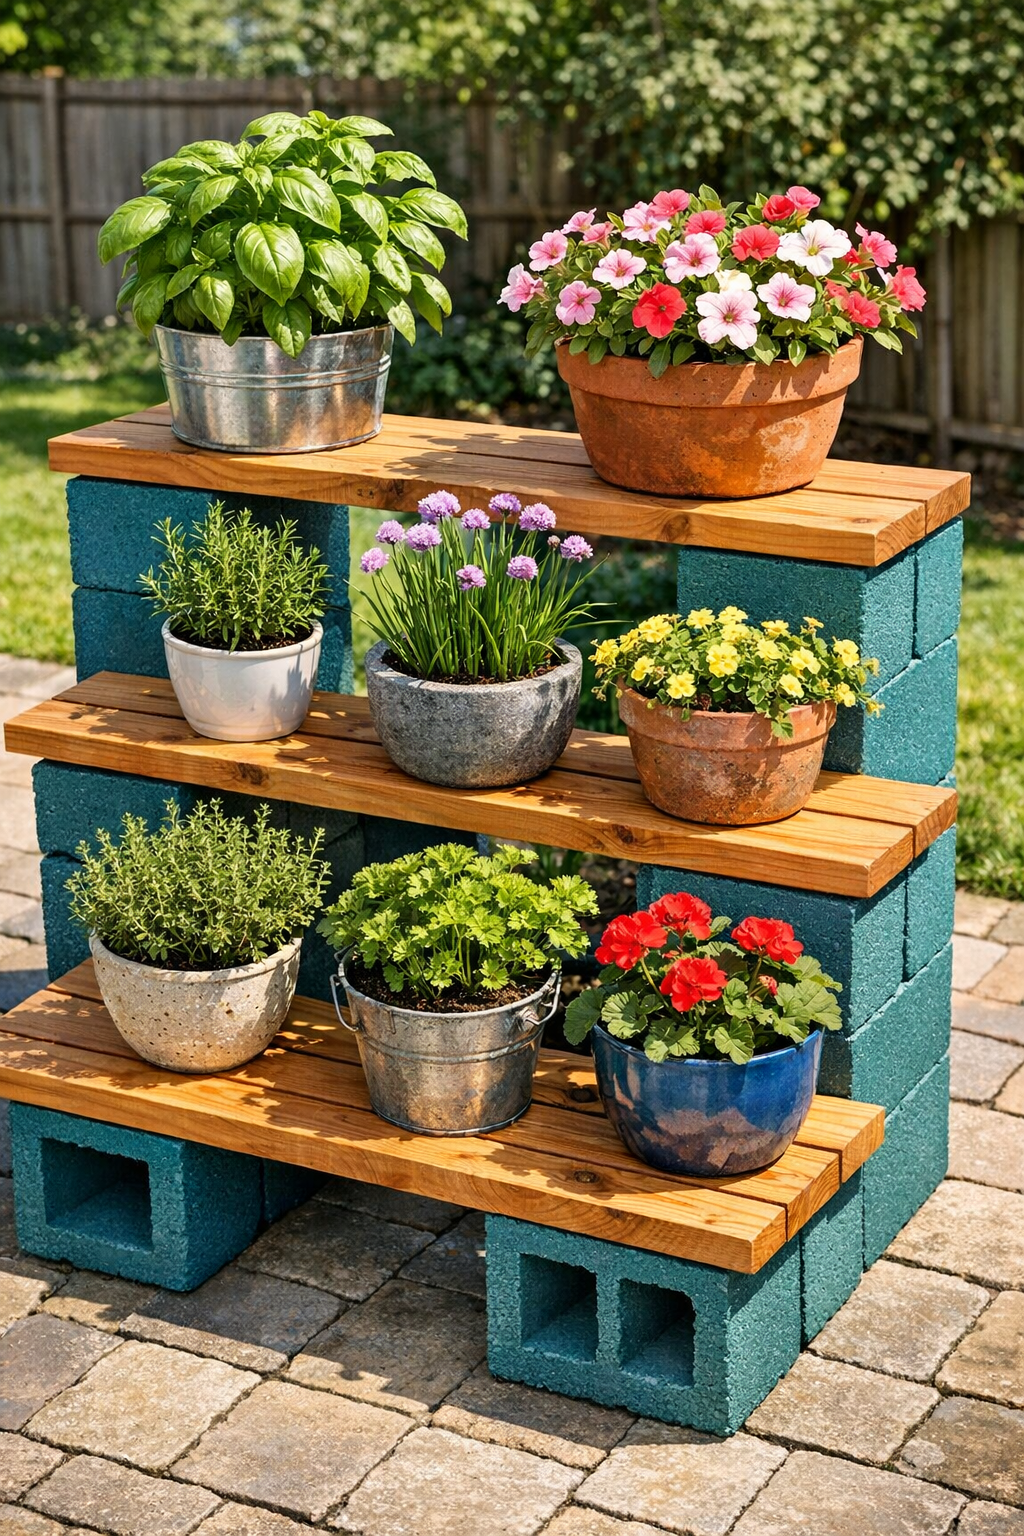
This plant stand is one of my favorite kinds of backyard projects: affordable, sturdy, and good-looking enough to make a patio corner feel intentionally styled instead of just “where I set the pots.” By stacking painted cinder blocks and layering in simple wooden plank shelves, you can build a tiered display that gives your plants better height, better light, and a much tidier footprint.
I like this project for beginners because it doesn’t require complicated joinery or advanced carpentry. If you can paint, measure, and stack carefully, you can make this. It’s especially useful for anyone who wants a flexible outdoor stand for herbs, flowers, or houseplants spending the summer outside.
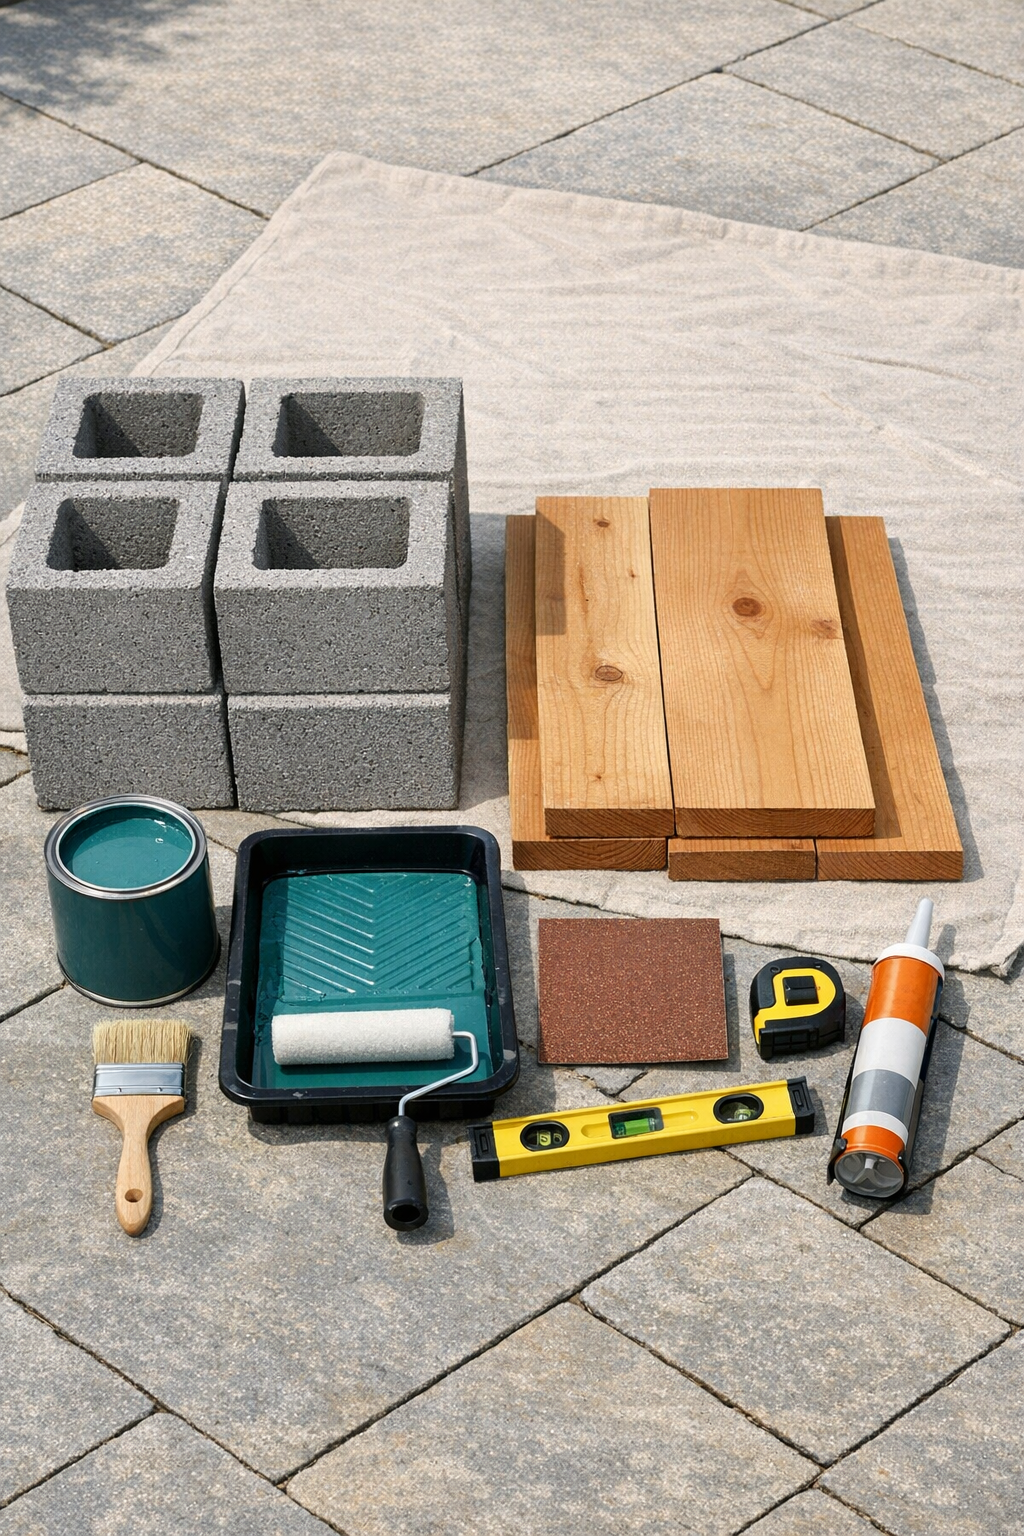
Materials
6 standard cinder blocks, 8 in x 8 in x 16 in
Instructions
1. Set up your work area on a flat surface outdoors or in a well-ventilated garage, and spread out the drop cloth. Wipe dust off the cinder blocks and cedar planks with a damp rag so paint and primer will adhere properly.
2. Sand the cedar planks lightly on all sides with 120-grit sandpaper to smooth rough spots and splinters. Dust them off thoroughly before finishing.
3. Apply one coat of primer to the cinder blocks, covering the outer faces and the visible inside edges of the block openings. Let the primer dry fully according to the manufacturer’s directions.
4. Paint the primed cinder blocks with two thin coats of teal exterior paint, allowing the first coat to dry before adding the second. Use the brush to reach corners and the roller to keep the larger faces even.
5. If you want extra protection for the wood, brush on a clear exterior sealer to the cedar planks and let them dry completely. This step is optional, but I recommend it if the stand will stay uncovered in rain.
6. Move the dry blocks to the final location and check that the ground or patio is level. Place two blocks on the bottom row, holes facing up, spaced 24 inches apart from outer edge to outer edge.
7. Lay one cedar plank across the bottom pair of blocks to create the first shelf, and center it so there is a similar overhang on both ends. Add felt or rubber pads between the block tops and plank if you want to reduce shifting and protect the wood.
8. Stack two more cinder blocks vertically on top of the first pair, one at each end, and rotate them so the openings face outward for visual contrast and plant cubby space. Check with a level before continuing.
9. Set the second cedar plank across this middle row and center it carefully. If you want a more permanent build, add a small bead of outdoor construction adhesive where the plank meets each block.
10. Add the last two cinder blocks on the top tier, again checking alignment and keeping the stack balanced. Place the third cedar plank across the top blocks to complete the stand.
11. Press gently on each shelf and block stack to make sure everything feels stable. Adjust spacing as needed, then let any adhesive cure before loading the stand with pots.
12. Arrange your plants with the heaviest pots on the bottom shelf, medium pots in the middle, and trailing or smaller plants on top. Step back and tweak the placement until the display feels balanced from both the front and sides.
Variations & Tips
For a smaller space: Use 2 cedar planks at 24 inches long and 4 cinder blocks to create a compact two-tier version for a balcony or narrow porch.
For a warmer wood tone: Swap the raw cedar look for a light exterior stain. I often prefer cedar left natural, though, because it ages beautifully against a saturated paint color like teal.
For heavier pots: Keep your widest and heaviest containers on the bottom shelf and avoid placing oversized ceramic planters on the top tier. The structure is sturdy, but smart weight distribution makes a big difference.
For a cleaner finish: Paint the blocks a day in advance and let them cure fully before assembly. Concrete is porous, so rushing the drying time can leave scuffs and fingerprints in the finish.
For extra stability: Add outdoor construction adhesive between every contact point if you do not plan to rearrange the stand later. I like leaving at least some parts unglued when I want the option to rebuild the layout next season.
Plant styling tip: Mix upright plants, trailing plants, and one flowering accent so the shelves look layered rather than flat. I use the same approach when plating food: contrast in height and texture makes the whole arrangement more appealing.