
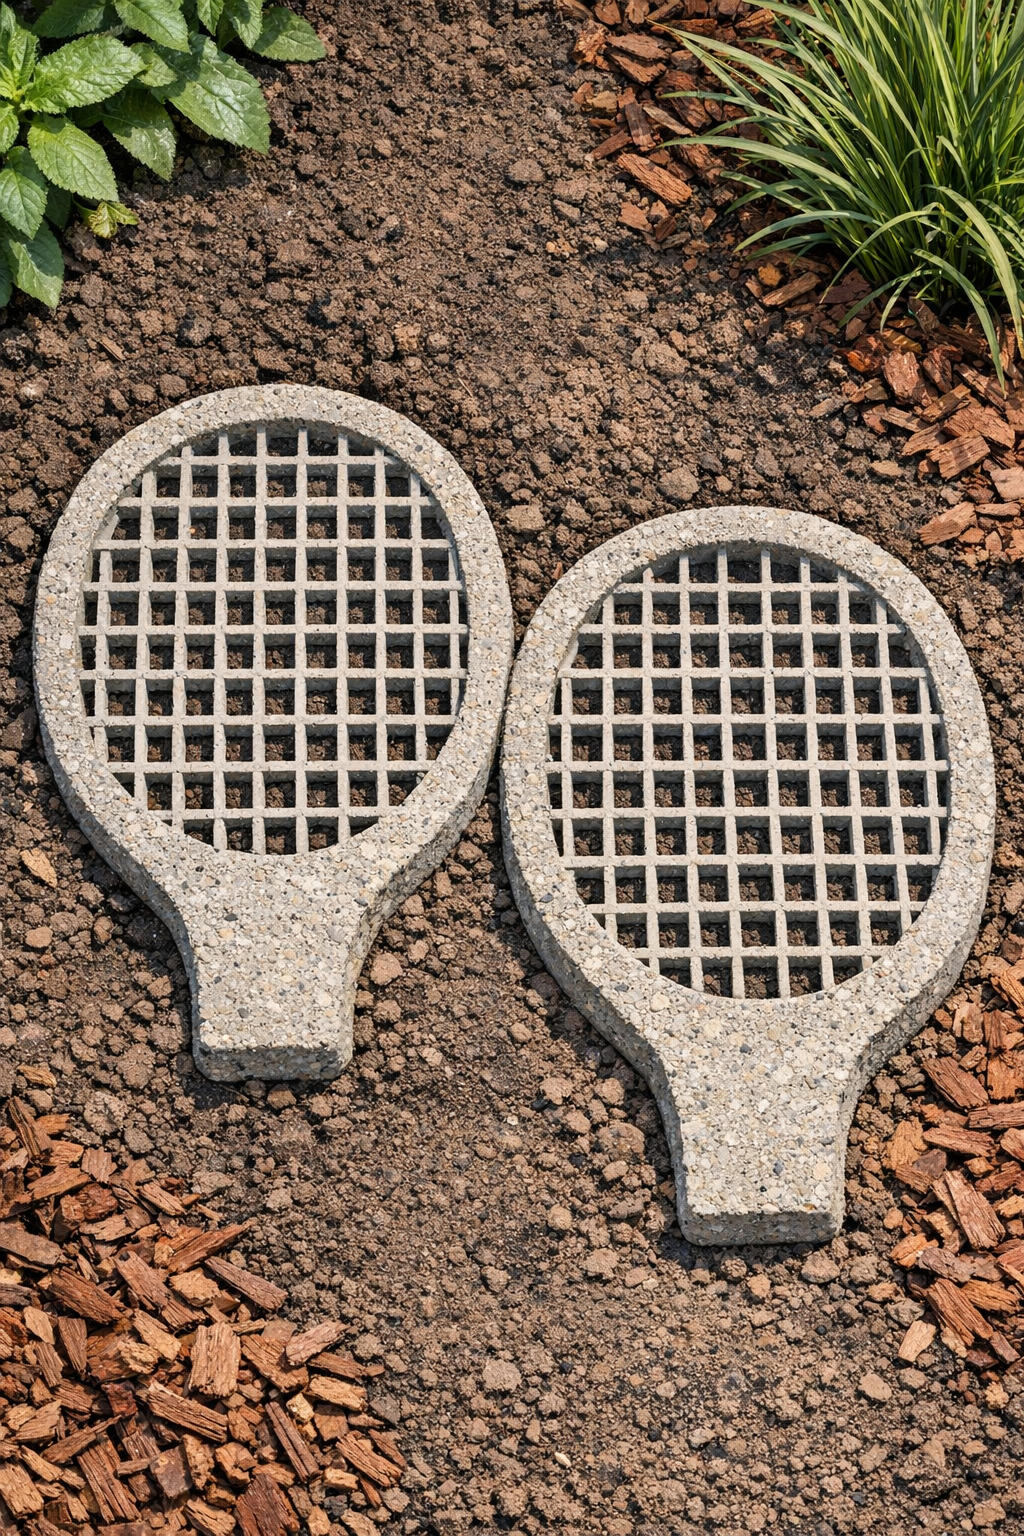
If you like simple yard projects with a big payoff, this one is such a fun surprise. These heavy grid-textured yard slabs are made by pouring wet cement through plastic tennis rackets, which create a sturdy open pattern that looks almost like custom garden pavers. It’s one of those clever little projects that feels a bit magical the first time you lift the mold and see the texture left behind.
I especially love this project for dressing up a garden path, making a small standing spot near a hose bib, or adding a playful touch beside raised beds. It’s beginner-friendly, inexpensive, and satisfying in the way all good hands-on projects are—messy enough to feel creative, but simple enough to finish in an afternoon.

Materials
Instructions
1. Choose a flat outdoor work area and spread out the plastic drop cloth so the wet cement won’t stick to the ground. If your surface is uneven, level a shallow bed of play sand underneath where the rackets will sit.
2. Lightly coat the inside grid and edges of each plastic tennis racket with cooking spray or a thin film of vegetable oil. This helps the cement release more cleanly once it firms up.
3. Set the rackets flat on the drop cloth with the heads facing up, and make sure they are stable and not rocking. If needed, press a little sand around the outer edges to hold them steady.
4. In a bucket or mixing tub, combine the cement mix with water a little at a time until it reaches a thick brownie-batter consistency. The mixture should be wet enough to press into the grid openings but not so runny that it pours straight through.
5. Scoop the wet cement into one racket head first, starting in the middle and working outward. Press it down firmly with a gloved hand or scrap piece of cardboard so the mix fills every section of the grid.
6. Add more cement until the racket head is filled to about 1 to 1 1/2 inches thick, then smooth the top lightly. Repeat with the second racket, keeping the thickness as even as possible so both slabs cure similarly.
7. Tap the sides of each racket gently and jiggle them just a bit to settle the mix and release trapped air. Patch any low spots with a little extra cement and smooth again.
8. Let the cement sit undisturbed until it firms up enough to hold its shape, usually 24 hours depending on temperature and humidity. Keep the slabs out of direct heavy rain while they set.
9. Once the cement is hard to the touch, carefully flex or peel the plastic racket away from the slab. Work slowly around the edges so the grid-textured piece lifts out without cracking.
10. Cure the slabs for another 2 to 5 days before placing them in the yard, lightly misting them once or twice a day if the weather is hot and dry. When fully cured, set them into soil, gravel, or mulch so they sit level and feel solid underfoot.
Variations & Tips
For a cleaner shape: If the racket handles look too playful for your space, you can fill only the head portion and leave the handle empty, or bury the handle end slightly under mulch for a more paver-like look.
For picky style preferences: In my house, somebody always wants things “less fancy” or “more fun,” and this project can go either way. Use bright rackets for a whimsical garden corner, or choose plain neutral ones if you want the finished slabs to blend in more naturally.
For stronger slabs: Keep the cement on the thicker side and make sure every grid section is fully packed. Thin spots are much more likely to crack when you move the slabs.
For easier release: Don’t skip the light oiling step, especially if the plastic grid has lots of tiny openings. A slow, gentle flex of the racket works better than pulling hard in one spot.
For placement: These are best used as decorative stepping accents rather than major load-bearing pavers. I like to nestle them into mulch or gravel where they stay supported and don’t wobble.
For a more polished finish: Smooth the back side well while the cement is wet, since that becomes the walking surface if you flip the slab over. You can also soften any rough edges with a sanding stone after full curing.