
On muggy summer evenings, I am always looking for simple ways to make the patio feel a little more inviting without spending a fortune on fancy outdoor cooling gear. This DIY outdoor fan mister uses a basic box fan, mesh bug netting, and drip irrigation tubing to create a light cooling mist while also helping keep curious fingers away from the fan blades. It is one of those practical backyard fixes that feels especially satisfying because it uses easy-to-find supplies and goes together quickly.
I like this project for family cookouts, porch sitting, and those sticky afternoons when everyone still wants to be outside. If you are comfortable with a few basic tools and can zip-tie or fasten tubing neatly, you can make this in an hour or so. The finished setup is best for patios, decks, and other outdoor spaces where a little airflow and a gentle mist can make a big difference.
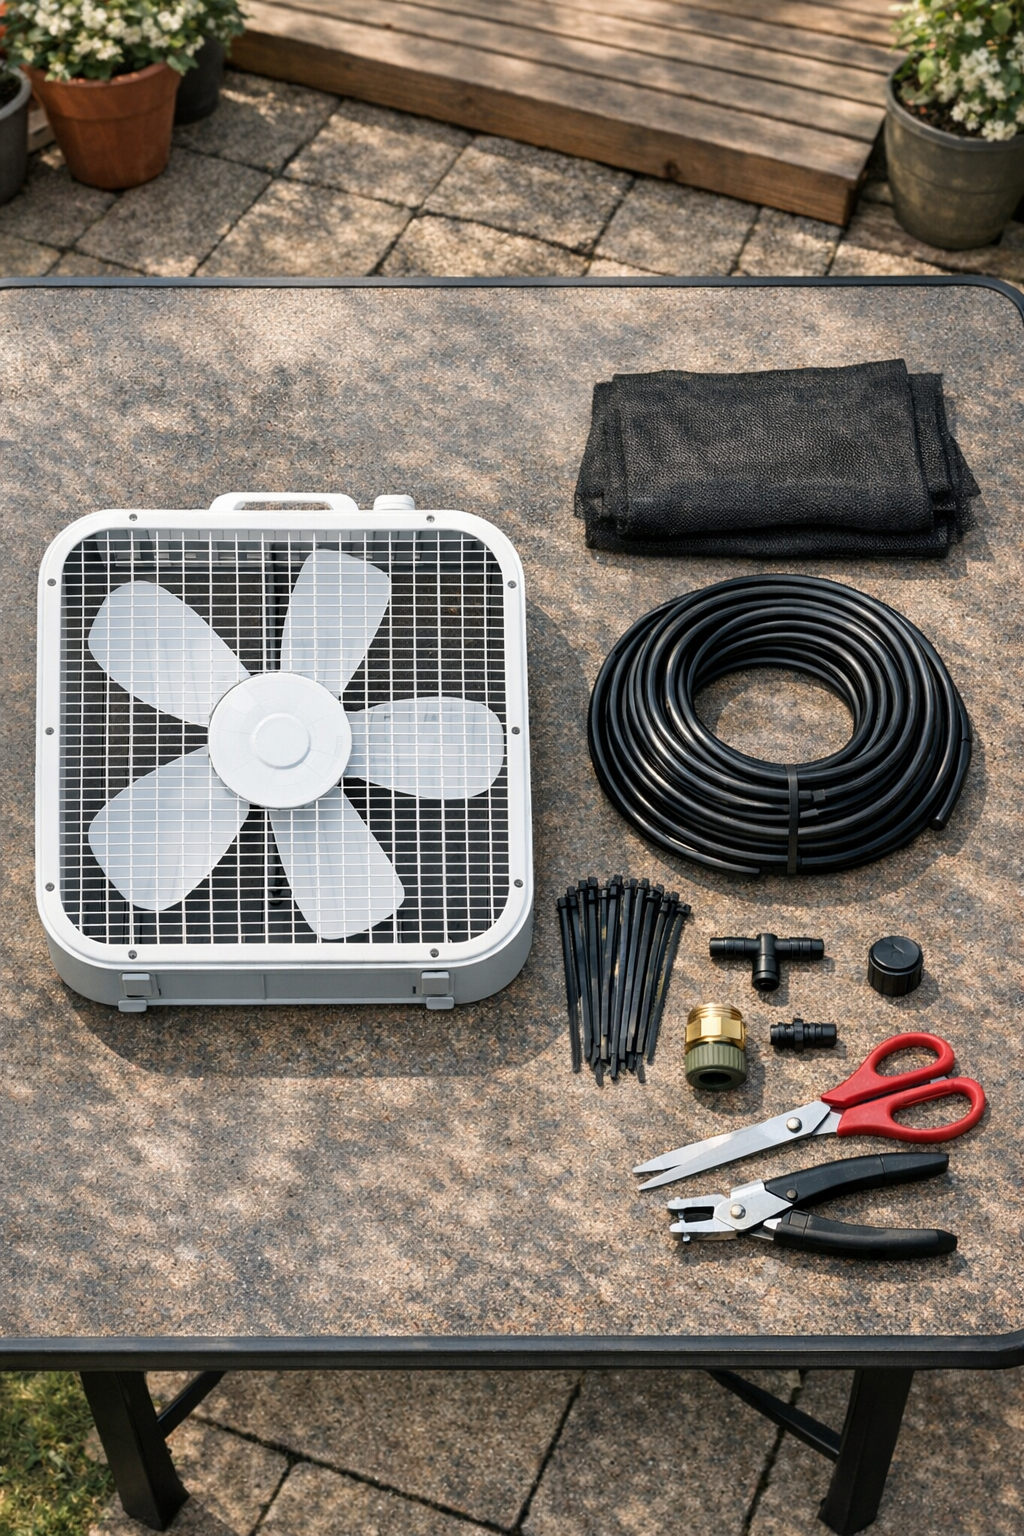
Materials
Instructions
1. Set the box fan on a sturdy outdoor table or bench near a garden hose connection, making sure the fan will stay dry at the motor and cord. Choose a covered patio or shaded spot so the setup is away from direct rain and standing water.
2. Cut the mesh bug netting to fully cover the front face of the fan with 2 extra inches on each side. This layer helps keep the tubing supported and adds a protective barrier over the fan grill.
3. Stretch the netting over the front of the fan and clip it in place with binder clips or spring clamps. Pull it snug so it lies flat without sagging into the fan grill.
4. Secure the netting permanently by threading zip ties through the fan’s outer grill and around the mesh at 4-inch intervals. Trim the zip tie tails so nothing catches when you move the fan.
5. Measure and cut a length of 1/4-inch drip tubing long enough to run around the outer perimeter of the fan’s front grill. Test-fit it in a square or rounded-square shape, keeping it about 1 inch in from the fan’s outer edge.
6. Use a hole punch or emitter tool to make evenly spaced holes in the tubing every 5 to 6 inches, then insert the misting or spray emitters. Keep all emitters facing toward the center of the fan so the mist blows outward with the airflow.
7. Fasten the tubing to the netted front of the fan with zip ties, attaching it at each corner and between emitters so it stays flat and secure. Do not cinch so tightly that you pinch the tubing closed.
8. Connect the ends of the tubing with the elbow fittings to form a neat perimeter loop, then add the tee fitting at the bottom center or lower side for the water supply line. Run a separate length of tubing from that tee down toward the hose connection.
9. Attach the supply tubing to the garden hose adapter and secure the line along the side or back edge of the fan with cable clips and a little electrical tape. Keep the tubing and all connections clear of the fan blades, motor vents, and power cord.
10. Place a bucket or towel under the connection area, then turn on the hose very slowly to test the system. Check each emitter and fitting for leaks, and tighten or re-seat any loose pieces before using the fan.
11. Once the water flow is adjusted to a fine mist instead of a heavy spray, turn the fan on low and stand to the side to test the airflow. Increase to medium if needed, but keep the mist light so the air feels cool instead of wet.
12. Reposition the fan to aim across a seating area, never directly into food or electrical outlets, and enjoy the cooler patio air. When you are done, turn off the fan first, then the water, and disconnect the hose if the unit will sit outside.
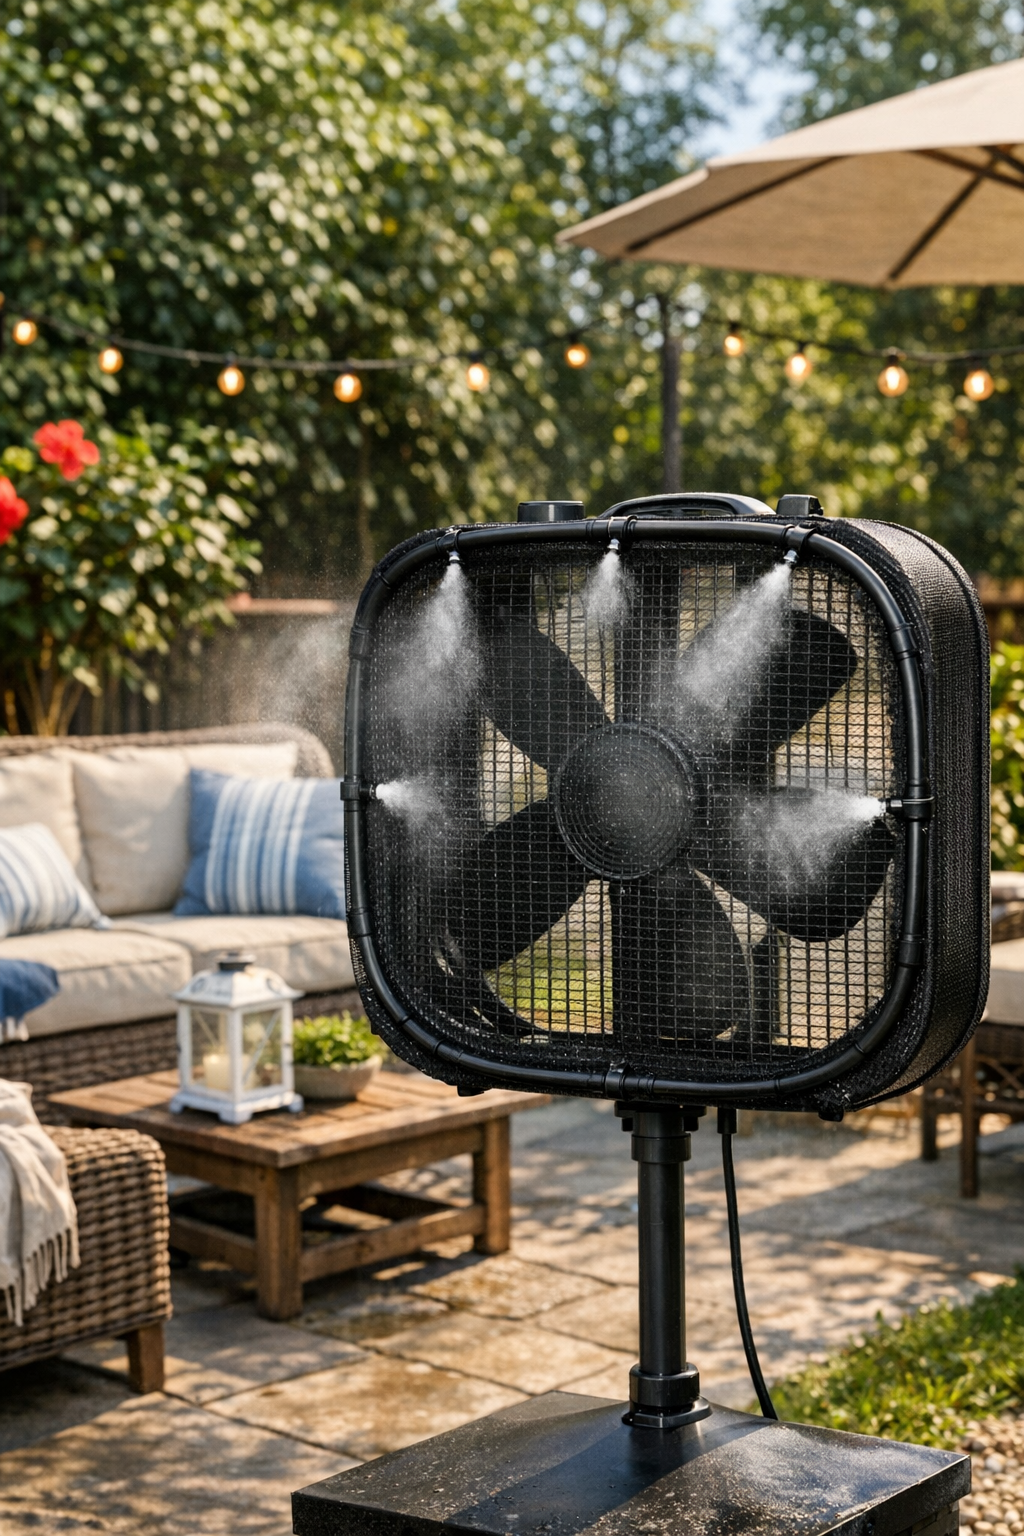
Variations & Tips
For a gentler mist: If your patio is small or you do not want damp chairs, use fewer emitters or space them farther apart. I find a lighter mist is more comfortable for family meals and keeps everyone happier.
For picky placement needs: If some family members love the cooling breeze and others do not, angle the fan across the edge of the seating area instead of straight at everyone. That way people can scoot closer or farther away as needed.
Use the right water pressure: High pressure can create large droplets instead of a fine cooling mist. A simple hose valve or pressure regulator can help you dial it in more easily.
Keep safety first: This project is for outdoor use only, and the fan should stay in a dry, covered area with a protected outlet. Never let water hit the motor housing, plug, extension cord connection, or indoor outlet.
Swap the netting if needed: Fine mesh bug netting works well because it is light and easy to zip-tie, but plastic garden mesh can also work if it is flexible enough to sit flat on the fan front. Just make sure airflow is not blocked too much.
Make cleanup easier: If your water leaves mineral buildup, remove and rinse the emitters every so often. At the end of the season, drain the tubing and store the fan indoors so it is ready for the next hot spell.