
When Midwest summers settle in, my patio can feel like a skillet by late afternoon, and that goes double for pets wearing a fur coat. This DIY outdoor pet cooling station is a simple way to give dogs a safe, refreshing place to splash, stand, and cool off using white PVC pipe, a garden hose connection, and a rubber mat that keeps the area more comfortable underfoot.
I like this project because it’s practical, affordable, and easy to customize for different patio sizes and pet breeds. If you’re comfortable measuring, cutting PVC, and drilling evenly spaced holes, you can put this together in an afternoon and have a tidy little cooling zone that looks far neater than dragging out a sprinkler every day.
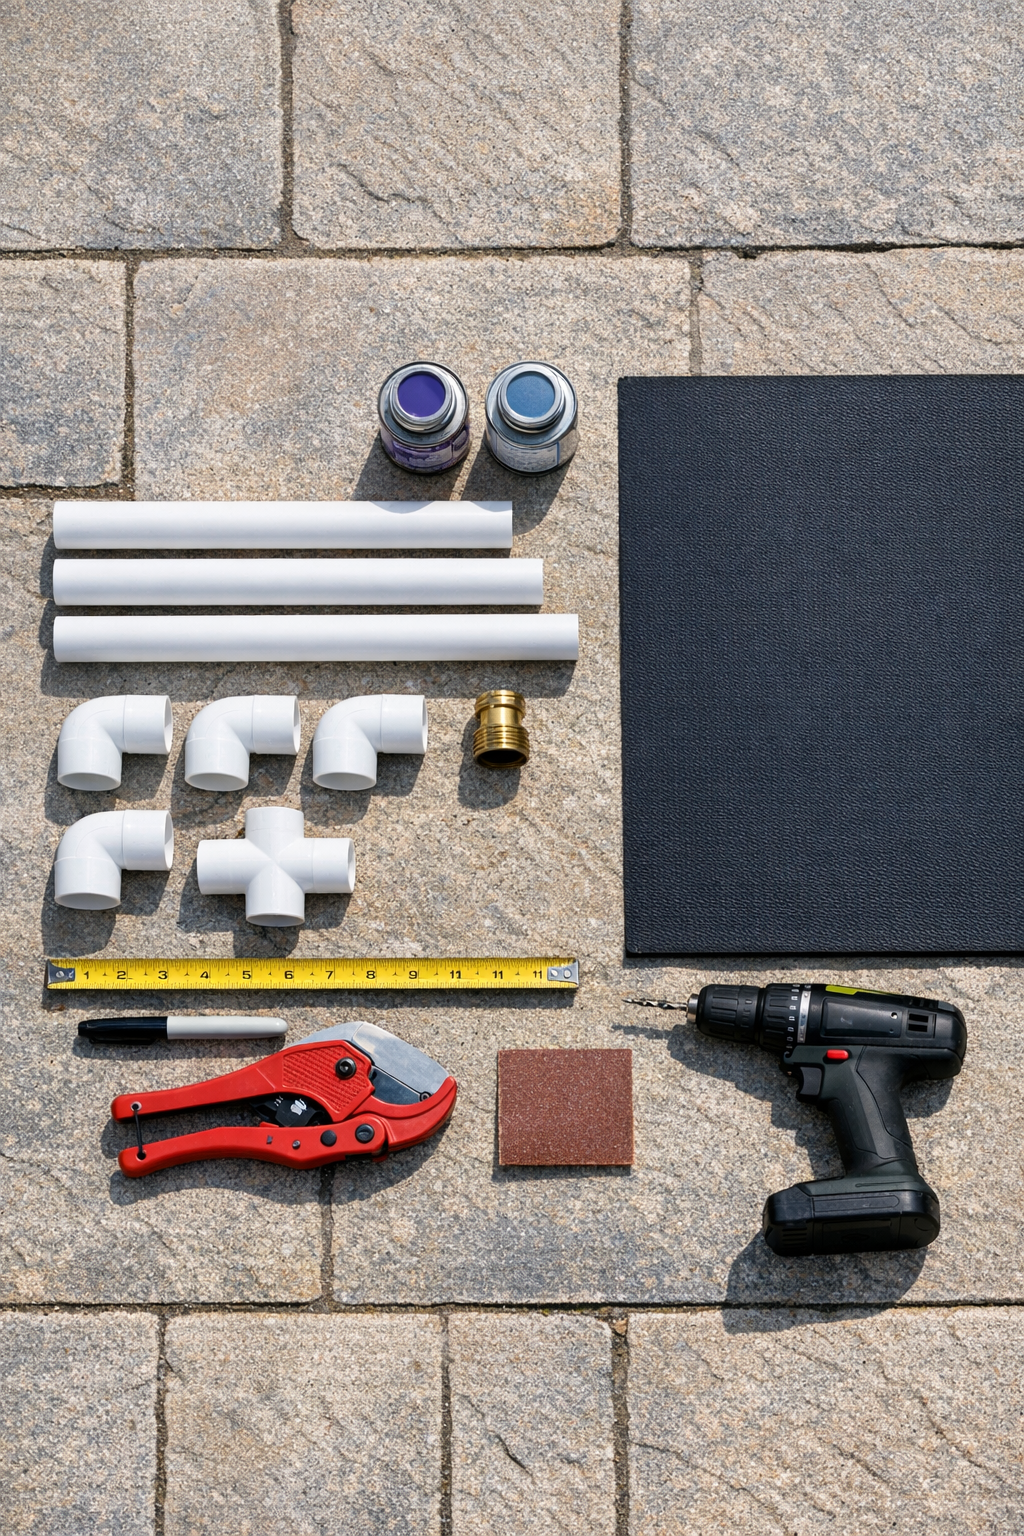
Materials
3 pieces 1/2-inch schedule 40 white PVC pipe, 36 inches long each
Instructions
1. Dry-fit the frame on the patio before gluing anything together. Arrange the 36-inch and 24-inch pipes into a low rectangle around the rubber mat so you can confirm the size feels right for your pet.
2. Build the two long spray sides by marking hole locations along each 36-inch pipe. Space the marks about 1 1/2 inches apart along one side of each pipe, keeping the holes in a straight line.
3. Drill the spray holes using a 1/16-inch to 3/32-inch drill bit, keeping each hole clean and consistent. Deburr the holes lightly with sandpaper so rough plastic doesn’t interfere with the water flow.
4. Cut or confirm the connector pieces so the frame can sit low and stable around the mat. Use the 4-inch pieces as corner and center connectors, and sand any rough cut edges smooth.
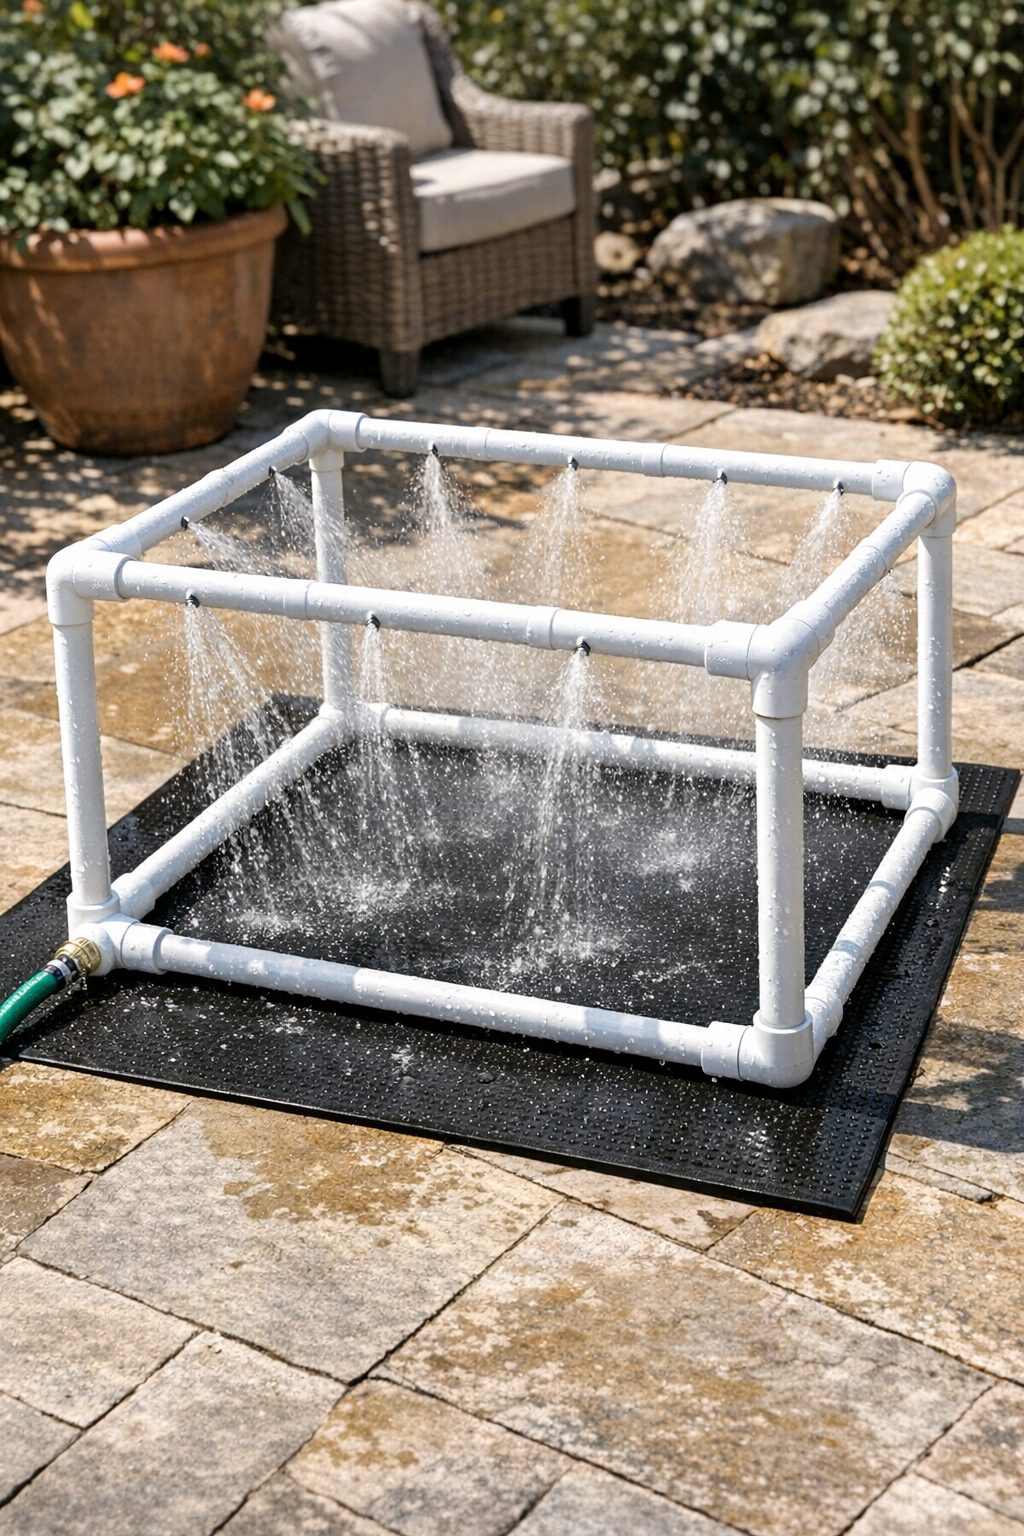
5. Assemble the rectangle with the drilled holes facing inward and slightly upward. Connect the corners with the elbow fittings, then place the tee fitting at the center of one 24-inch side where the hose will attach.
6. Attach the PVC male threaded garden hose adapter to the tee fitting side of the frame. Wrap the threads with plumber’s tape first so the connection seals better when you attach the hose.
7. Once the dry fit looks square, prime and glue one joint at a time with PVC primer and cement. Work steadily and keep the drilled holes oriented inward as you press each piece together.
8. Let the glued frame cure according to the cement directions, then place it over the rubber mat. If you want the station to stay perfectly aligned, use cable ties through the mat openings or around the edges to secure the frame lightly.
9. Connect the garden hose and turn the water on slowly. Adjust pressure until you get gentle spray arcs rather than sharp jets, which is usually more comfortable for pets and wastes less water.
10. Test the station with your pet nearby but not forced onto it, and fine-tune the hole direction if needed by slightly enlarging a few openings or rotating the frame. The goal is a soft cooling mist and shallow splash zone centered on the mat.
Variations & Tips
For larger dogs: Increase the mat size to 36 x 48 inches and lengthen the long sides of the PVC frame to 48 inches so your pet has room to stand and turn comfortably.
For smaller pets: Use shorter side pieces and fewer spray holes so the water stays gentler and more contained. Small dogs usually prefer a lower-pressure setup.
Hole size matters: I always start with the smaller drill bit because you can enlarge holes later, but you can’t make them smaller again. Smaller holes usually give a more even spray pattern with normal household hose pressure.
Patio placement: Set the station where runoff can drain safely and where part of the area gets shade. Cool water feels even better when pets have the option to step in and out of sun.
Mat choice: A rubber mat with a textured surface helps with traction, which is especially useful for older dogs. It also keeps paws off hot concrete, something I pay close attention to in July.
Cleaning tip: Flush the frame with clean water after use and check the holes occasionally for mineral buildup. If the spray weakens, a toothpick or pipe cleaner can clear individual holes quickly.
No-glue option for testing: If you want to experiment with the size first, dry-fit the whole frame and test it before cementing. I do this whenever I’m adjusting a build for a different patio footprint.