
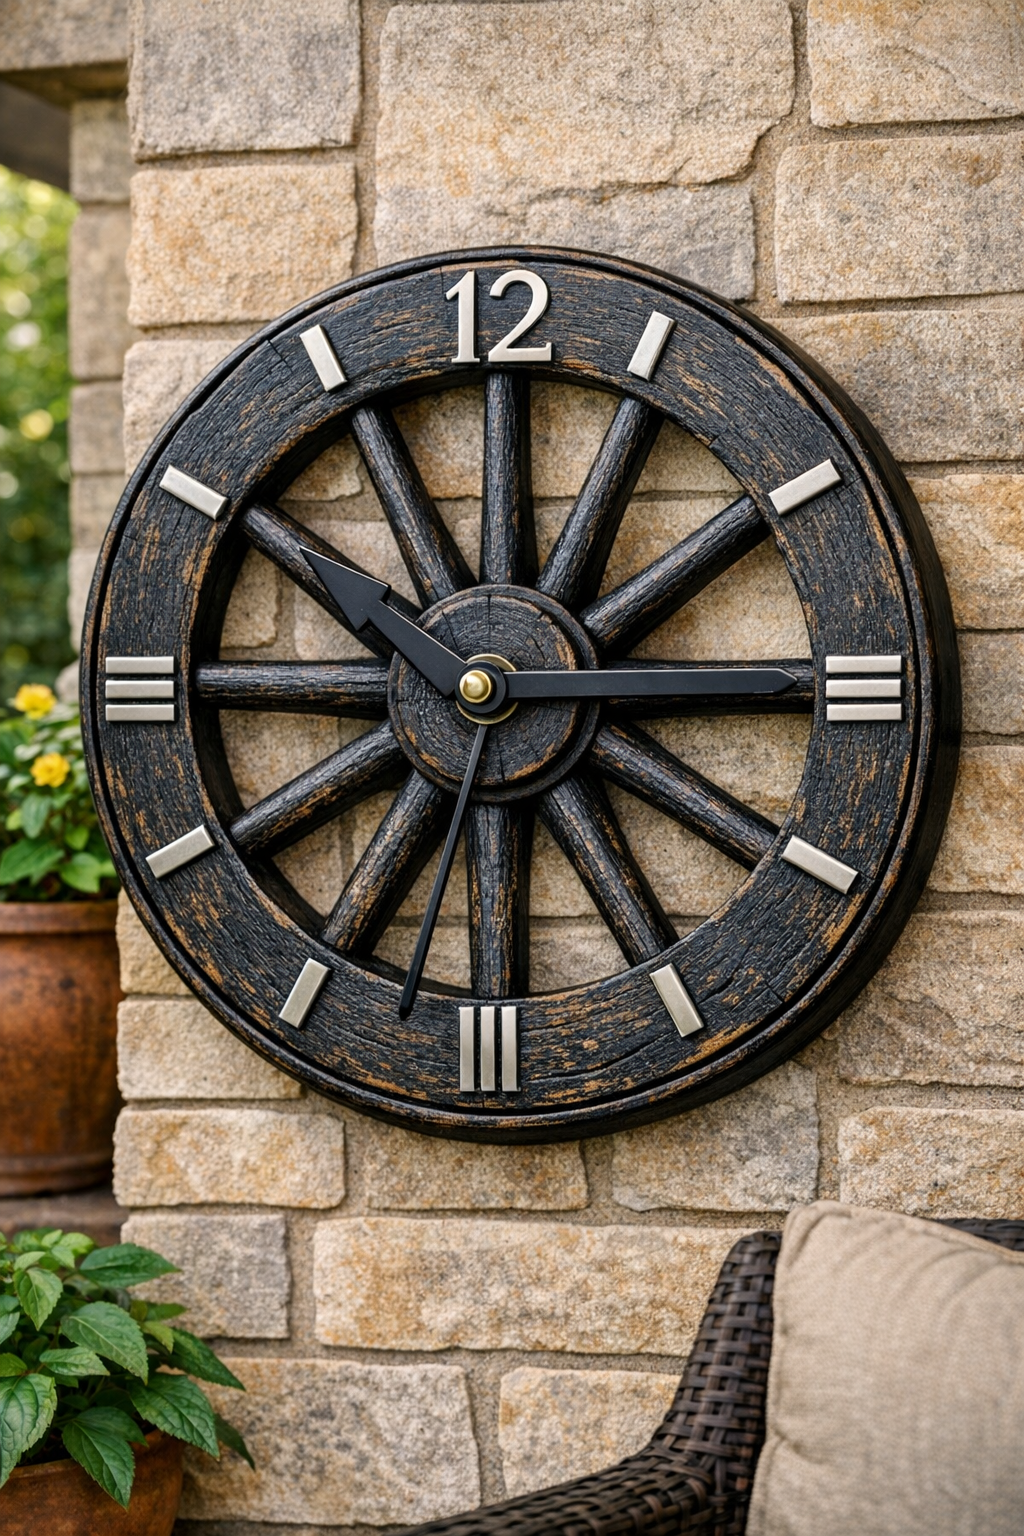
An outdoor clock like this turns a plain patio wall into a focal point, and I love that it mixes rustic wood with crisp metal details. In this project, I’m transforming a wooden wagon wheel into a large decorative clock by painting it for weather resistance and mounting metal hour markers around the rim for a clean, readable face.
This is a good weekend project for anyone who wants statement décor without complicated woodworking. If you’re comfortable measuring, drilling pilot holes, and working carefully with outdoor paint, you can make a clock that looks custom-made for your porch, garden fence, or covered patio.
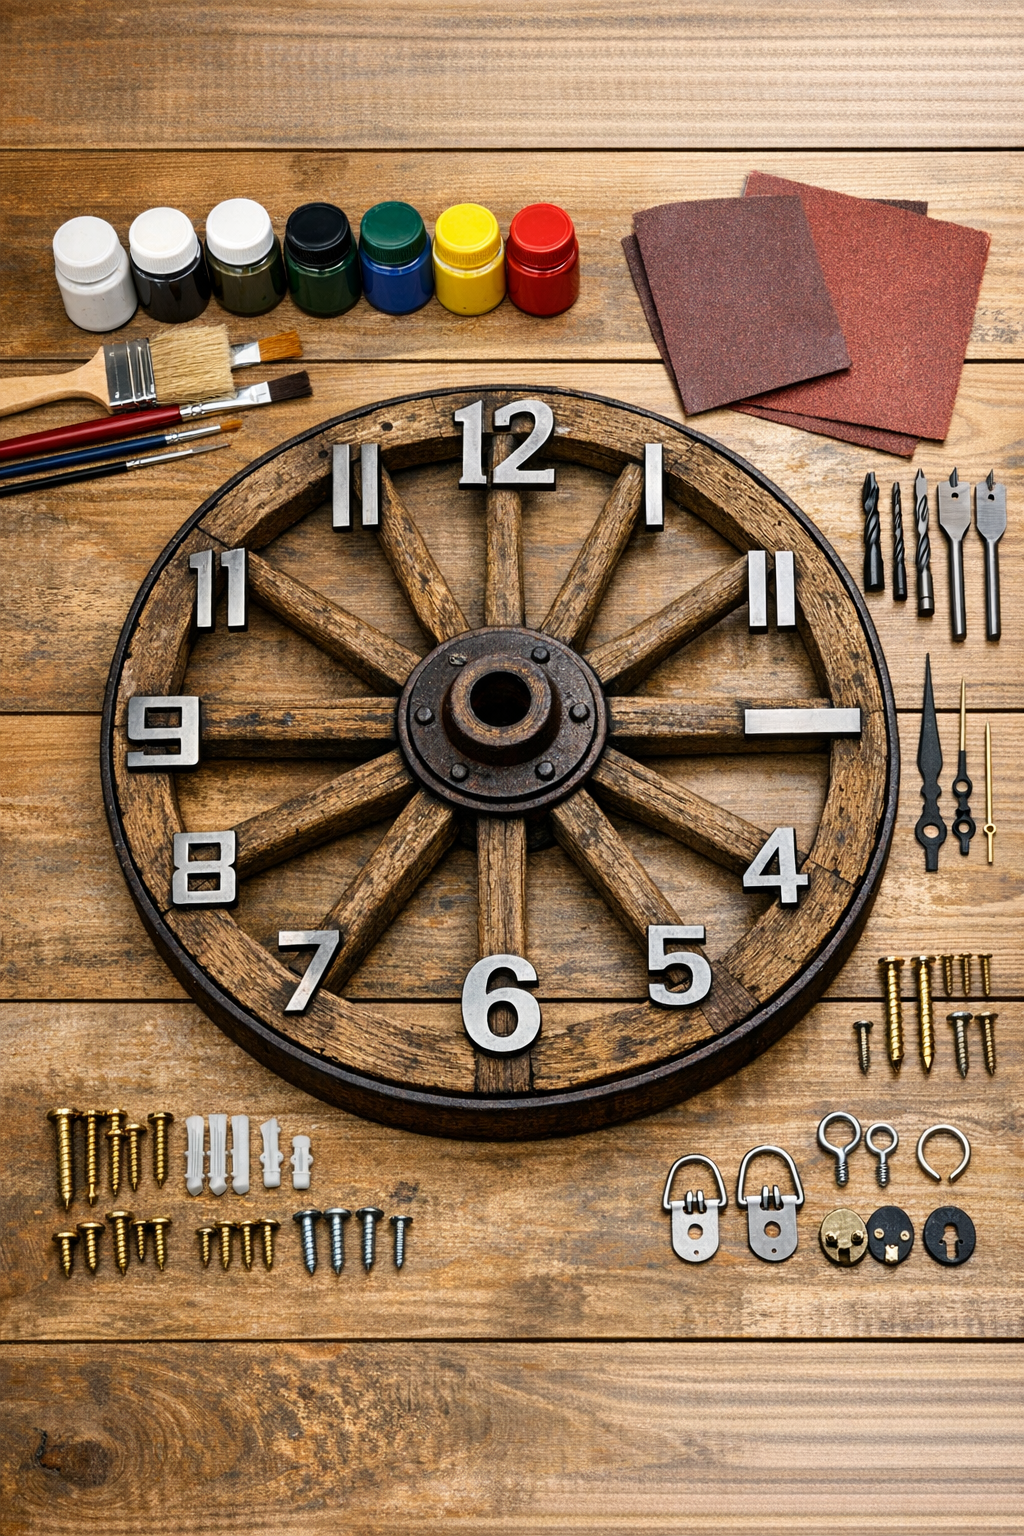
Materials
Instructions
1. Clean the wagon wheel thoroughly and remove any loose dirt, flaking finish, or cobwebs with a dry brush and a damp cloth. Let it dry completely before you start sanding.
2. Sand the entire wheel with 120-grit sandpaper to smooth rough spots and help the primer bond, then follow with 220-grit for a more even finish. Wipe away all dust with a clean cloth.
3. Fill any deep cracks, dents, or old holes with wood filler if needed, and let it cure according to the package directions. Sand those repaired areas smooth so the painted finish looks consistent.
4. Apply a full coat of exterior primer to the front, back, rim, and spokes using a brush, working it into joints and crevices. Allow it to dry fully, then lightly sand any raised grain.
5. Paint the wheel with two thin coats of exterior paint, letting each coat dry completely before applying the next. I prefer a satin black, white, or deep bronze here because the metal numbers stand out beautifully against those colors.
6. Seal the painted wheel with an exterior clear sealer, especially if it will hang in a partially exposed outdoor area. Let the sealer cure fully before attaching anything to the front.
7. Find the exact center of the wagon wheel and confirm that the clock movement shaft will fit through the existing center hole; enlarge it carefully if necessary. Test-fit the movement without forcing it so the wood does not split.
8. Mark the 12, 3, 6, and 9 positions first to establish the clock layout, using a tape measure and pencil for even spacing. Then fill in the remaining hour positions around the rim, checking the layout from a few feet back for balance.
9. Tape the metal numbers in place temporarily and adjust them until the spacing looks even. If you’re using decorative metal numbers, make sure each one sits at the same distance from the center for a polished look.
10. Mark the screw holes for each number, then drill small pilot holes to prevent the wood from cracking. Keep the drill bit slightly smaller than the screw diameter for a snug fit.
11. Attach the metal numbers with stainless steel screws and washers, tightening them just until secure. Do not overtighten, especially near the outer rim, because older wood can split under pressure.
12. Install the clock movement through the center hole and assemble the hands in the order directed by your kit. Check that the hands move freely and do not rub against each other or the wood surface.
13. Add the battery and set the correct time, then let the clock run flat on the table for an hour to confirm the mechanism works properly. This quick test can save you from rehanging it later if a hand is misaligned.
14. Attach the heavy-duty hanging hardware to the back of the wheel and place felt pads or rubber bumpers where the wood may touch the wall. Hang the clock on a secure fastener in a covered or semi-covered outdoor spot and check that it sits level.
Variations & Tips
Color choice: For a more farmhouse look, use matte white paint with black metal numbers. For something more dramatic on brick or siding, deep charcoal or bronze gives the wheel a richer, more architectural feel.
Number alternatives: If you can’t find metal house numbers as a full set, use metal Roman numerals, flat metal tabs, or even evenly spaced decorative bolts for the hour markers. I’d still keep the 12, 3, 6, and 9 positions visually stronger for readability.
Outdoor placement: Even with exterior finishes, this clock will last longer in a covered patio or porch than on a fully exposed fence. In Midwestern weather, freeze-thaw cycles and direct summer sun can be hard on both wood and clock mechanisms.
Clock mechanism tip: Use a high-torque movement made for oversized clocks, because standard mechanisms often struggle with longer hands. This is one of those small details that makes the finished project actually function well, not just look good.
Layout help: If spacing the numbers by eye feels tricky, make a paper circle template first and divide it into 12 equal sections. It’s a simple extra step, but it gives the face that satisfying, professionally balanced look.
Finishing touch: If your wagon wheel has beautiful age and texture, don’t over-sand it. I like to preserve some of that character under the paint, because the contrast between old wood and crisp metal is what makes this patio piece so striking.