
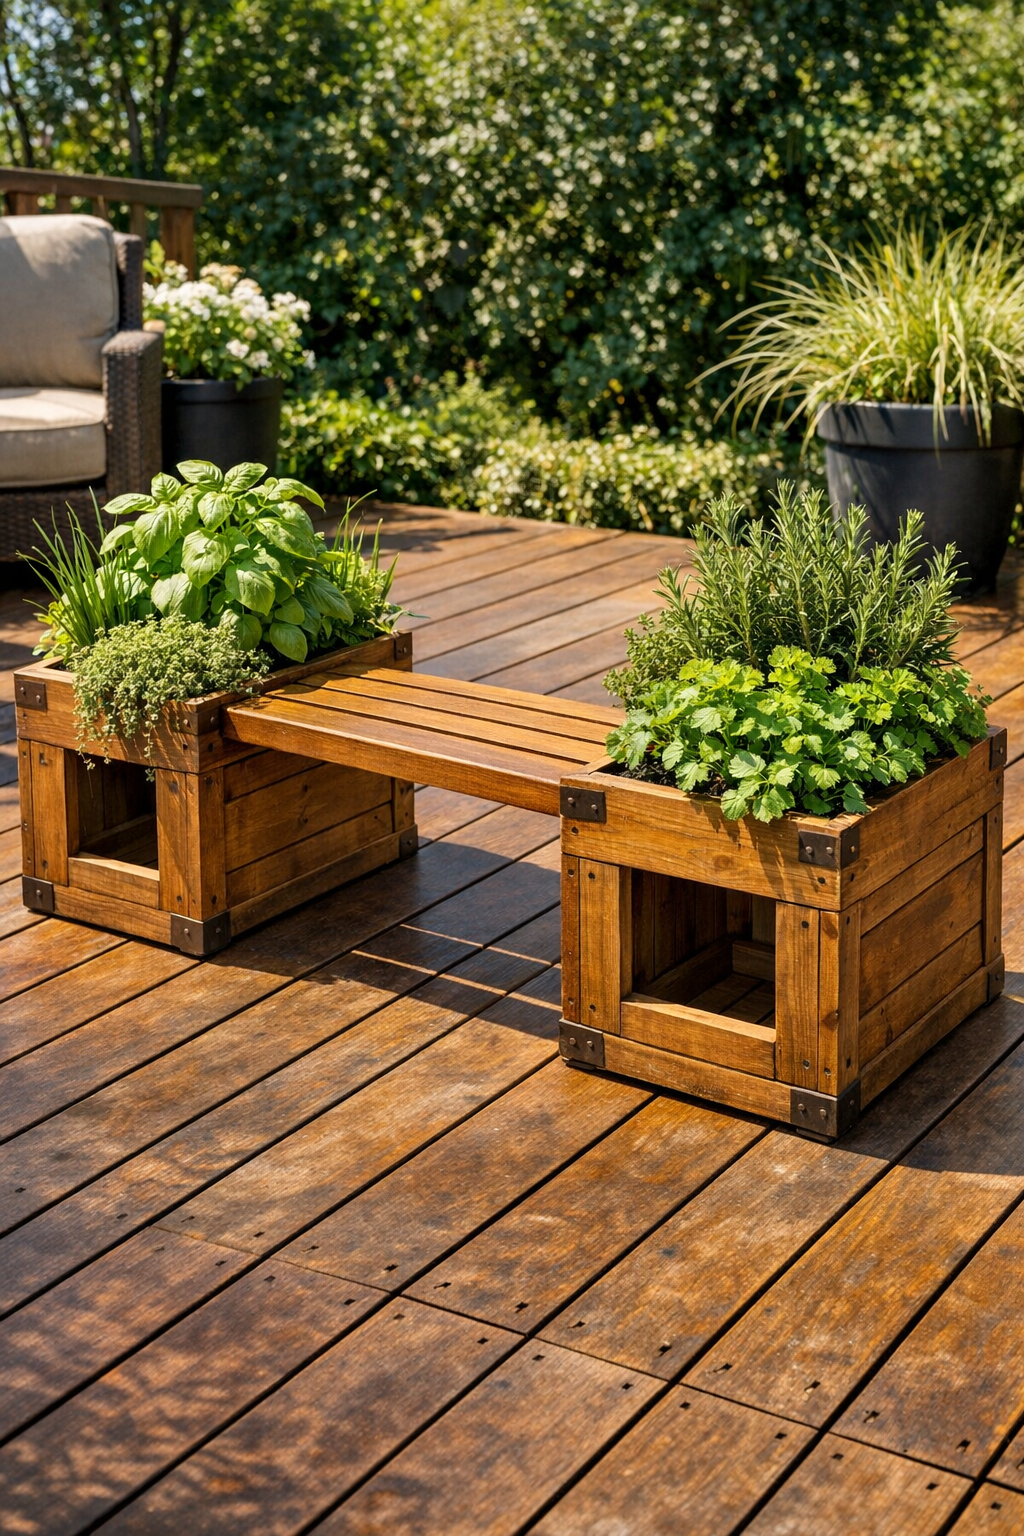
I love a deck project that earns its keep in more than one way, and this outdoor planter bench does exactly that. By cutting rectangular openings into sturdy wooden shipping crates, you can turn basic crate boxes into a built-in-looking bench with planters at the ends—part seating, part container garden, and all charm. It’s the sort of transformation that makes an outdoor space feel finished without requiring custom carpentry from scratch.
This project is especially good for anyone who wants a practical weekend build with a big visual payoff. If you’re comfortable measuring, cutting straight lines, and driving exterior screws, you can absolutely tackle it. I’m always drawn to projects that combine structure and greenery; as a cook, I can’t resist the idea of tucking herbs or edible flowers into the planters so the bench becomes beautiful and useful at the same time.
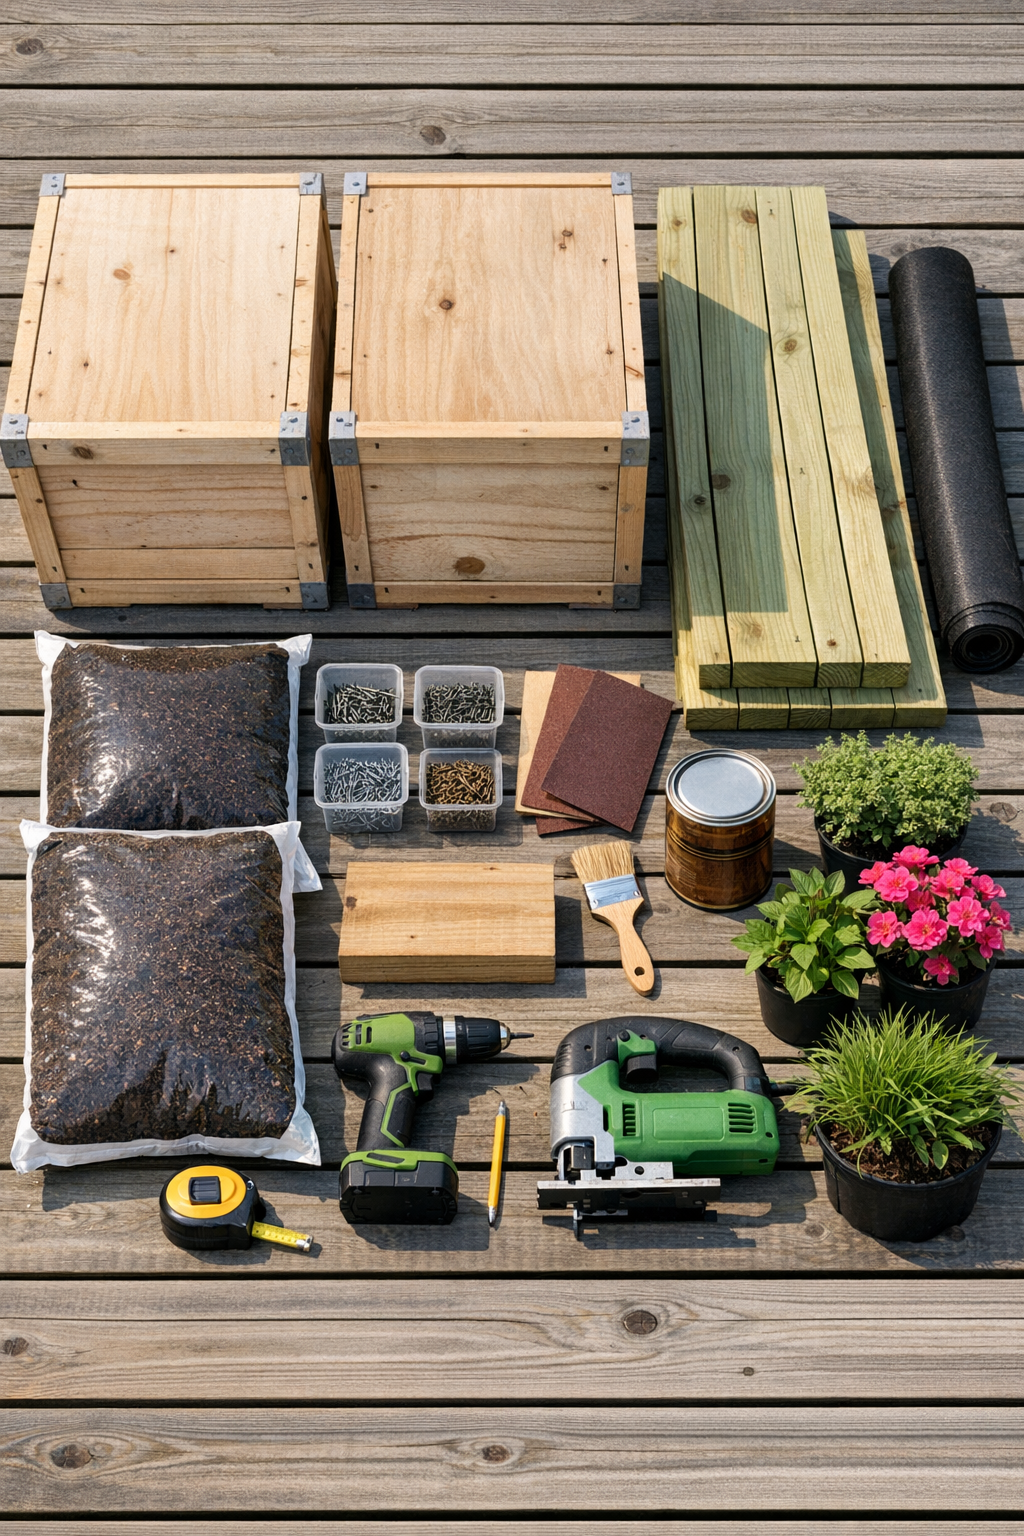
Materials
Instructions
1. Set the two crates upright on a flat surface and inspect them for loose slats, split wood, or protruding nails; tighten or replace anything unstable before you begin cutting.
2. Sand all outer surfaces and edges with 120-grit sandpaper so the crates are safe to handle and the finish will go on evenly.
3. On the inward-facing side of each crate, mark a centered rectangular opening about 16 inches wide x 10 inches high, leaving at least 3 inches of wood at each corner for strength.
4. Drill a starter hole inside each marked rectangle, then use a jigsaw to cut out the opening carefully along the lines; sand the cut edges smooth when finished.
5. Position the crates so the cut openings face each other, spacing them 48 inches apart from outer edge to outer edge, or to match the exact length of your seat boards.
6. Cut the 2 x 10 boards if needed so they span between the crates, then fasten them through the crate walls as structural seat supports, one set near the top and one lower if you want extra rigidity.
7. Add short 2 x 4 cleats inside the crates where the seat supports meet the crate walls, then secure them with 2 1/2-inch screws and galvanized corner braces for a stronger connection.
8. Attach the two 1 x 6 cedar boards and the 1 x 4 cedar board across the top supports to create the bench seat, leaving a small 1/4-inch gap between boards for drainage.
9. Check the bench for wobble and add extra screws or a bead of exterior construction adhesive at joints if any area shifts under pressure.
10. Brush on exterior wood sealer or deck stain over the crates, cut edges, and seat boards, then let it dry fully according to the product directions.
11. Line the inside of each crate with landscape fabric, stapling it in place and trimming neatly around the top edges; add plastic liner pieces underneath if you want extra protection from constant moisture.
12. Fill each lined crate with potting soil, keeping the soil level a few inches below the rim, then plant your flowers, herbs, or compact ornamental grasses and water them in well.
13. Move the finished planter bench into place on the deck, sit on it to test stability one last time, and adjust the plant arrangement until both ends feel balanced and full.
Variations & Tips
Herb bench: Plant basil, thyme, rosemary, chives, and parsley in the crate ends if you want the bench to double as a little kitchen garden near the back door.
Deeper seat: If you prefer a roomier bench, use wider seat boards or add one more 1 x 4 board, but keep the overall span supported well underneath.
Wood choice: Cedar is a great upgrade for the visible seat because it holds up well outdoors and smells wonderful when cut, though pressure-treated lumber is often more economical for hidden structural parts.
Drainage tip: If your crates don’t already have gaps in the bottom, drill several 1/4-inch drainage holes before adding liner and soil so roots don’t sit in water after heavy rain.
Weight caution: Once filled with damp soil, these planters get heavy fast, so build the bench as close as possible to its final location on the deck.
Finish option: A clear exterior sealer keeps the crate look rustic, while a solid deck stain can make the whole piece read more like built-in furniture.
Plant selection: On a sunny deck, trailing petunias, calibrachoa, sweet potato vine, and compact grasses give you a lush, layered look; for shade, try coleus, heuchera, and ivy.