
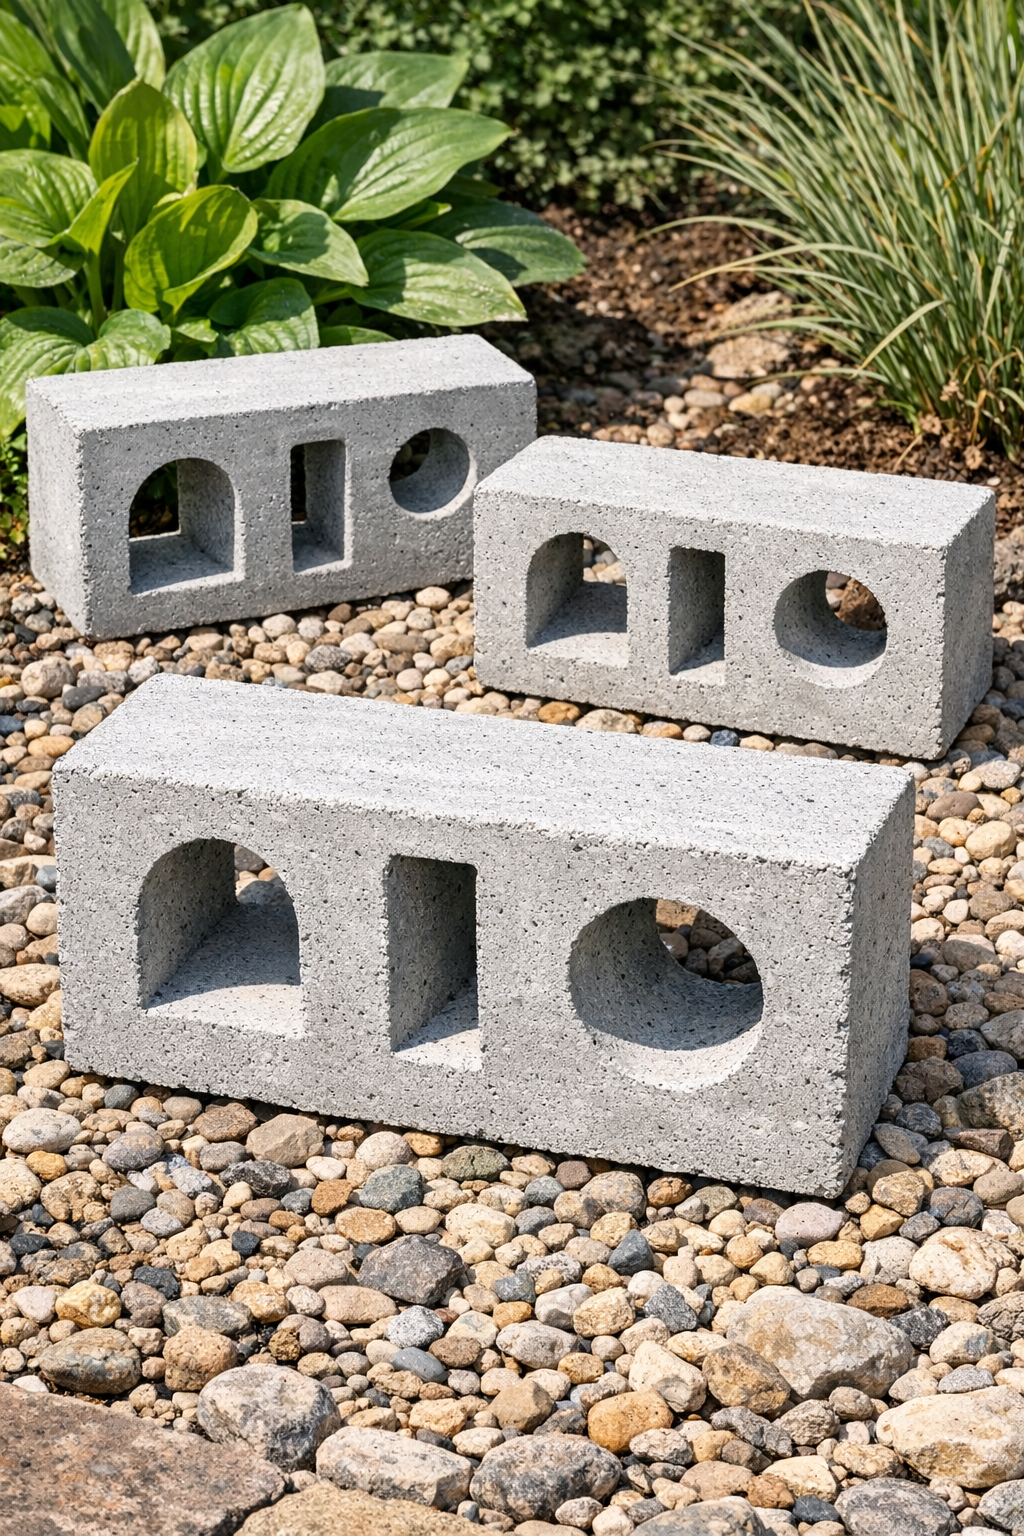
I love a project that turns a few inexpensive household items into something that looks far more substantial than it has any right to. These heavy perforated yard blocks do exactly that: by using cheap plastic shower caddies as molds and filling them with cement, you end up with sturdy decorative blocks that can edge a garden bed, hold down a tarp, accent a patio corner, or simply add an architectural touch to the yard.
What makes this one especially satisfying is that it uses just three main items, yet the result looks like a cast concrete piece you might spot at a garden center. If you’re comfortable mixing cement and want an approachable outdoor project with a big visual payoff, this is a very manageable afternoon build.
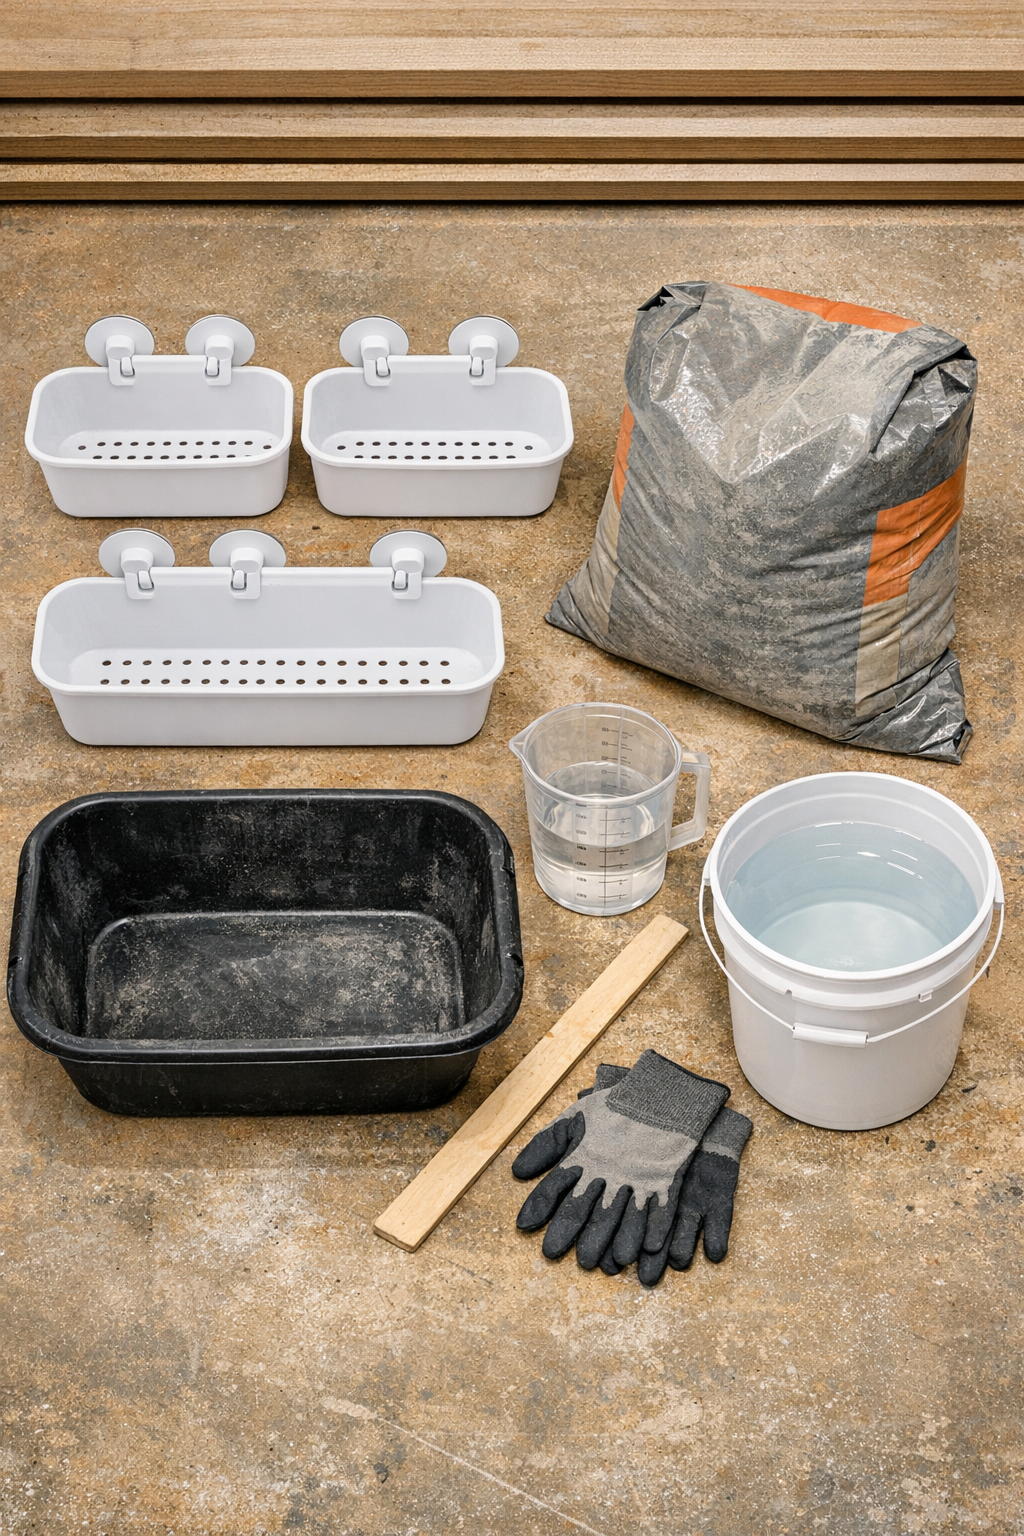
Materials
Instructions
1. Choose a flat, level work surface outdoors or in a well-ventilated garage, and cover it with a plastic drop cloth to make cleanup easy.
2. Wash and dry the shower caddies so the cement bonds evenly against the mold shape without dust or residue interfering.
3. Lightly coat the inside of each shower caddy with cooking oil or mold release using a paper towel or disposable brush, making sure to get into the corners and perforated areas.
4. Pour the cement mix into your mixing tub, add most of the water, and stir until it reaches a thick brownie-batter consistency that can be scooped but still settles into the mold.
5. Fill each shower caddy halfway with cement, then tap the sides firmly with your gloved hand to release trapped air and help the mix settle into all the openings and edges.
6. Continue filling the caddies to the top, pressing the mix gently into corners and smoothing the surface with your stick or gloved hand.
7. Tap the molds again several times and lightly shake them side to side so the finished blocks cure with cleaner edges and fewer voids.
8. Let the cement set undisturbed according to the package directions, usually 24 hours for initial hardening, then check that the blocks feel firm before demolding.
9. Flex the plastic shower caddies gently to loosen the edges, then turn them over and ease out the concrete blocks without forcing them.
10. Set the blocks in a shaded spot and allow them to cure for another 2 to 3 days before placing them in the yard, especially if they’ll bear weight or sit on damp soil.
Variations & Tips
For a smoother finish: If you want cleaner faces, mix the cement a touch wetter and tap the molds longer, but don’t overdo the water or the blocks will weaken.
For a more rustic look: Leave the top surface slightly textured instead of smoothing it perfectly; I actually like this finish in garden spaces because it looks more like aged cast stone.
For added durability: Keep the blocks lightly misted during the first day after demolding if the weather is hot and dry, which helps concrete cure more evenly.
For placement: Set these on compacted soil, gravel, or pavers rather than soft mud so they stay level and don’t sink after rain.
For mold selection: Shower caddies with open geometric holes give the best “perforated block” look; I’d avoid very flimsy caddies with thin, brittle plastic because they can crack during demolding.
For color options: You can stir masonry pigment into the dry cement mix before adding water if you want charcoal, terracotta, or sandy tones that blend better with your landscape.