
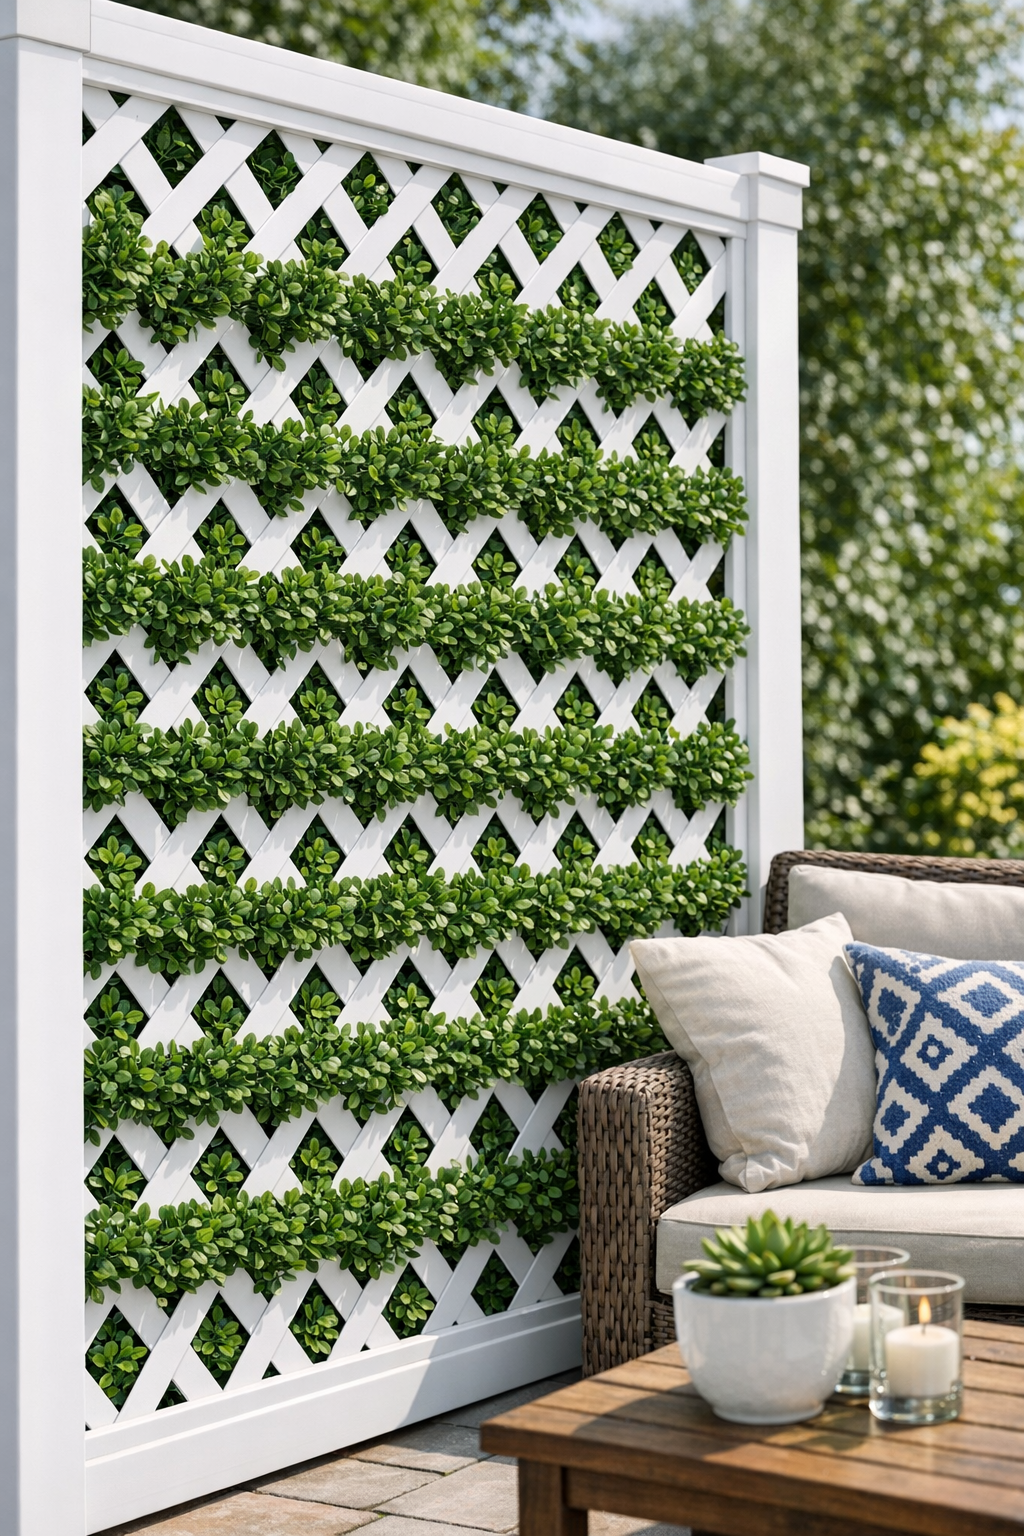
A patio privacy screen like this is one of my favorite kinds of weekend projects: it looks polished and expensive when it’s done, but the actual build is very manageable. By weaving artificial boxwood strips through white vinyl lattice panels, you get the softness and color of greenery with the structure and crisp lines of a classic outdoor screen.
I especially like this project for patios, apartment balconies, and small backyard seating areas where you want a little separation without building a full wall. If you’re comfortable measuring, cutting zip ties, and fastening lightweight panels, you can absolutely pull this off in an afternoon, and the result gives that tucked-away, garden-room feeling that makes outdoor meals and evening coffee much more enjoyable.
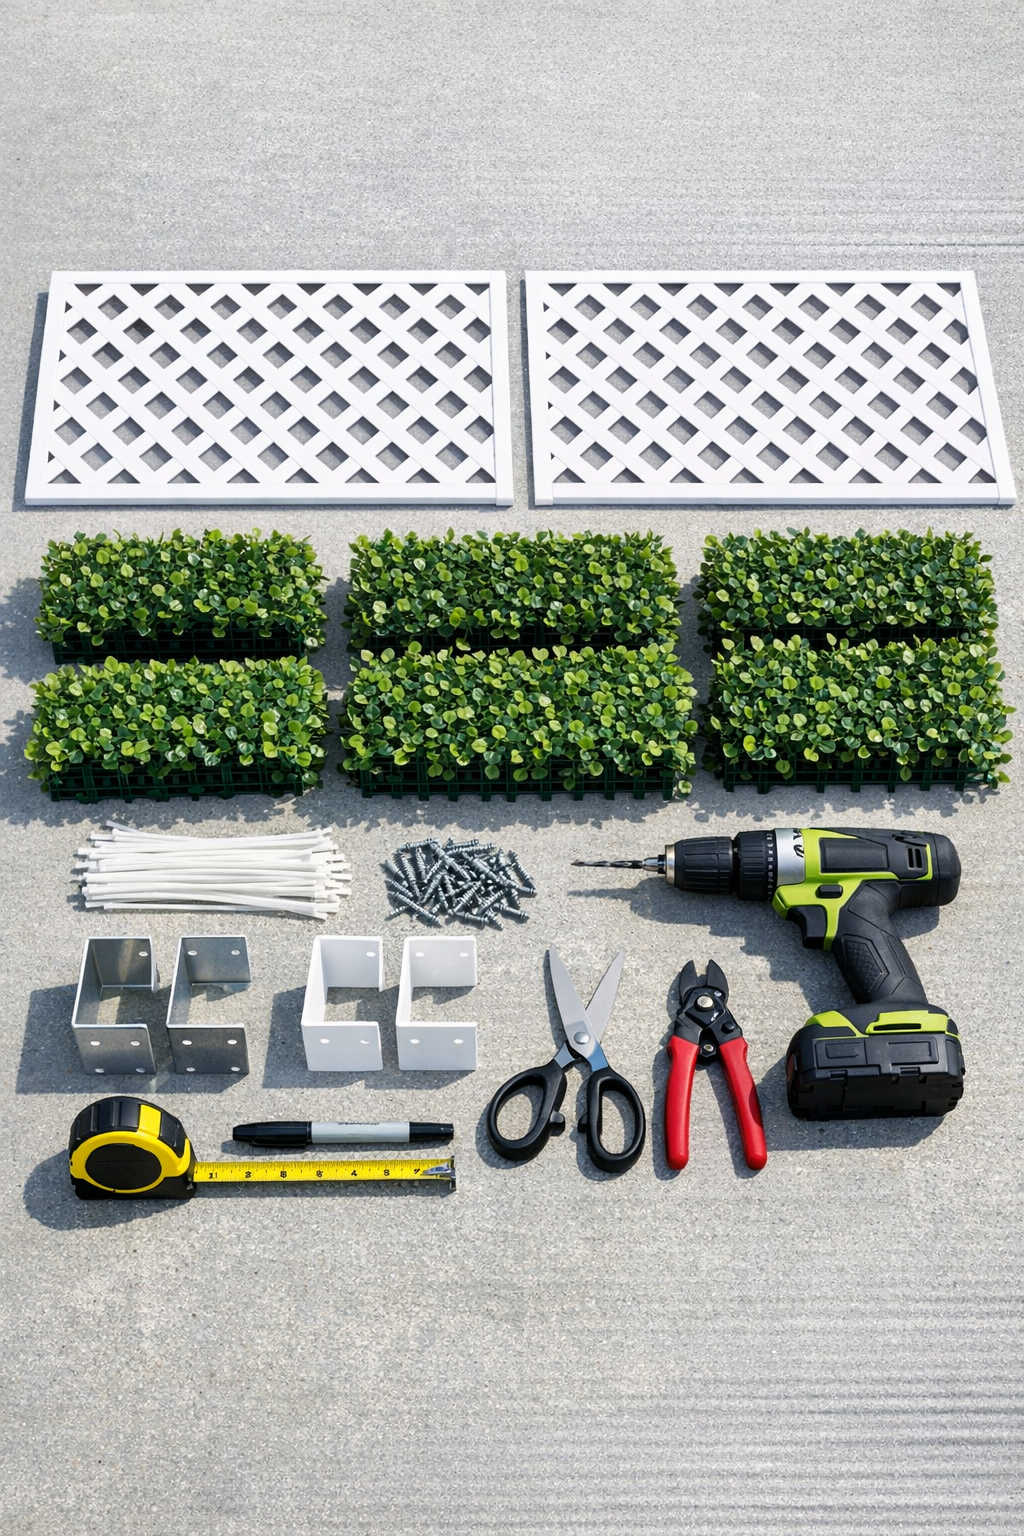
Materials
2 white vinyl lattice panels, 24 x 48 inches each
Instructions
1. Measure the area where you want the privacy screen to sit, then confirm your lattice panel size leaves enough clearance for railings, posts, or furniture. Dry-fit the panels in place so you know exactly how they’ll be mounted before adding the greenery.
2. Wipe down the lattice panels with a damp cloth and let them dry fully. Clean panels are easier to handle, and the boxwood strips will sit flatter against the vinyl.
3. If your artificial boxwood comes in larger mats, cut it into long strips or manageable sections that match the height or width of the lattice openings. Keep the cut sections as even as possible so the woven pattern looks intentional rather than patchy.
4. Start at one edge of the first lattice panel and weave the boxwood strips over and under the lattice slats. Pull each strip through gently so the greenery stays full and the plastic backing does not snag or twist.
5. Alternate the weave direction every few strips if needed to fill gaps and create a dense, balanced look. Step back every few rows to check coverage, because it’s much easier to adjust spacing now than after everything is tied down.
6. Secure the ends and a few center points of each boxwood strip to the lattice with white zip ties placed on the back side whenever possible. Snip off the extra tie length flush so the finished screen looks clean from every angle.
7. Repeat the weaving and fastening process on the second lattice panel, matching the density and direction so both panels look like a coordinated set. If one section appears thinner, tuck in a short extra strip and fasten it from the back.
8. Add optional 1 x 2 frame boards along the outer vertical edges if you want a more finished, sturdy look. Fasten them lightly so they support the panel without crushing the woven greenery.
9. Hold the finished panel in position and attach it to your patio posts, railing, or wall using brackets and outdoor screws. Check that the panel sits level before fully tightening the hardware.
10. Mount the second panel beside the first, keeping the top and side spacing even for a seamless look. Once both are installed, fluff the boxwood with your hands and trim any obvious stray plastic bits or uneven stems.
Variations & Tips
For more coverage: Use a tighter weave and overlap the boxwood strips slightly so less white lattice shows through. This gives a fuller privacy wall and a richer green finish.
For a lighter look: Space the woven strips a bit farther apart and let some of the white lattice remain visible. I like this version when the patio already has a lot of plants and doesn’t need such a solid visual block.
Windy location tip: Add extra zip ties at the center and corners of each strip, and use all four mounting brackets per panel. Outdoor décor that catches wind always lasts longer when it’s secured more generously than you think necessary.
Budget option: Cover only the most visible section of each panel with boxwood rather than weaving every opening. You still get the same overall effect from a distance while using fewer greenery panels.
Cleaning tip: Rinse the finished screen occasionally with a gentle hose spray and let it air-dry. Artificial greenery tends to collect dust just like a bookshelf in my dining room, only outdoors it happens faster.
Color variation: Mix two shades of artificial greenery for a more natural, garden-like surface. A blend of bright and deep green looks less flat and photographs beautifully in afternoon light.
Installation tip: If you cannot screw into your patio structure, attach the panels to freestanding posts anchored in heavy planters. That approach works especially well for renters who want privacy without making permanent changes.