
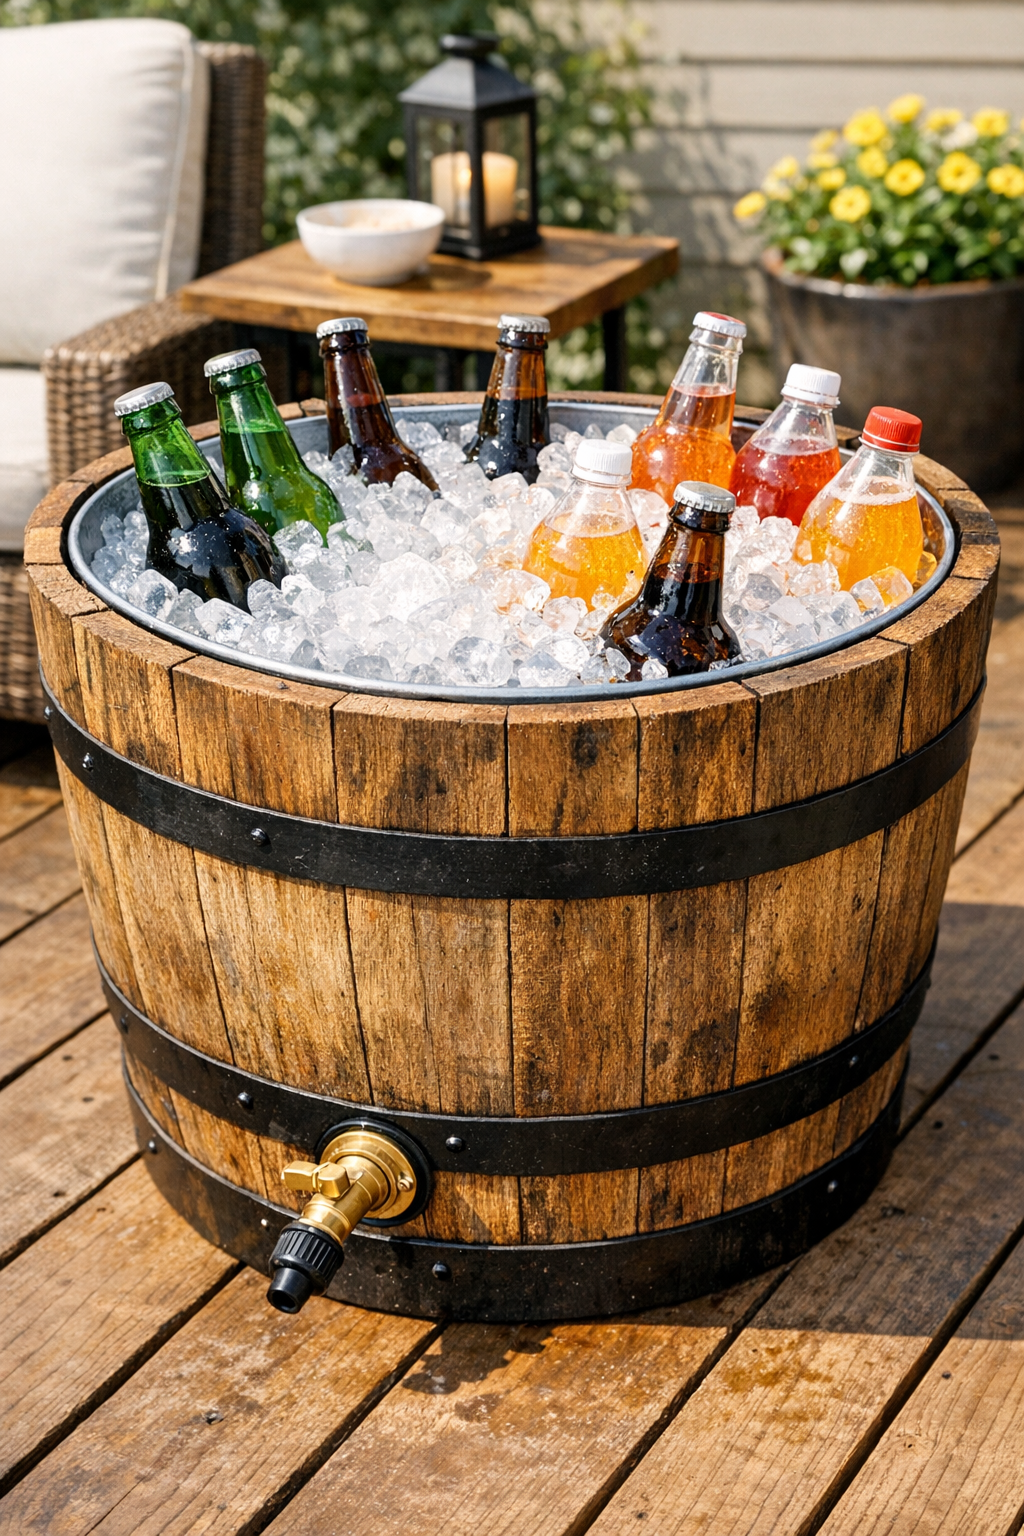
If you love easy backyard projects that actually get used, this one is such a winner. I’m turning a wooden half-barrel planter with a galvanized steel tub insert into a deck-friendly drink cooler, complete with a drain hole so melting ice doesn’t leave you scooping out water by hand at the end of the night. It has that rustic, patio-ready look, but it’s also genuinely practical for cookouts, family parties, and those last-minute “come hang out on the deck” evenings.
As someone who works full time and still wants my outdoor spaces to feel pulled together without spending an entire weekend building complicated furniture, this is exactly my kind of project. It’s straightforward, beginner-friendly if you’re comfortable with basic tools, and gives you a piece that looks much more custom than it really is.
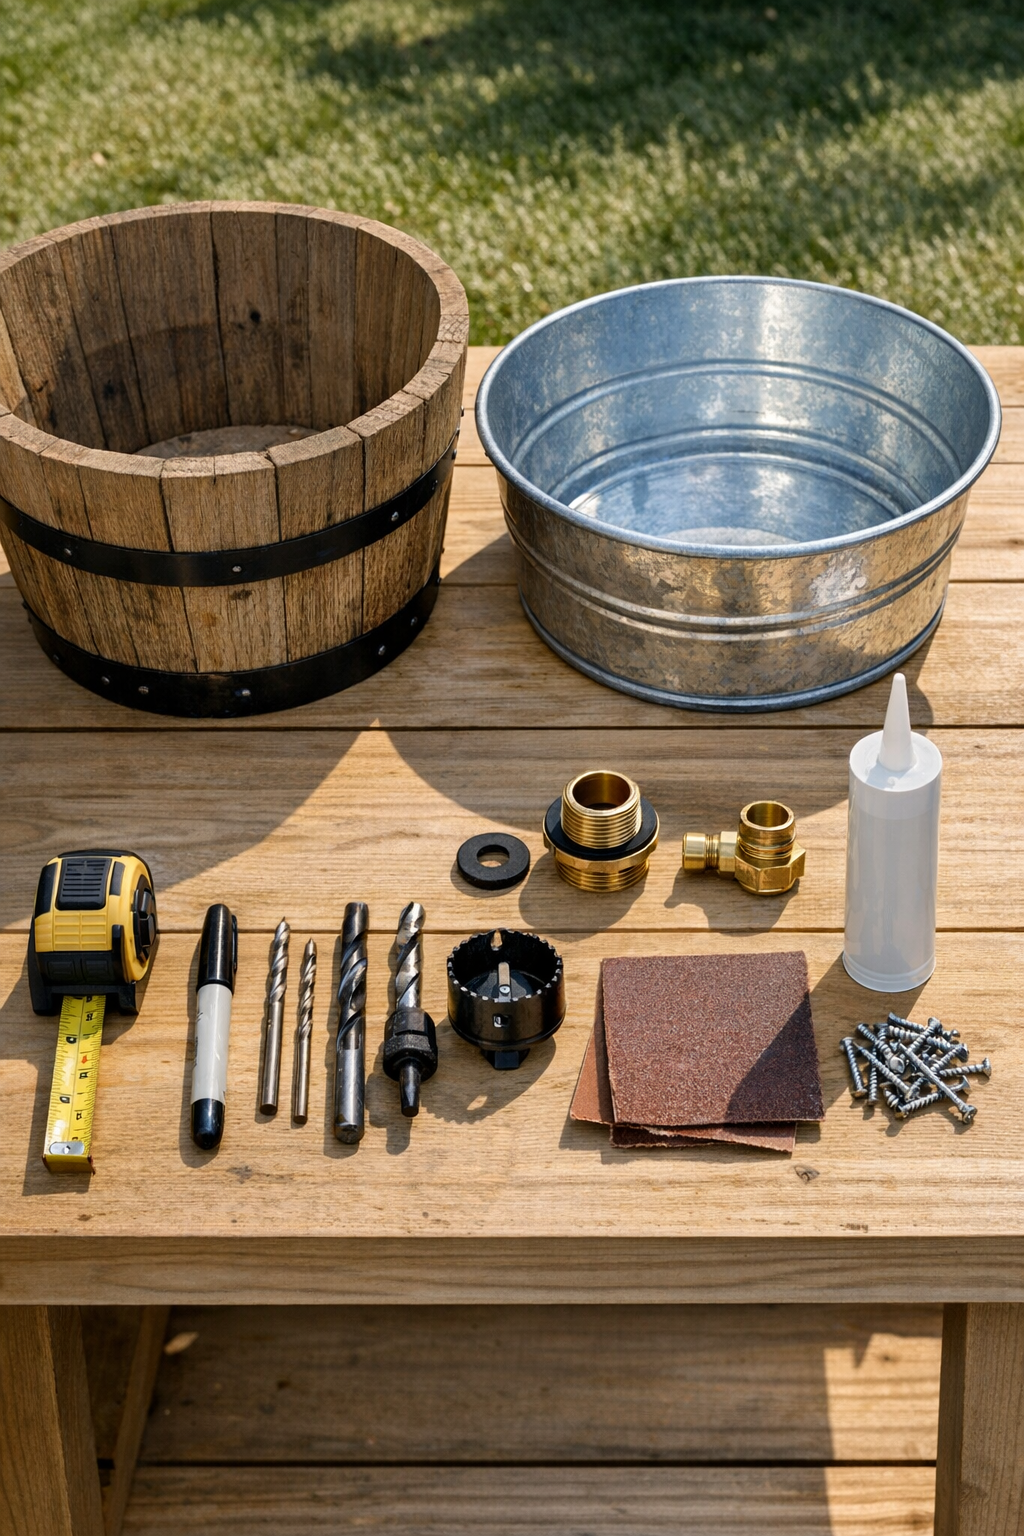
Materials
1 wooden half-barrel planter, approximately 24 inches diameter and 16 inches tall
Instructions
1. Set the galvanized tub inside the wooden barrel planter and center it so the rim sits evenly all the way around. Check that the tub rests flat and decide where you want the drain to exit near the lower side of the barrel.
2. Mark the drain location on the galvanized tub first, keeping it about 1 to 1 1/2 inches up from the bottom so the fitting clears the curve of the metal. Transfer that same center point to the outside of the wooden barrel.
3. Remove the tub and drill a pilot hole at the marked spot in the galvanized steel. Use a metal hole saw sized for your drain fitting, and cut slowly to make a clean opening.
4. Smooth the cut edge on the metal hole with medium-grit sandpaper so the drain gasket sits flat. Wipe away any metal dust before moving on.
5. Drill a matching hole through the wooden barrel at the transferred mark, using a wood hole saw large enough for the drain outlet to pass through without rubbing. Sand the wood edges smooth so the fitting won’t catch.
6. Set the galvanized tub back inside the barrel and rotate it until both holes line up. Test-fit the drain assembly through the tub and barrel before adding sealant.
7. Run a bead of exterior silicone around the drain opening on the inside of the tub, then insert the drain fitting with its rubber washer in place. Tighten the locknut from the outside until snug, but don’t overtighten and distort the metal.
8. Attach the hose-thread adapter or outlet piece to the drain if your assembly requires it, and connect a short hose if you want to direct runoff away from the deck. Make sure the hose angles downward so water drains easily.
9. If the tub shifts inside the barrel, secure it with two small brackets or a few stainless screws placed discreetly under the rim area. Keep fasteners high enough that they don’t interfere with the watertight part of the cooler.
10. Lightly sand any rough wood on the barrel and apply exterior wood sealer if you want extra weather protection. Let the finish dry completely according to the product directions.
11. Test the cooler before filling it with ice by adding a few inches of water and checking around the drain for leaks. Tighten the fitting slightly or add a little more silicone if needed, then retest.
12. Fill the finished cooler with ice and drinks right before guests arrive, and open the drain when the ice starts melting. That simple drain hole is what makes this project so much easier to live with after the party is over.
Variations & Tips
Add casters: If you want this cooler to move around the patio, mount four heavy-duty outdoor-rated locking casters to a round wood platform underneath the barrel rather than directly to the curved base.
Use a darker finish: A coat of exterior stain can make the barrel look more like a coordinated deck piece, especially if your outdoor furniture is in warmer wood tones.
Try a spigot-style drain: If you entertain often, swap the basic outlet for a small hose-bib style valve so you can control draining without disconnecting anything.
Keep the tub removable: I like designs that are easy to clean, so avoid over-fastening the insert if you may want to lift it out for seasonal storage or a deep scrub.
Protect the deck: Even with a drain hose, I’d still place the cooler on a small outdoor mat or tray if your deck boards are painted, just to catch drips during filling and emptying.
Plan for party prep: For the easiest hosting setup, I chill drinks in the fridge the night before and add ice right before people arrive, which keeps the ice from melting too fast and saves me one last-minute errand.